Capturing Timeless Drama: Black & White Landscape Photography in Joshua Tree National Park
Explore Landscapes #95
There are several techniques that can help you capture beautiful desert scenes. One technique that I enjoy to use is black and white photography.
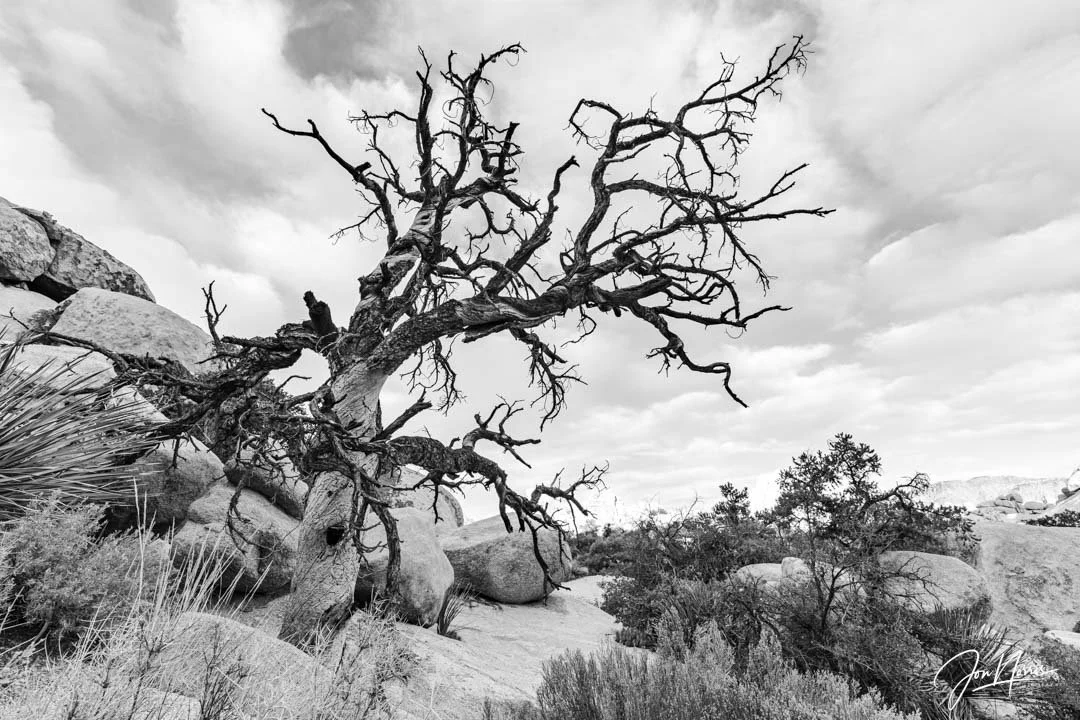
Twisted Pinyon Pine, Joshua Tree National Park | © 2019 Jon Norris
Introduction
Before getting into the specifics of black and white photography, let me describe the landscape of Joshua Tree National Park for those who haven’t had the chance to visit.
Three distinct California ecosystems meet in Joshua Tree National Park, providing a diverse range of fauna and flora across its 800,000 acres - including the namesake Joshua Tree.
The Colorado Desert occupies the south and east of the park and is characterized by ocotillo plants and cholla cactus. The southern edge of the Mojave Desert extends across the north and west of the park - with the largest concentration of Joshua Trees in the western half of the park. California juniper and pinyon pines can be found in the westernmost part of the park, in the Little San Bernardino Mountains, above 4,000 ft (1,219 m).
The park features some amazing geologic features shaped by plate tectonics, volcanism, and erosion, which make it a fascinating place to visit for landscape photographers. You’ll find exposed granite monoliths, rugged canyons, washes, playas, alluvial fans, igneous and metamorphic rocks interacting with each other, and vying for your attention.
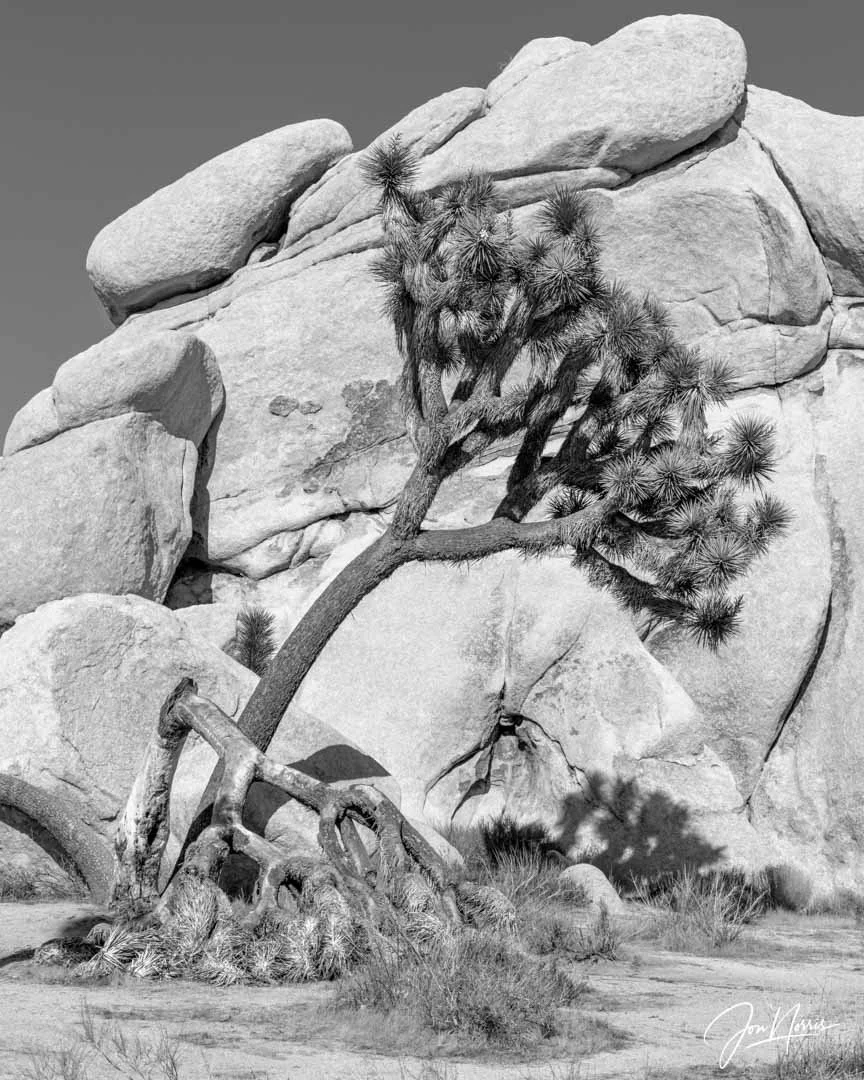
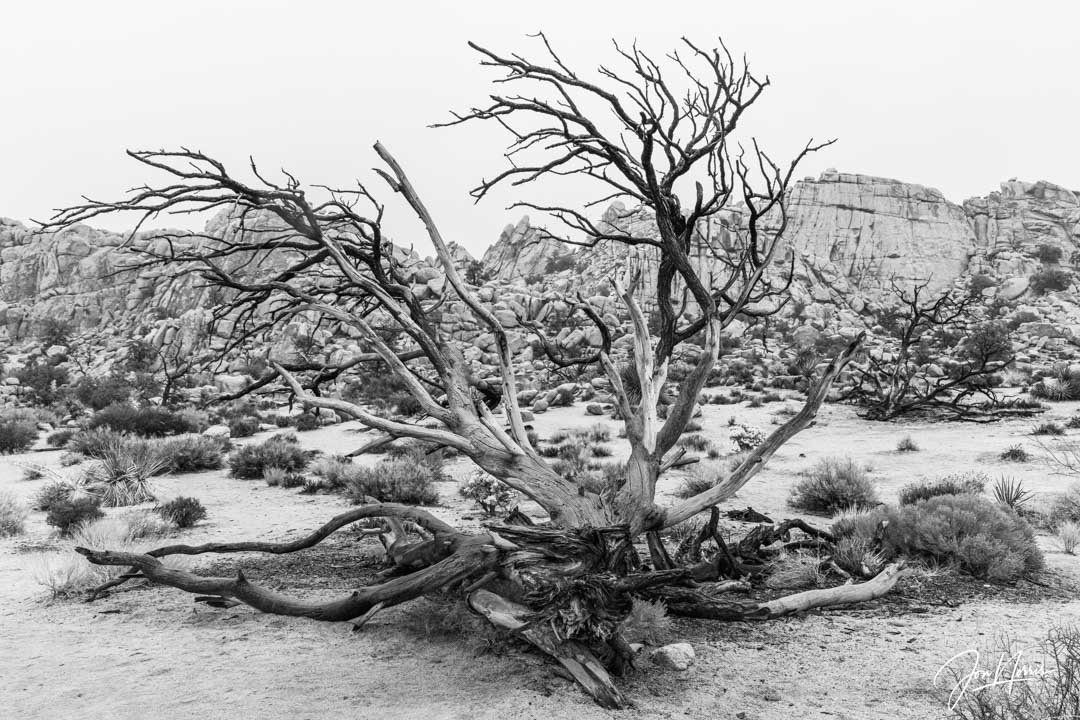
Fallen, Hidden Valley | © 2024 Jon Norris
Why black and white photography is powerful in desert environments
Desert photography provides ample opportunities to capture fascinating landscapes. However, the extreme temperatures and harsh lighting likely to be experienced in these barren environments mean that desert photography can be challenging.
Much of this challenge can be mitigated by selecting a suitable subject for the lighting conditions when you shoot, managing exposure carefully by utilizing your histogram, and bracketing exposures when required.
Read about the essential photography terms that I mention in this article.
It’s important to remember that in landscape photography, there’s really no such thing as bad light – just the wrong composition for the available lighting conditions.
There are several techniques that can help you capture beautiful desert scenes. One technique that I enjoy to use is black and white photography.
When you have harsh, direct overhead light, you can minimize the amount of sky that you include in the composition (as a bluebird sky does not often make for a great photograph) and shoot in black and white.
By stripping away color from a scene you can emphasize form, texture, and mood, and bring a very different aesthetic to your images.

Geometric Rocks, Joshua Tree National Park | © 2020 Jon Norris
Why black and white works in Joshua Tree
I already mentioned the harsh, direct overhead light, that means any scene you shoot from early morning to late afternoon is going to be high-contrast.
By shooting in black and white, you can use this harsh desert light to emphasize the textures, tones, shadows, and patterns which abound in the twisted, sculptural forms of the Joshua Trees, and their neighboring granite inselbergs (rock piles).
Black and white images also have timeless, minimalist, and abstract qualities, that support emotional storytelling.
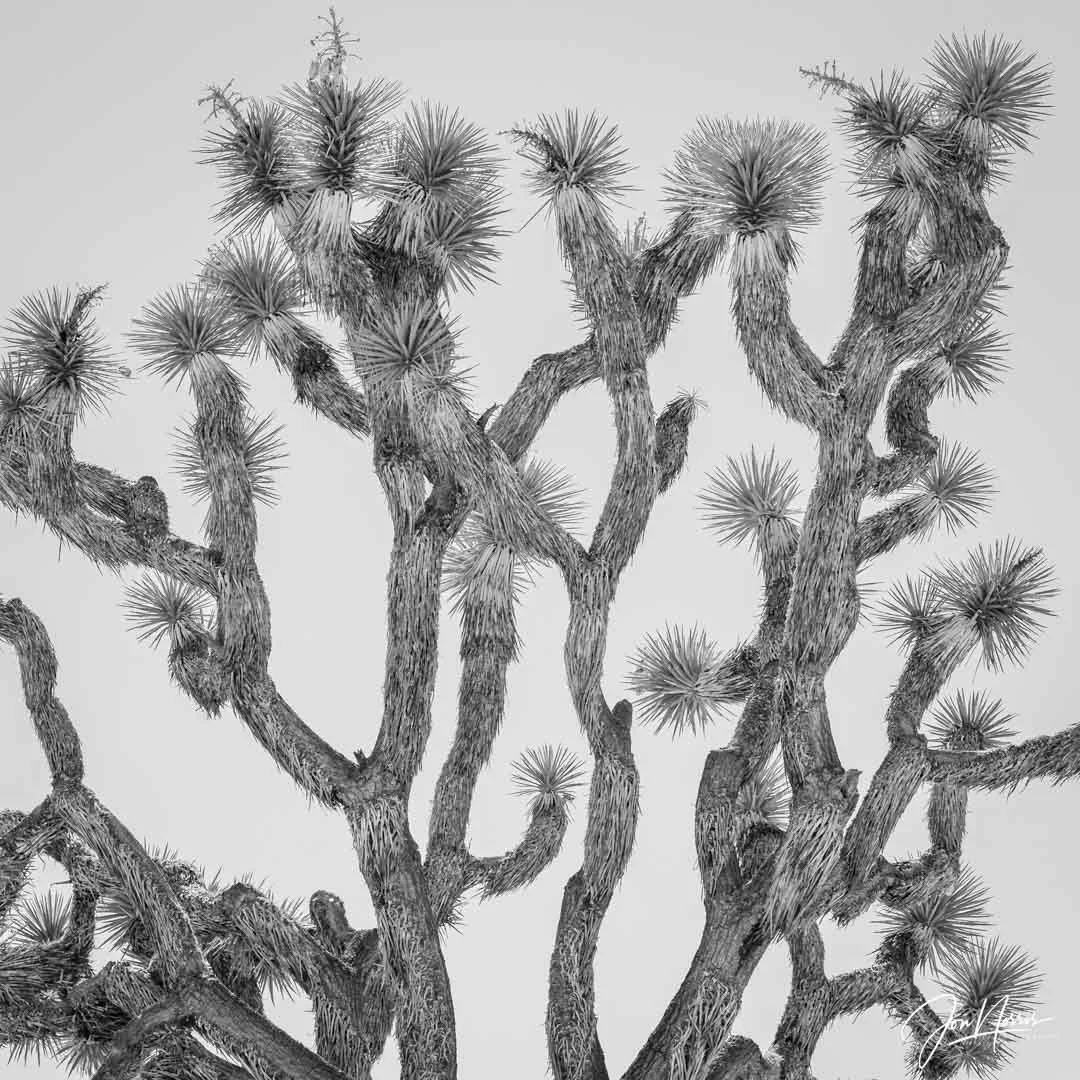
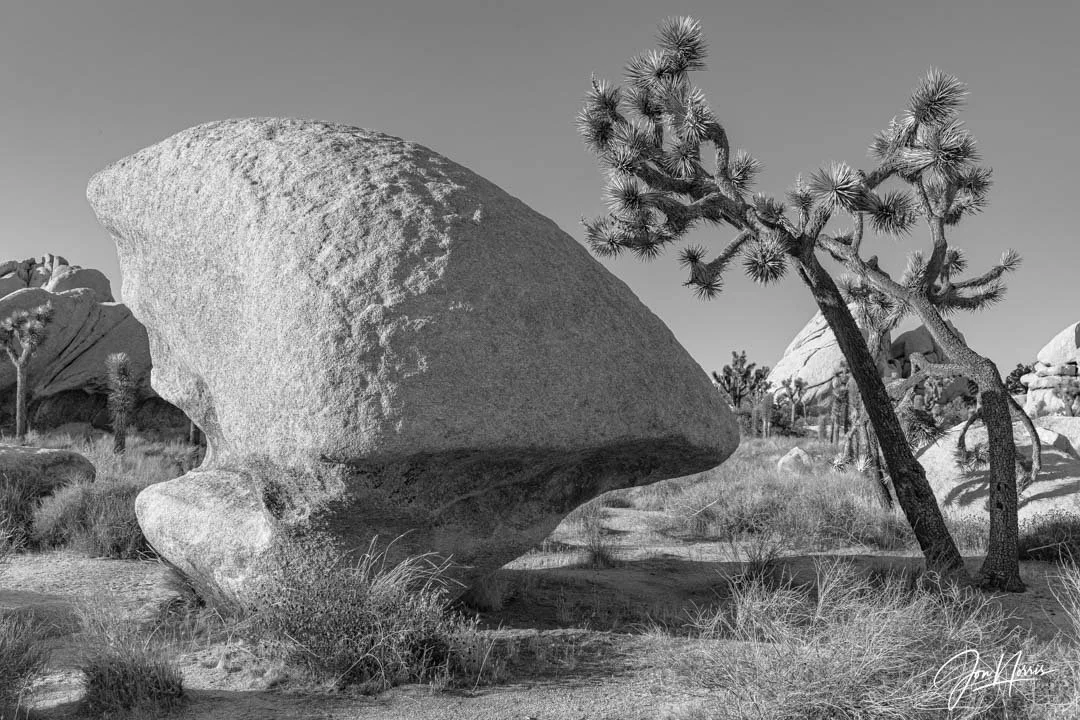
High-Key Joshua Tree, Hidden Valley | © 2022 Jon Norris
Another technique you can apply to your black and white images is to shoot your subject (in the image above, a Joshua Tree) against the sky (not into the sun) and deliberately expose it to the right, creating a high-key image with minimal shadow or darker tones.
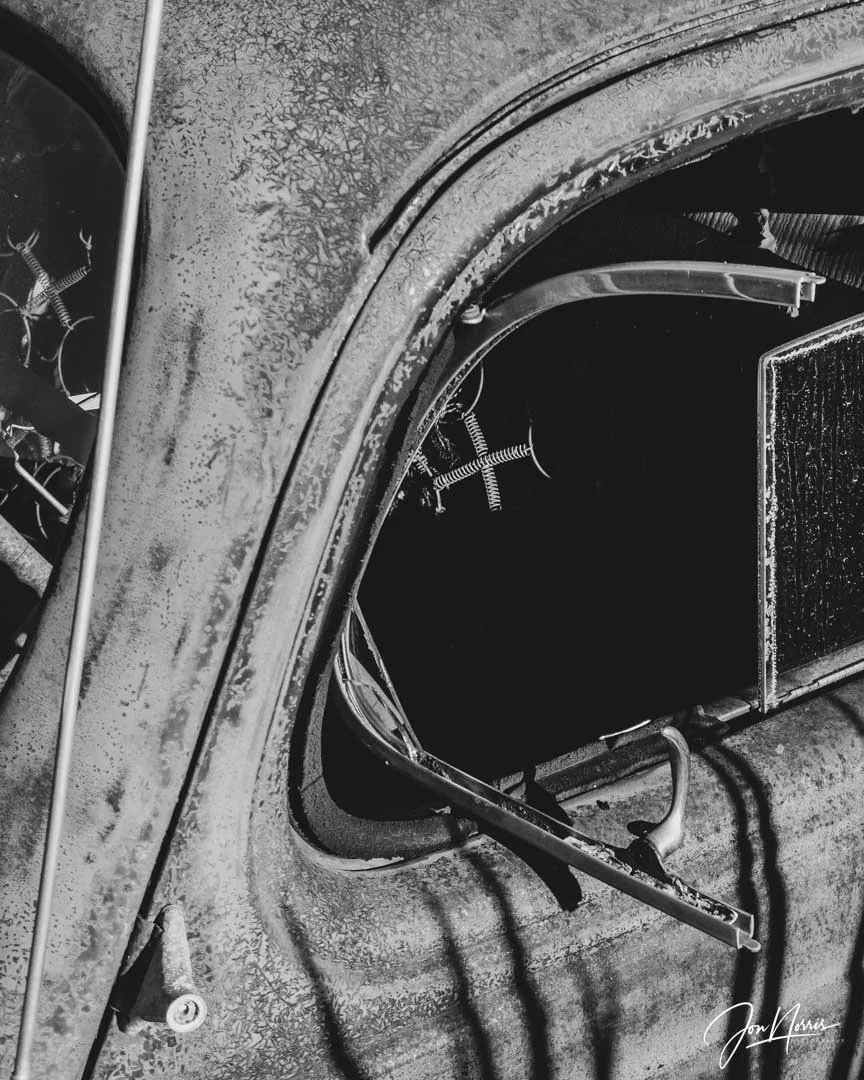
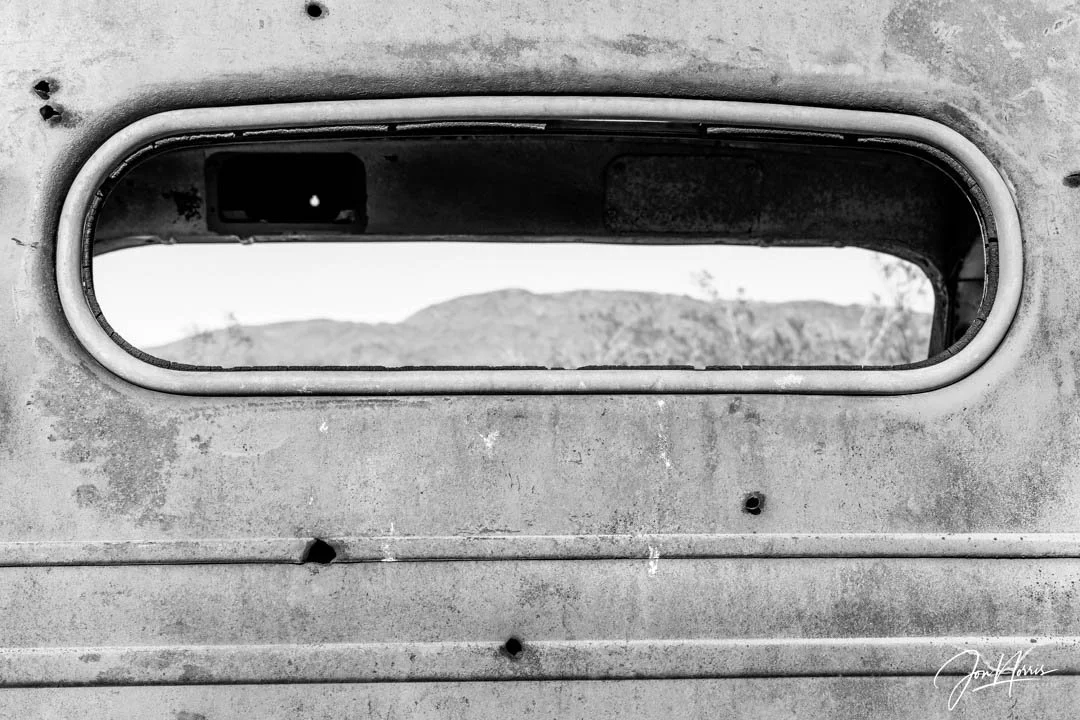
Old Timer, Keys Ranch | © 2022 Jon Norris
In the image above of the Old Timer, I opted to broaden the dynamic range in the final image so that there are tones going from almost white to almost black (without clipping either tonal extreme).
Techniques and camera settings
Always shoot in RAW for maximum tonal flexibility, as it captures the most light information and lets you tweak and edit the photo most broadly during post-processing. Read more about RAW vs JPG in this article.
I mentioned earlier that managing exposure carefully (by utilizing your histogram), and bracketing exposures is often required due to the harsh high-contrast light that will exceed the dynamic range of your camera. Learn about using your histogram and how to use exposure bracketing.
Most digital cameras (DSLR and Mirrorless) will let you compose in-camera as black-and-white, by selecting the camera-back screen to display in monochrome. The menu below is from my Canon EOS R.
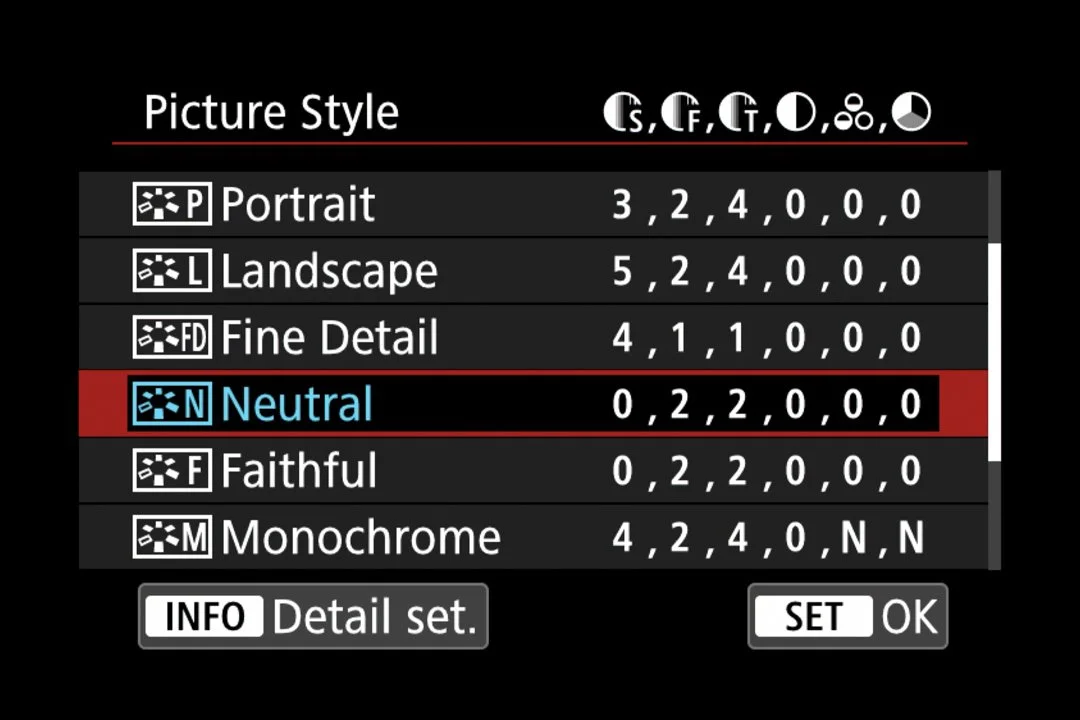
Canon EOS R Picture Style Menu
After selecting monochrome the image displayed on the back of my camera (and what I see in the viewfinder) is shown below.
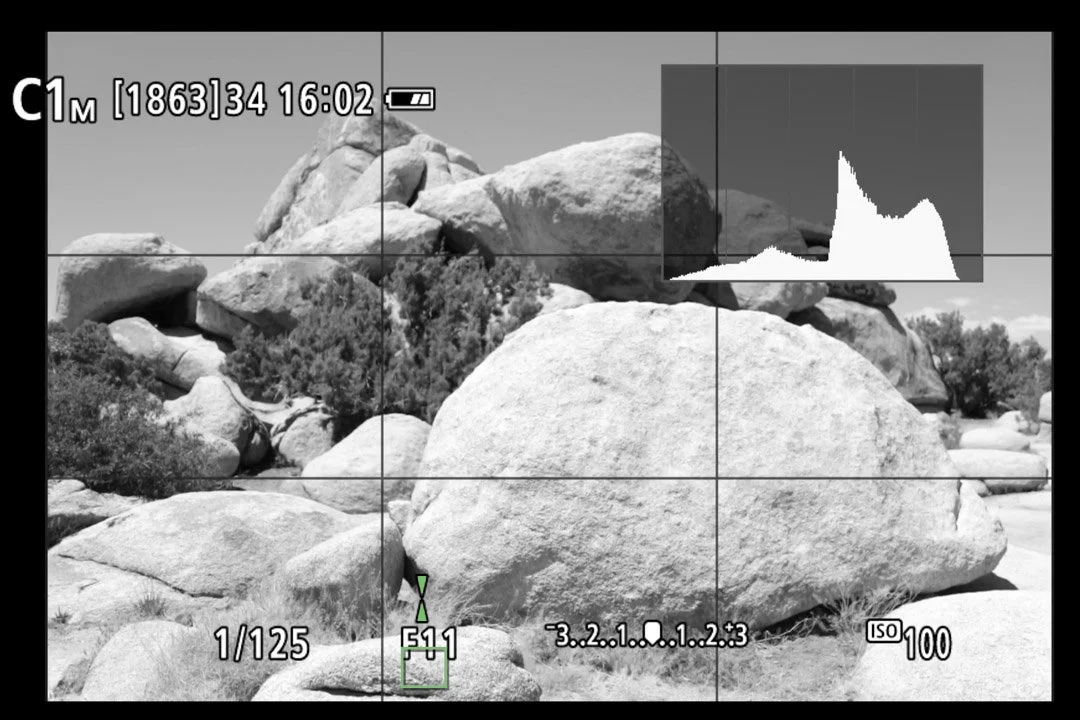
Canon EOS R with Monochrome Picture Style Selected
This helps you to pre-visualize how the tones in your scene will work together in your composition, which I find very useful. Be aware though, the image that your camera takes will be in color. Assuming that you’re shooting in RAW (you are shooting in RAW aren’t you?), what you see on the back of the camera (and through the viewfinder) is a JPG of the scene (made black and white via the Picture Style setting). This setting has no effect on the RAW file that your camera captures.
So in post-processing, you’ll need to convert the image to black and white before you start your editing.
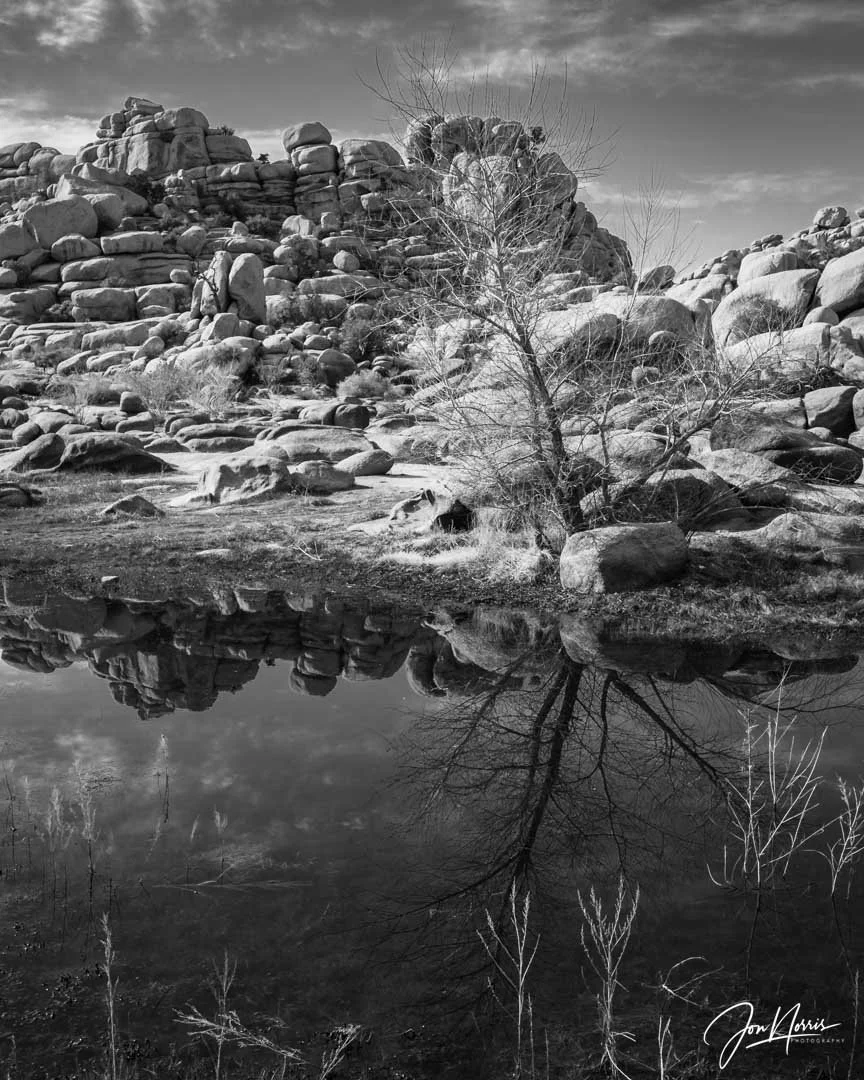
Barker Dam (shot with a Circular Polarizer) | © 2023 Jon Norris
There are two types of filters that work well for black and white photography (as well as color): Circular Polarizer (CPL) and Neutral Density (ND). Polarizers are used to emphasize sky contrast (for example in the image of Barker Dam above), and ND filters are used for long exposures (for example to accentuate cloud movement). Read more about filters in this article.
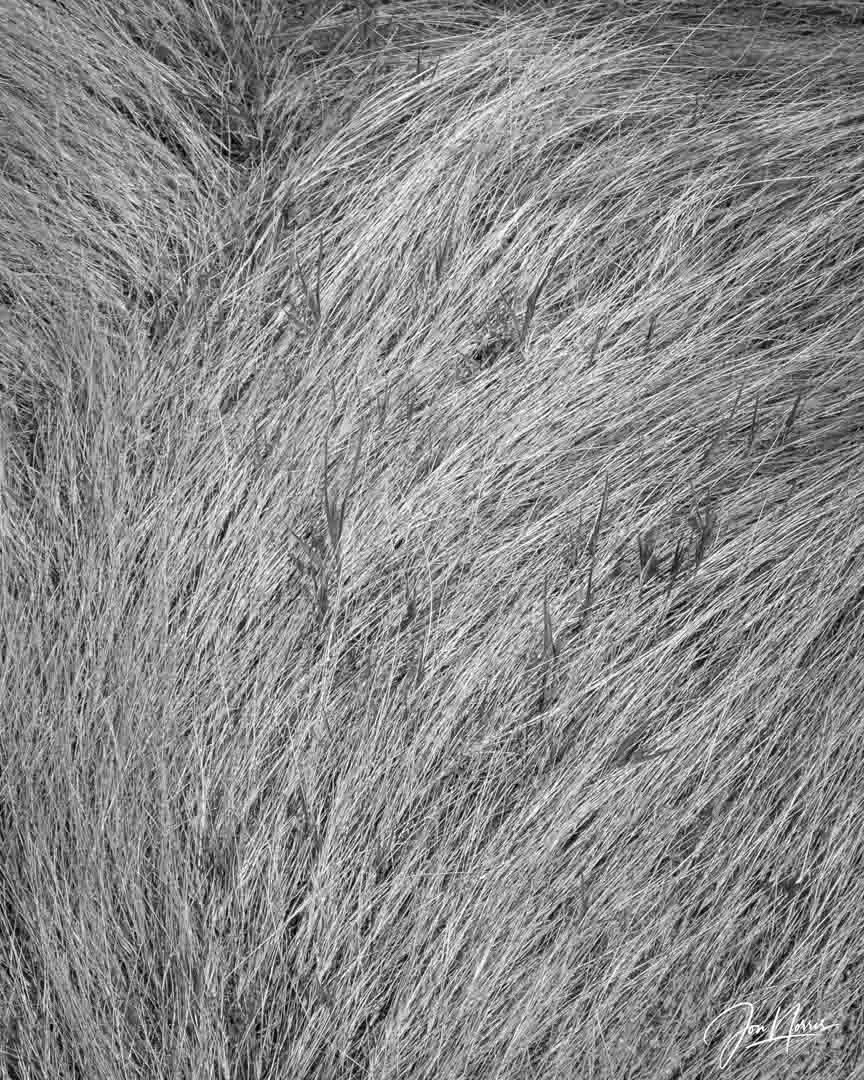
Grasses, Black Rock Canyon | © 2023 Jon Norris
Post-Processing for Black & White
I will write up a future article that will cover post-processing for black and white images. As a quick introduction to that, here are the steps that you will take (based on your image):
Converting color to monochrome effectively (using Lightroom, Photoshop, or other dedicated software).
Adjusting contrast, clarity, and tonal curves for desert textures.
Dodging and burning for sculpting light.
Emphasizing texture (without over-processing).
Pinyon Pine, Hidden Valley | © 2025 Jon Norris
Composition Strategies
The various composition approaches (some may say rules) that are used to good effect for color images can also be used for black and white images. For example: leading lines (trails, desert roads, rock formations), framing with trees and boulders, negative space for minimalist impact, symmetry vs. asymmetry in desert landscapes.
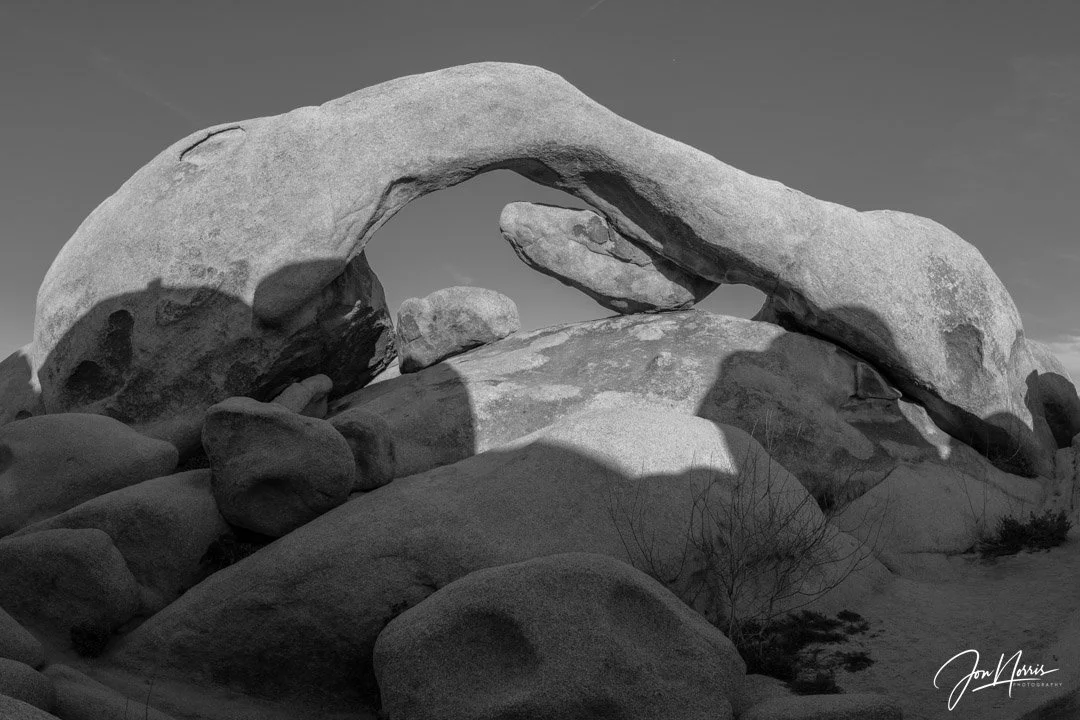
Arch Rock, Joshua Tree National Park | © 2023 Jon Norris
The following articles are a good primer on composition: Composition is a feeling … sometimes and a Guide to Landscape Photography Composition.
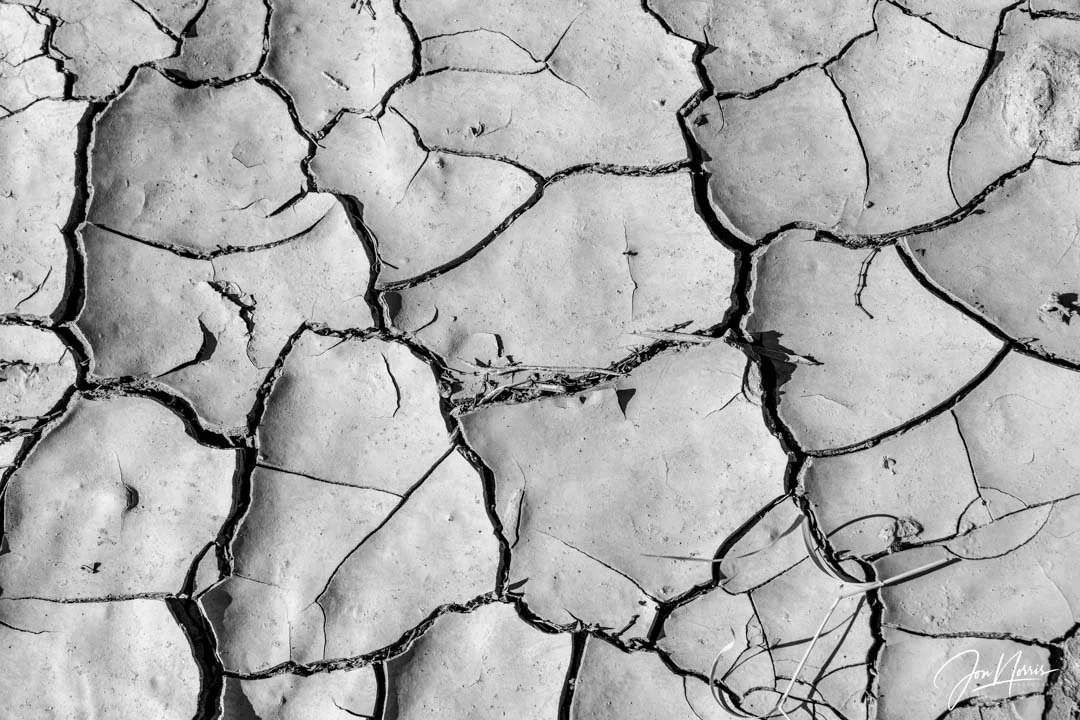
Cracking Up, Pinto Basin | © 2025 Jon Norris
Practical tips for photographers visiting Joshua Tree
The good news is that you can try out black and white photography year round in Joshua Tree, as the temperatures and harsh desert light are prevalent for most of the year.
September to May tend to be the most popular months to visit Joshua Tree. Summer in Joshua Tree National Park is the least popular season due to the hot daytime temperatures. With average daytime highs of 90°-105°F (32°-40˚C), outdoor activities like hiking are uncomfortable.
See this linked article for more specific information on visiting Joshua Tree.
For information on safety in desert environments (such as Joshua Tree) please take a look at this article.
Weathered, Hidden Valley | © 2020 Jon Norris
Conclusion
In summary, Joshua Tree is a superb destination for black and white photographers.
By shooting in black and white, you can use the harsh desert light to emphasize the textures, tones, shadows, and patterns which abound in the twisted, sculptural forms of the Joshua Trees, and their neighboring granite inselbergs (rock piles).
Black and white images also have timeless, minimalist, and abstract qualities, that support emotional storytelling.
If this article has whetted your appetite please consider joining one of my landscape photography weekend workshops. Workshops from now through 2026 are available to book on my website. Click on this link to learn more and get 20% of your workshop.
Rear View, Pinto Basin | © 2025 Jon Norris