Hike Smart - The Essentials You Need to Know to Start Walking in the Wilderness
Explore Landscapes #68
Your guide to the essentials needed to hike in Joshua Tree National Park (or other wilderness area) and making sure you have what it takes to hike smart.
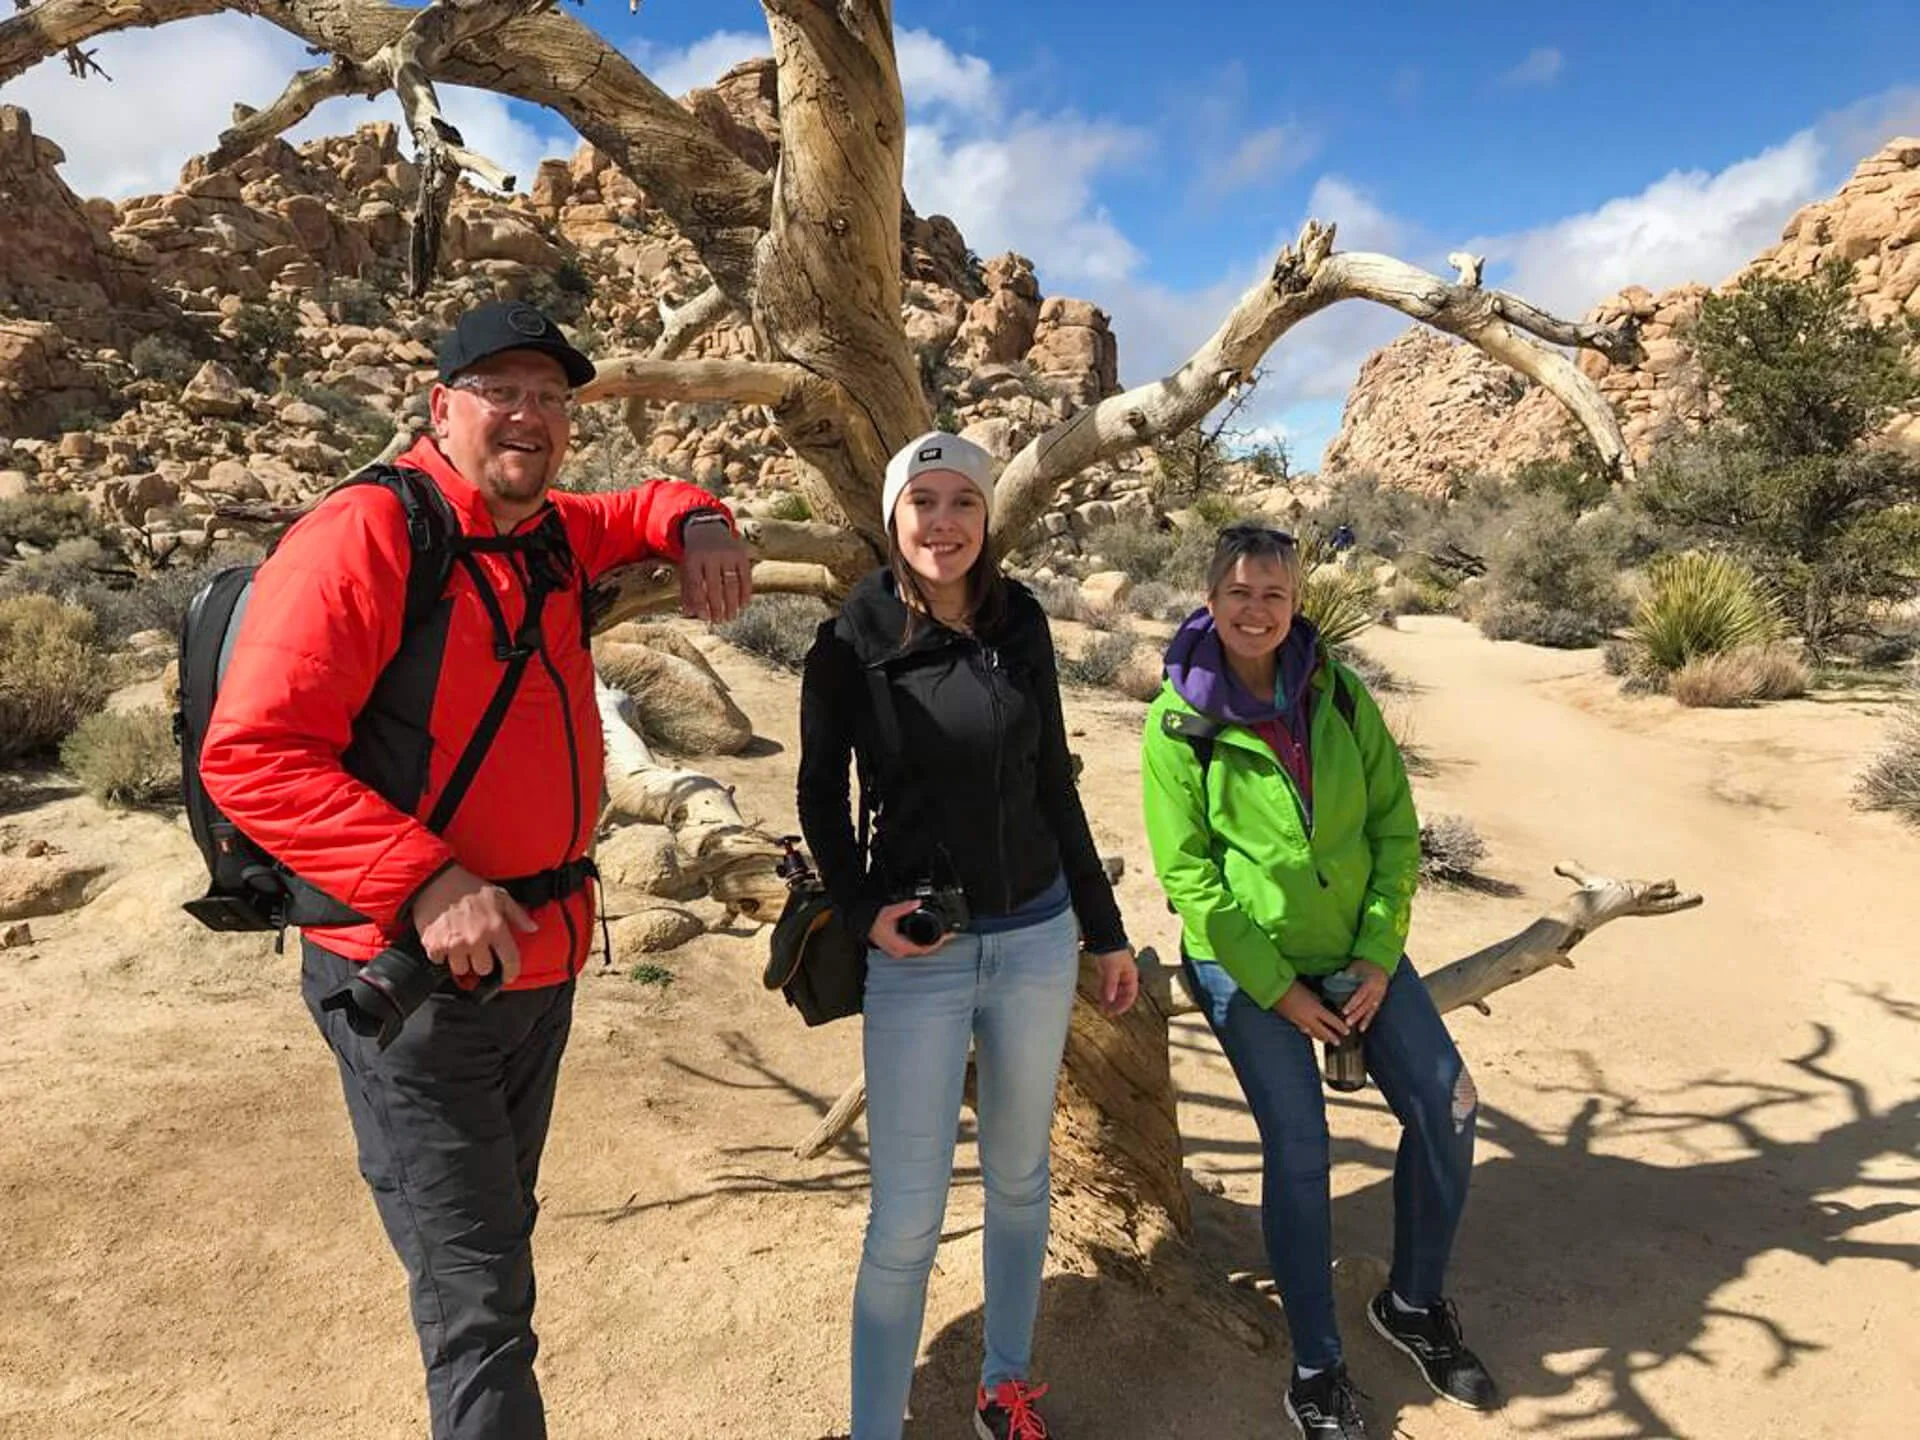
Me, Charlotte (my eldest daughter), and Jackie (my wife) enjoying the Hidden Valley trail in Joshua Tree National Park | © 2019 Jon Norris
First, I want to acknowledge two sources I’m using to write this post. Thanks to the Joshua Tree National Park Association (specifically Reilly Powell for their excellent work creating the Hike Smart brochure) and Sarah Witt's Hiking 101 class notes.
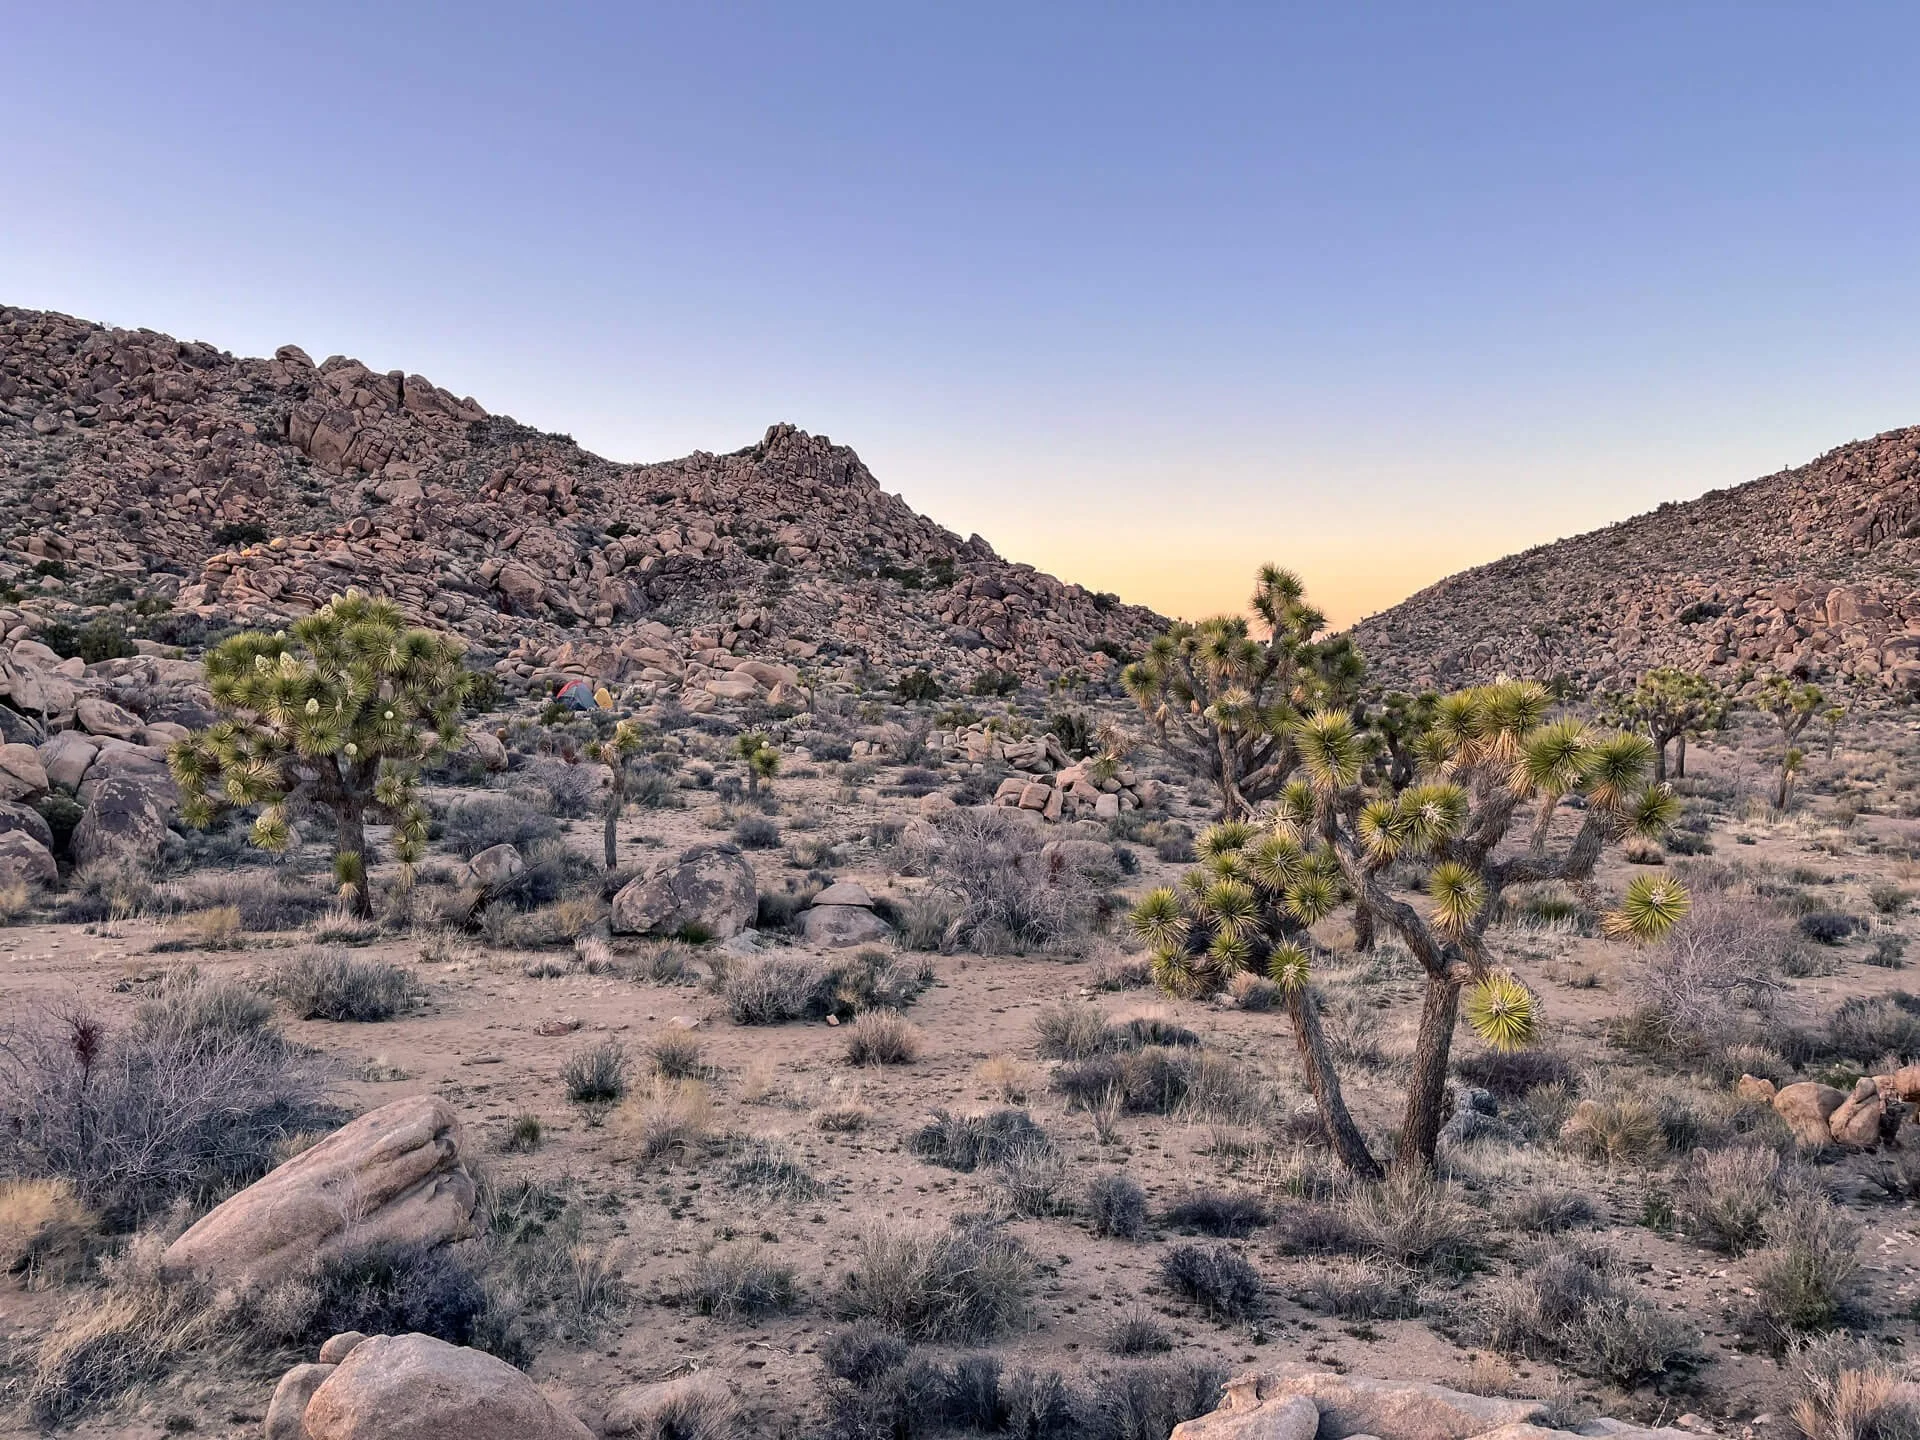
Deep in the wilderness of Joshua Tree National Park | © 2023 Jon Norris
Be a Good Human Out There
Follow the Leave No Trace principles when out in the wilderness to minimize your impact on Nature.
Photographers should adopt the Nature First principles, which guide professional and recreational photographers in sustainable, minimal-impact practices that will help preserve nature’s beautiful locations.
Watch out for cryptobiotic crust and avoid using social trails.
If you have to go, use one of the vault toilets throughout the park. Otherwise, dig a cathole if you’re in the wilderness. Remember to pack out your toilet paper. Consider using a Biffy Bag, Wag Bag, or Kula Cloth to reduce your impact further.
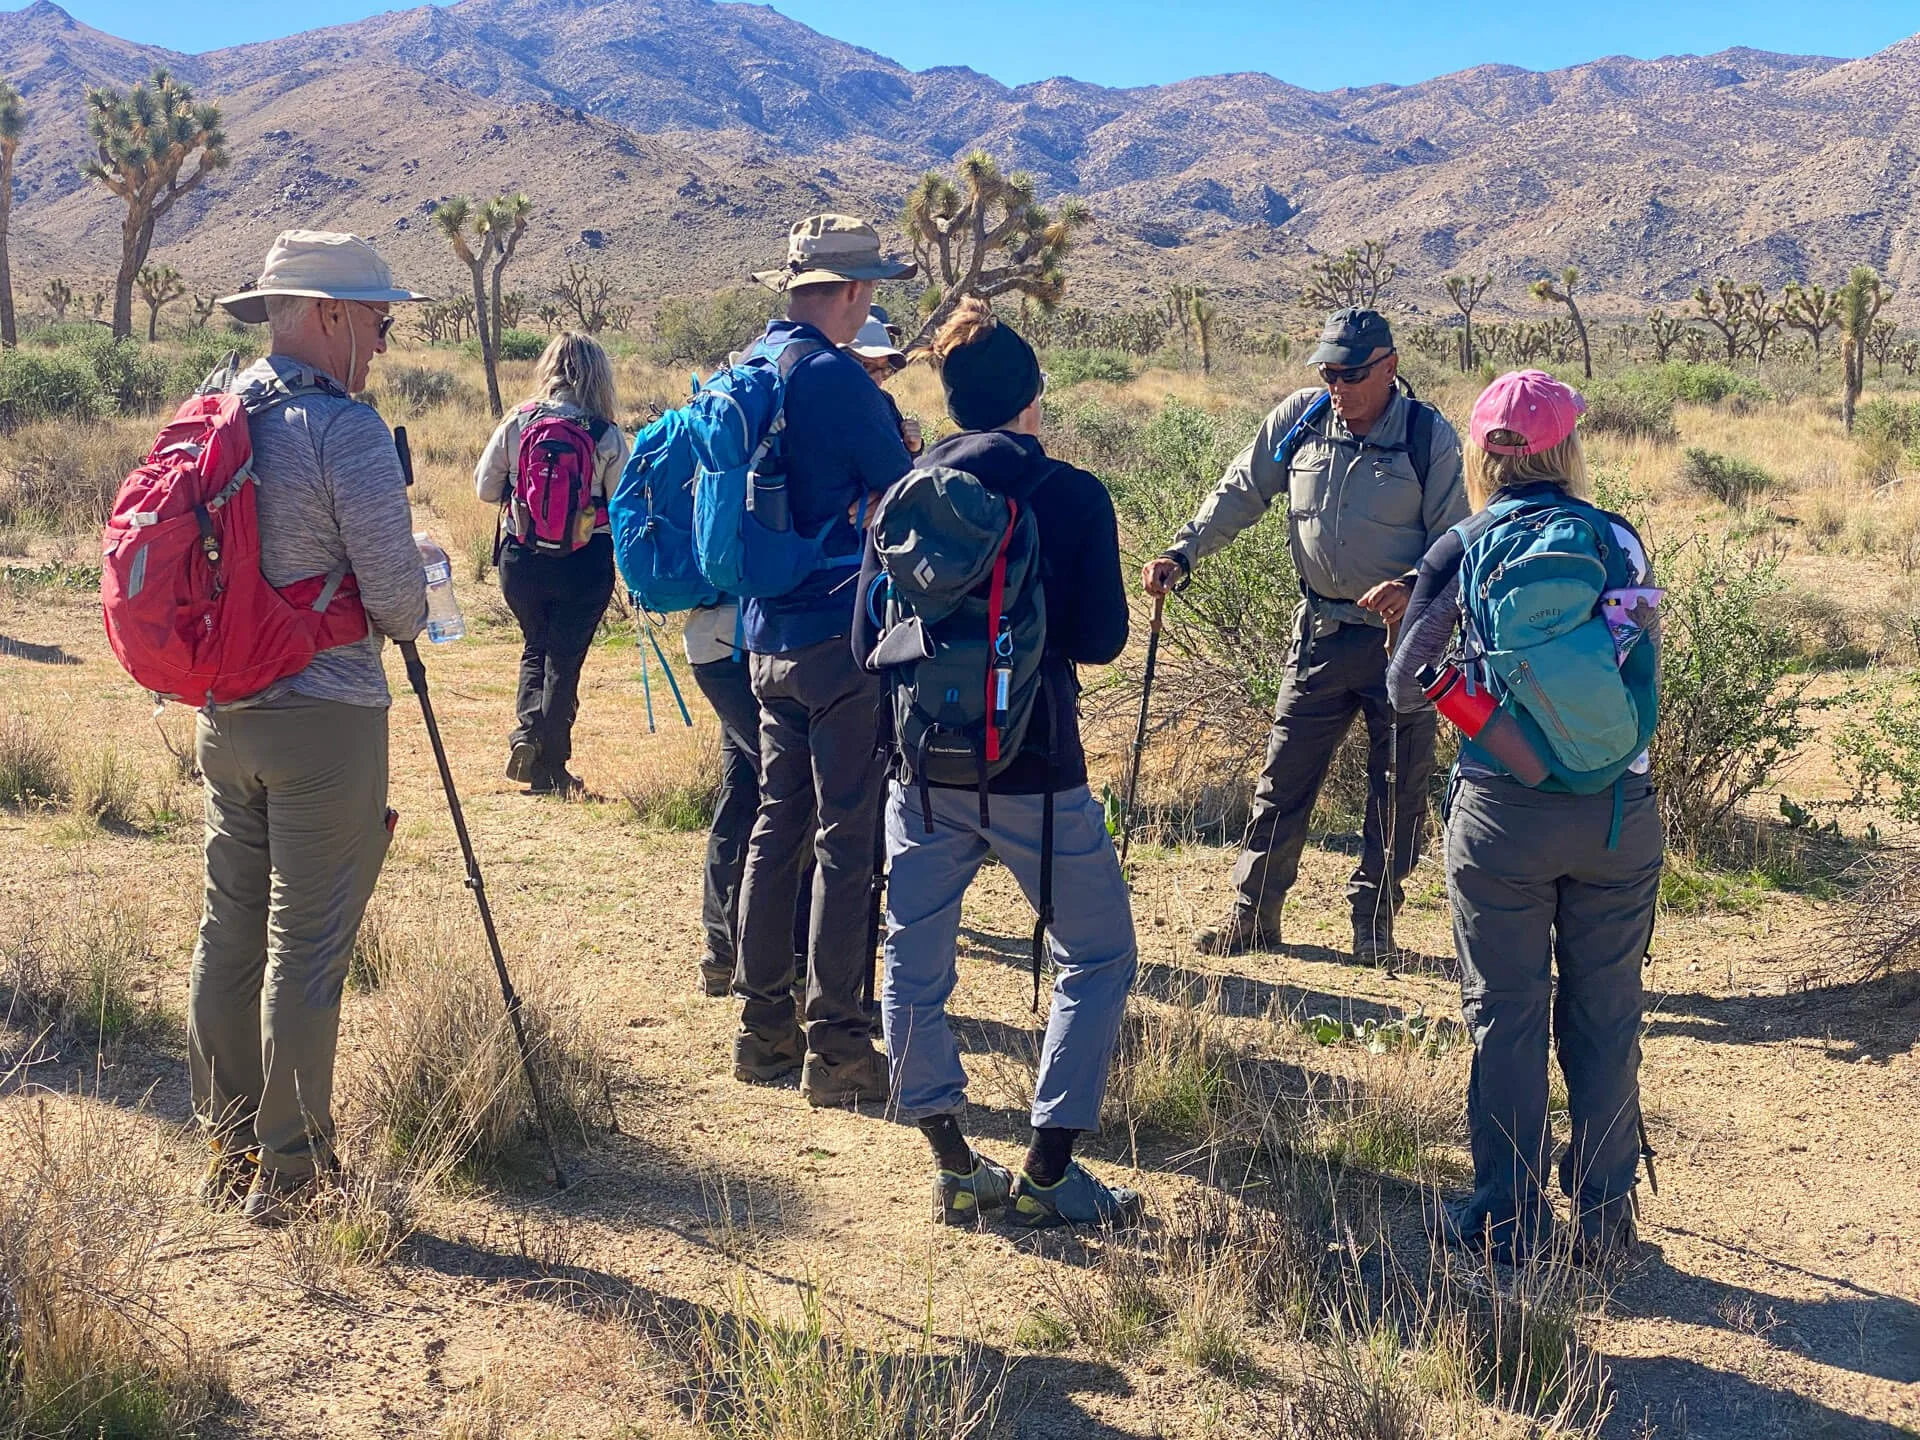
A good selection of day packs on a JTNPA hike | © 2022 Jon Norris
To Bring or Not to Bring
Bring a day pack that’s big enough to carry your essentials but not so big that you pack too much and make it too heavy. Typically, day packs are between 18L and 40L. I think the sweet spot for a day pack is around 30L. It has enough capacity to hold your 10 essentials (see the next section) plus some extras, like a camera and guidebook.
Bring sufficient water with you; no water is available in the park. Your body can only absorb about 1L per hour, and 1L of every 3L consumed should include an electrolyte solution. In winter, 4L is suitable for easier day hikes (under 8 miles), and 6L+ is ideal for warmer weather or strenuous days with longer mileage.
Bring the 10 essentials (see the brochure and list below).
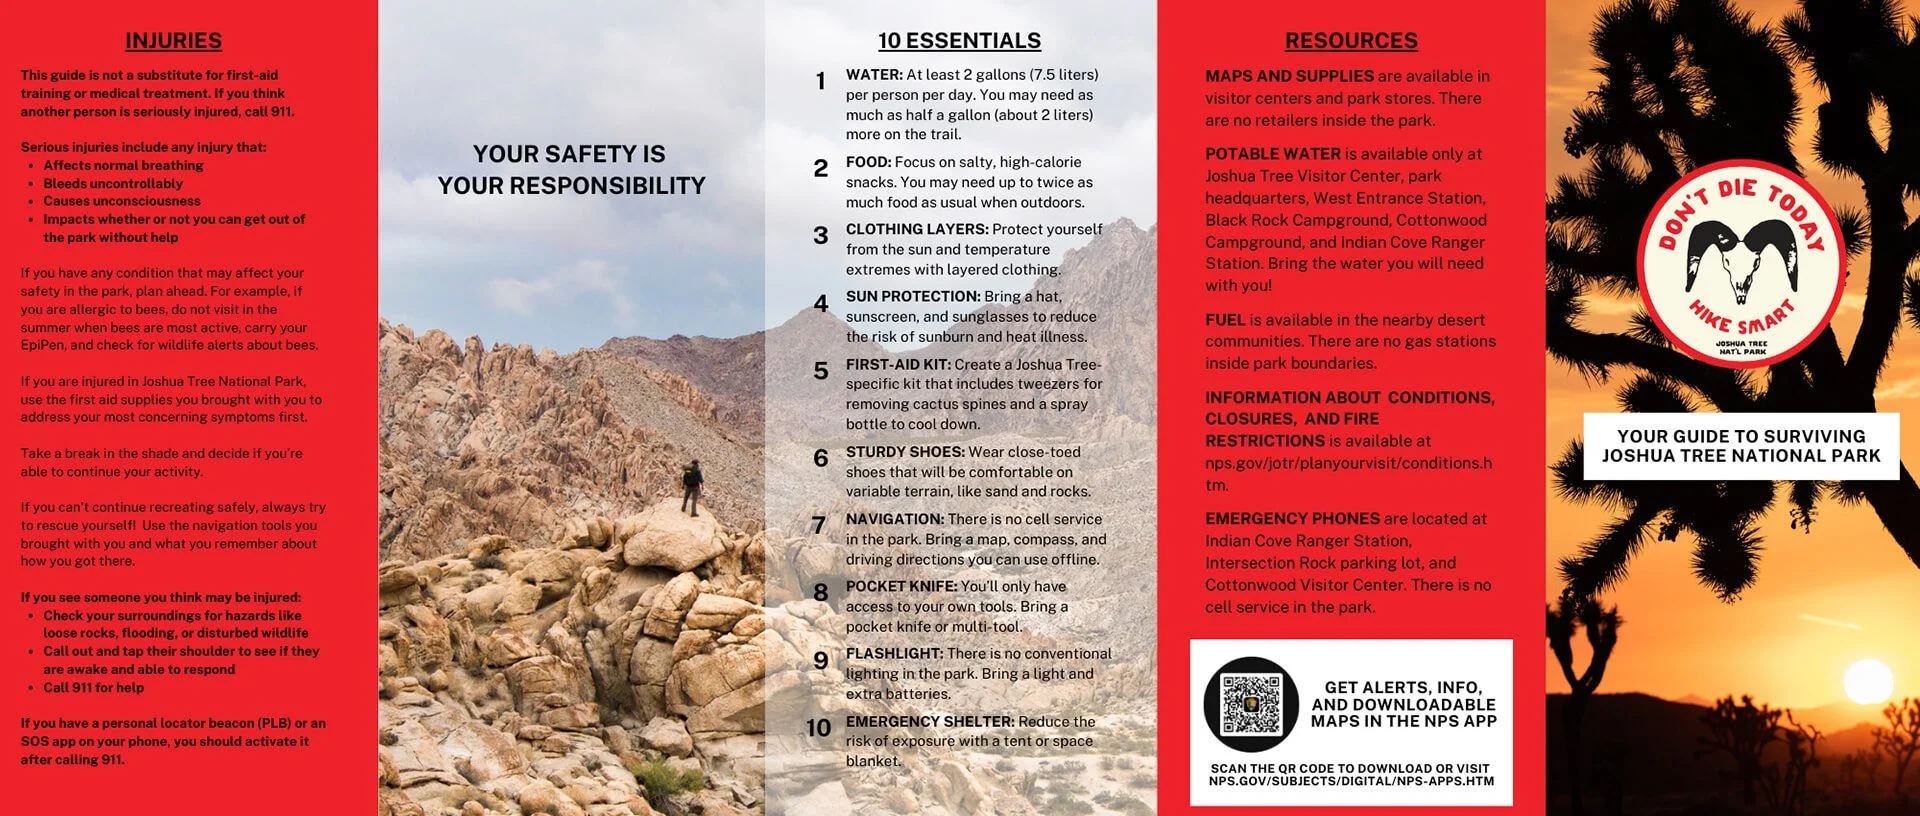
Guide to Surviving Joshua Tree National Park (front) | © 2024 JTNPA
The 10 Essentials
NAVIGATION: Never rely solely on your phone, as there is no cell service in the park. Bring a paper map, compass, and offline driving directions.
SUN PROTECTION: To reduce the risk of sunburn and heat illness, bring sunscreen, a long-sleeved light-colored shirt, long pants, a brimmed or billed hat, and sunglasses.
WARM LAYERS: For when the sun goes down, and you’re still out hiking or have to stay in the wilderness after dark.
STURDY SHOES: Wear close-toed shoes that will be comfortable on variable terrain, like sand and rocks.
HEADLAMP / FLASHLIGHT: The park does not have conventional lighting. Bring spare batteries. You never know when you may have to stay out after dark.
FOOD / SNACKS: Focus on salty, high-calorie snacks, and plenty of them. You may need up to twice as much food as usual outdoors.
WATER (AND MORE WATER): Bring 4L per day (average); in hot weather, you can double that need, but don’t forget to balance with electrolytes or your salty snacks.
FIRST AID KIT: Think about what you need and what you know how to use. There’s no point in carrying extra weight if you’re unsure what to do with it. Think medications, essential bandaids, prep pads, gauze, tape, and tweezers (for removing cactus spines).
EMERGENCY SHELTER: Reduce the risk of exposure with a space blanket or a lightweight tarp.
POCKET KNIFE: A knife (or multi-tool) is indispensable.
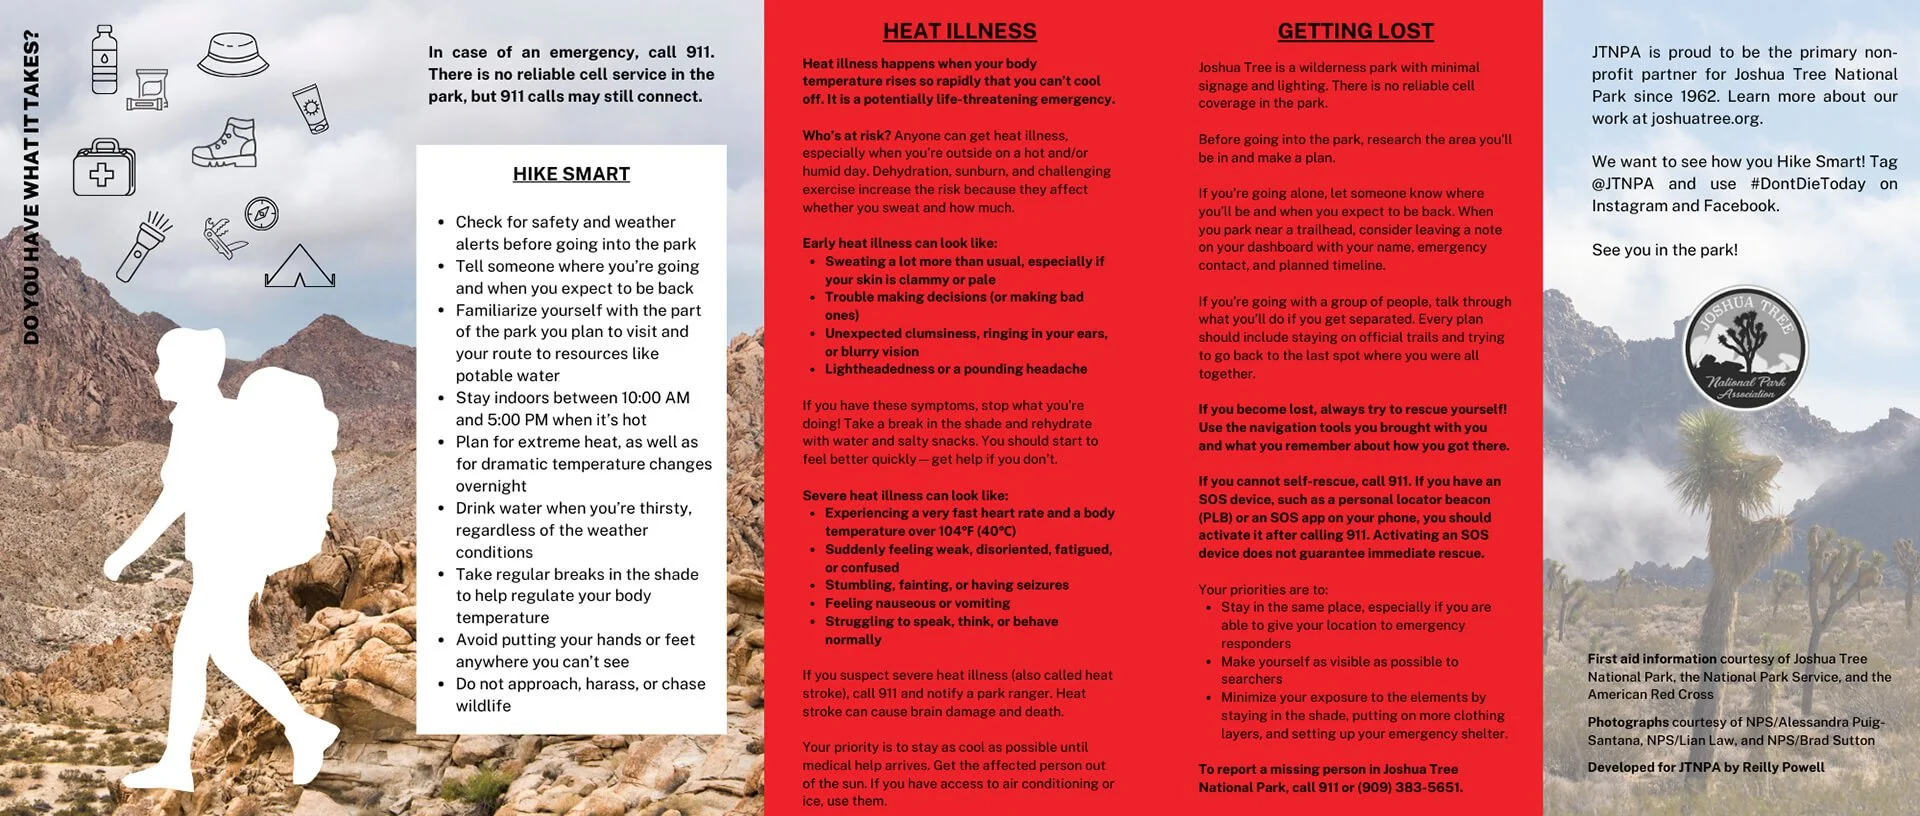
Guide to Surviving Joshua Tree National Park (back) | © 2024 JTNPA
Two extra recommendations
WHISTLE: Bring a whistle to attract attention and to send a distress signal. The international distress signal is delivered by producing six blasts of the whistle every minute. The accepted response by rescuers is three whistle blasts every minute.
GPS PERSONAL LOCATOR BEACON (PLB): A GPS PLB lets you stay in touch with friends and family with global two-way messaging via satellite (when there’s no cellular service available). You can also trigger an interactive SOS message with your GPS coordinates to a 24/7-staffed emergency response coordination center.
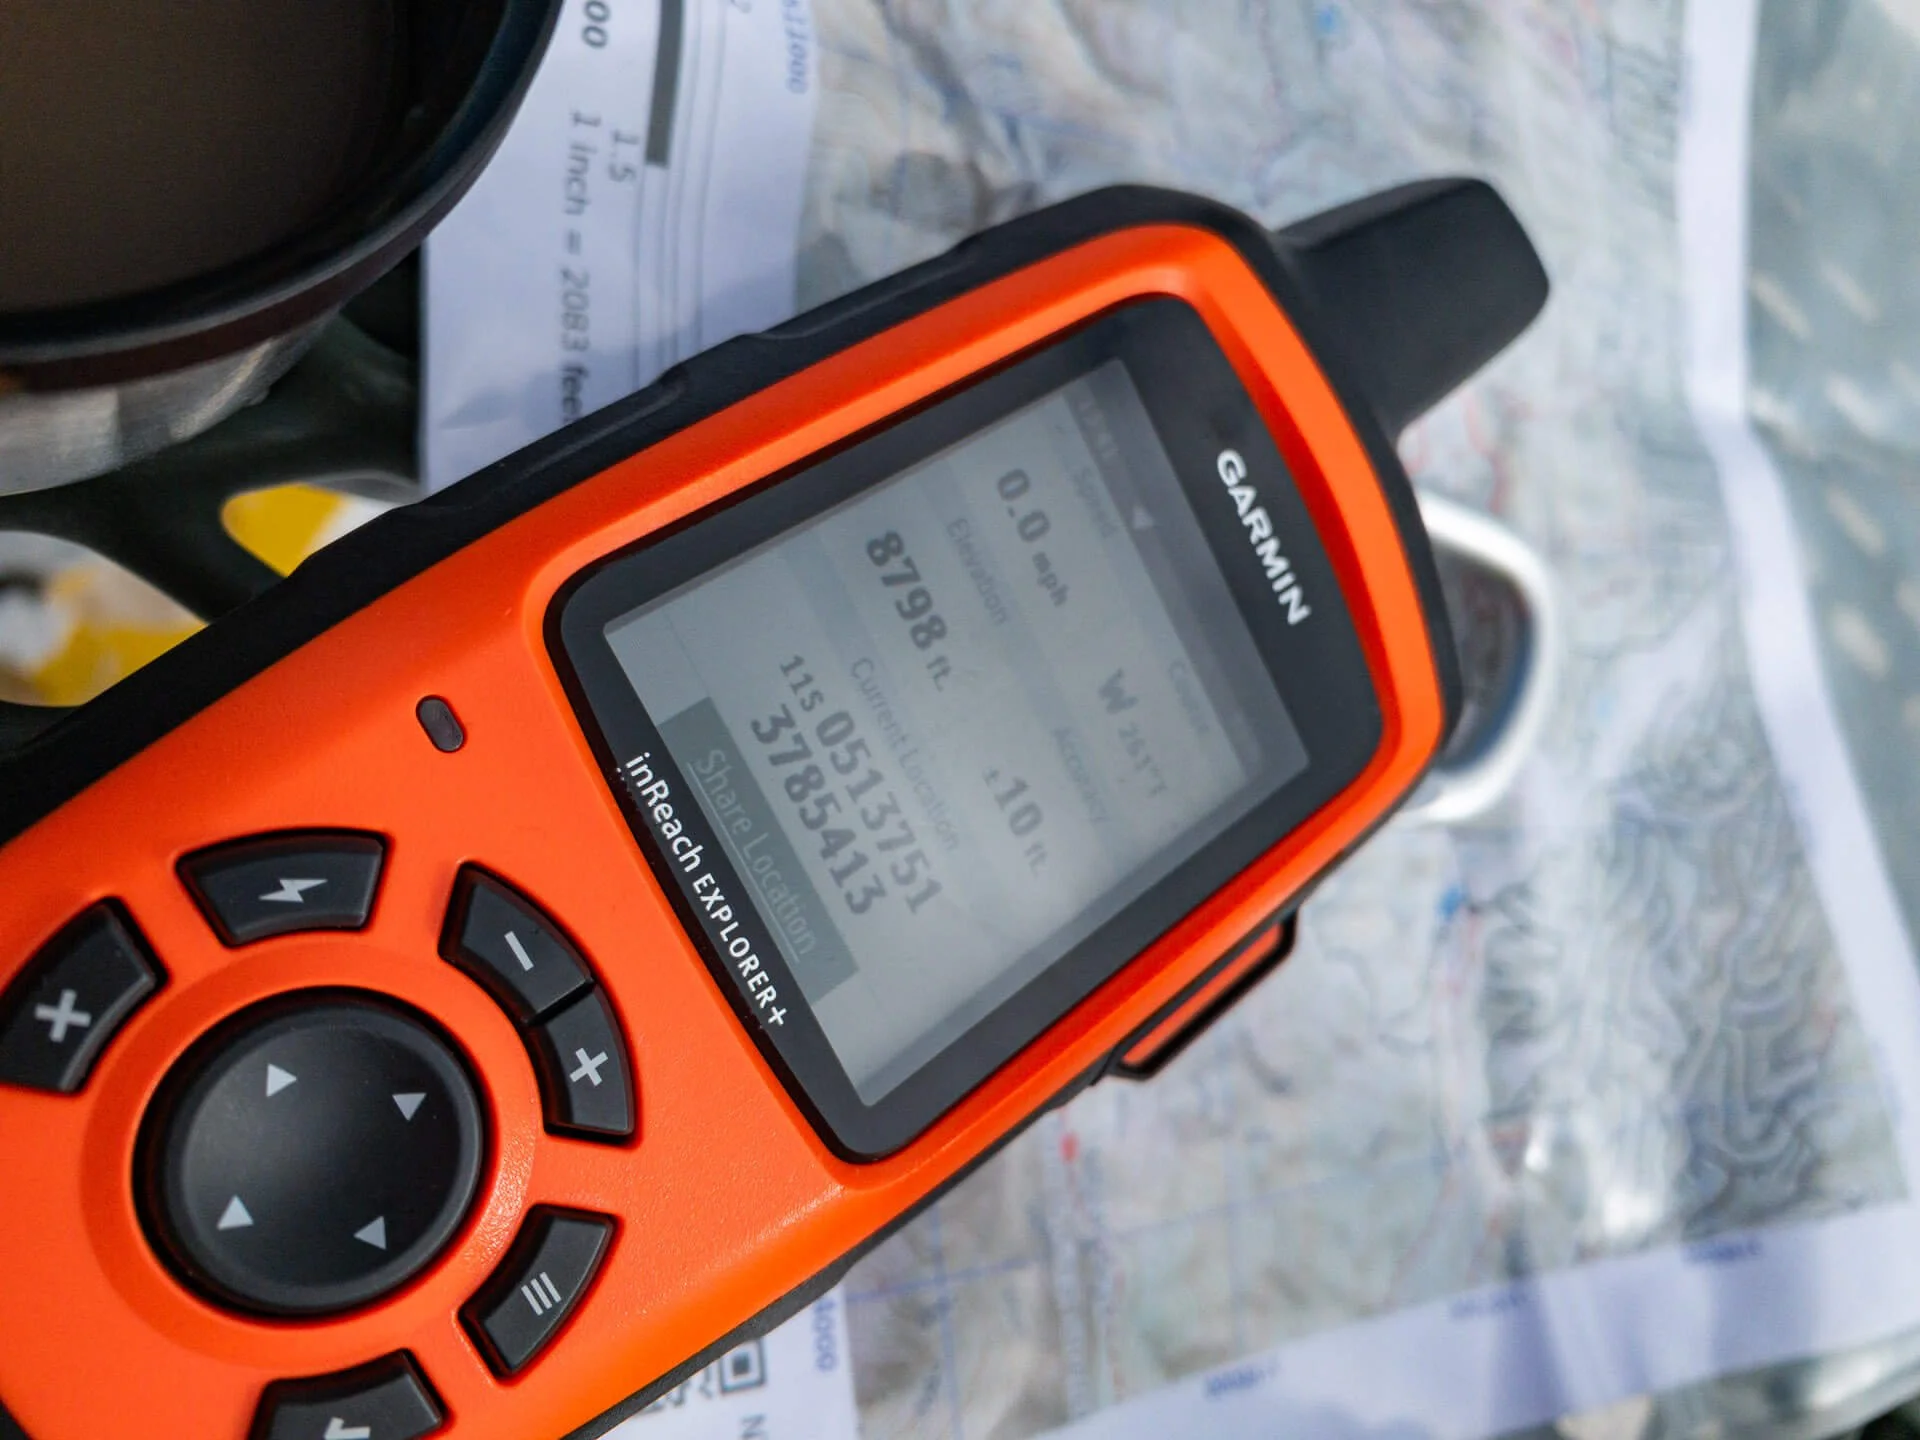
My Garmin inReach Explorer+ GPS PLB | © 2019 Jon Norris
Clothing
Clothing made from synthetics like nylon, polyester, or even wool or silk is ideal, as these materials dry quickly. Wet clothes can lead to hypothermia, a serious condition that can be fatal if not treated correctly and promptly.
Layer your clothing smartly:
Choose a base layer that fits snugly - this is your thermal layer.
Wear an insulating layer that traps and multiplies your warmth, i.e., a down (or down alternative) puffy jacket or fleece.
Then, add an outer shell layer to prevent warmth from escaping. This layer could also be waterproof and windproof if the weather dictates it.
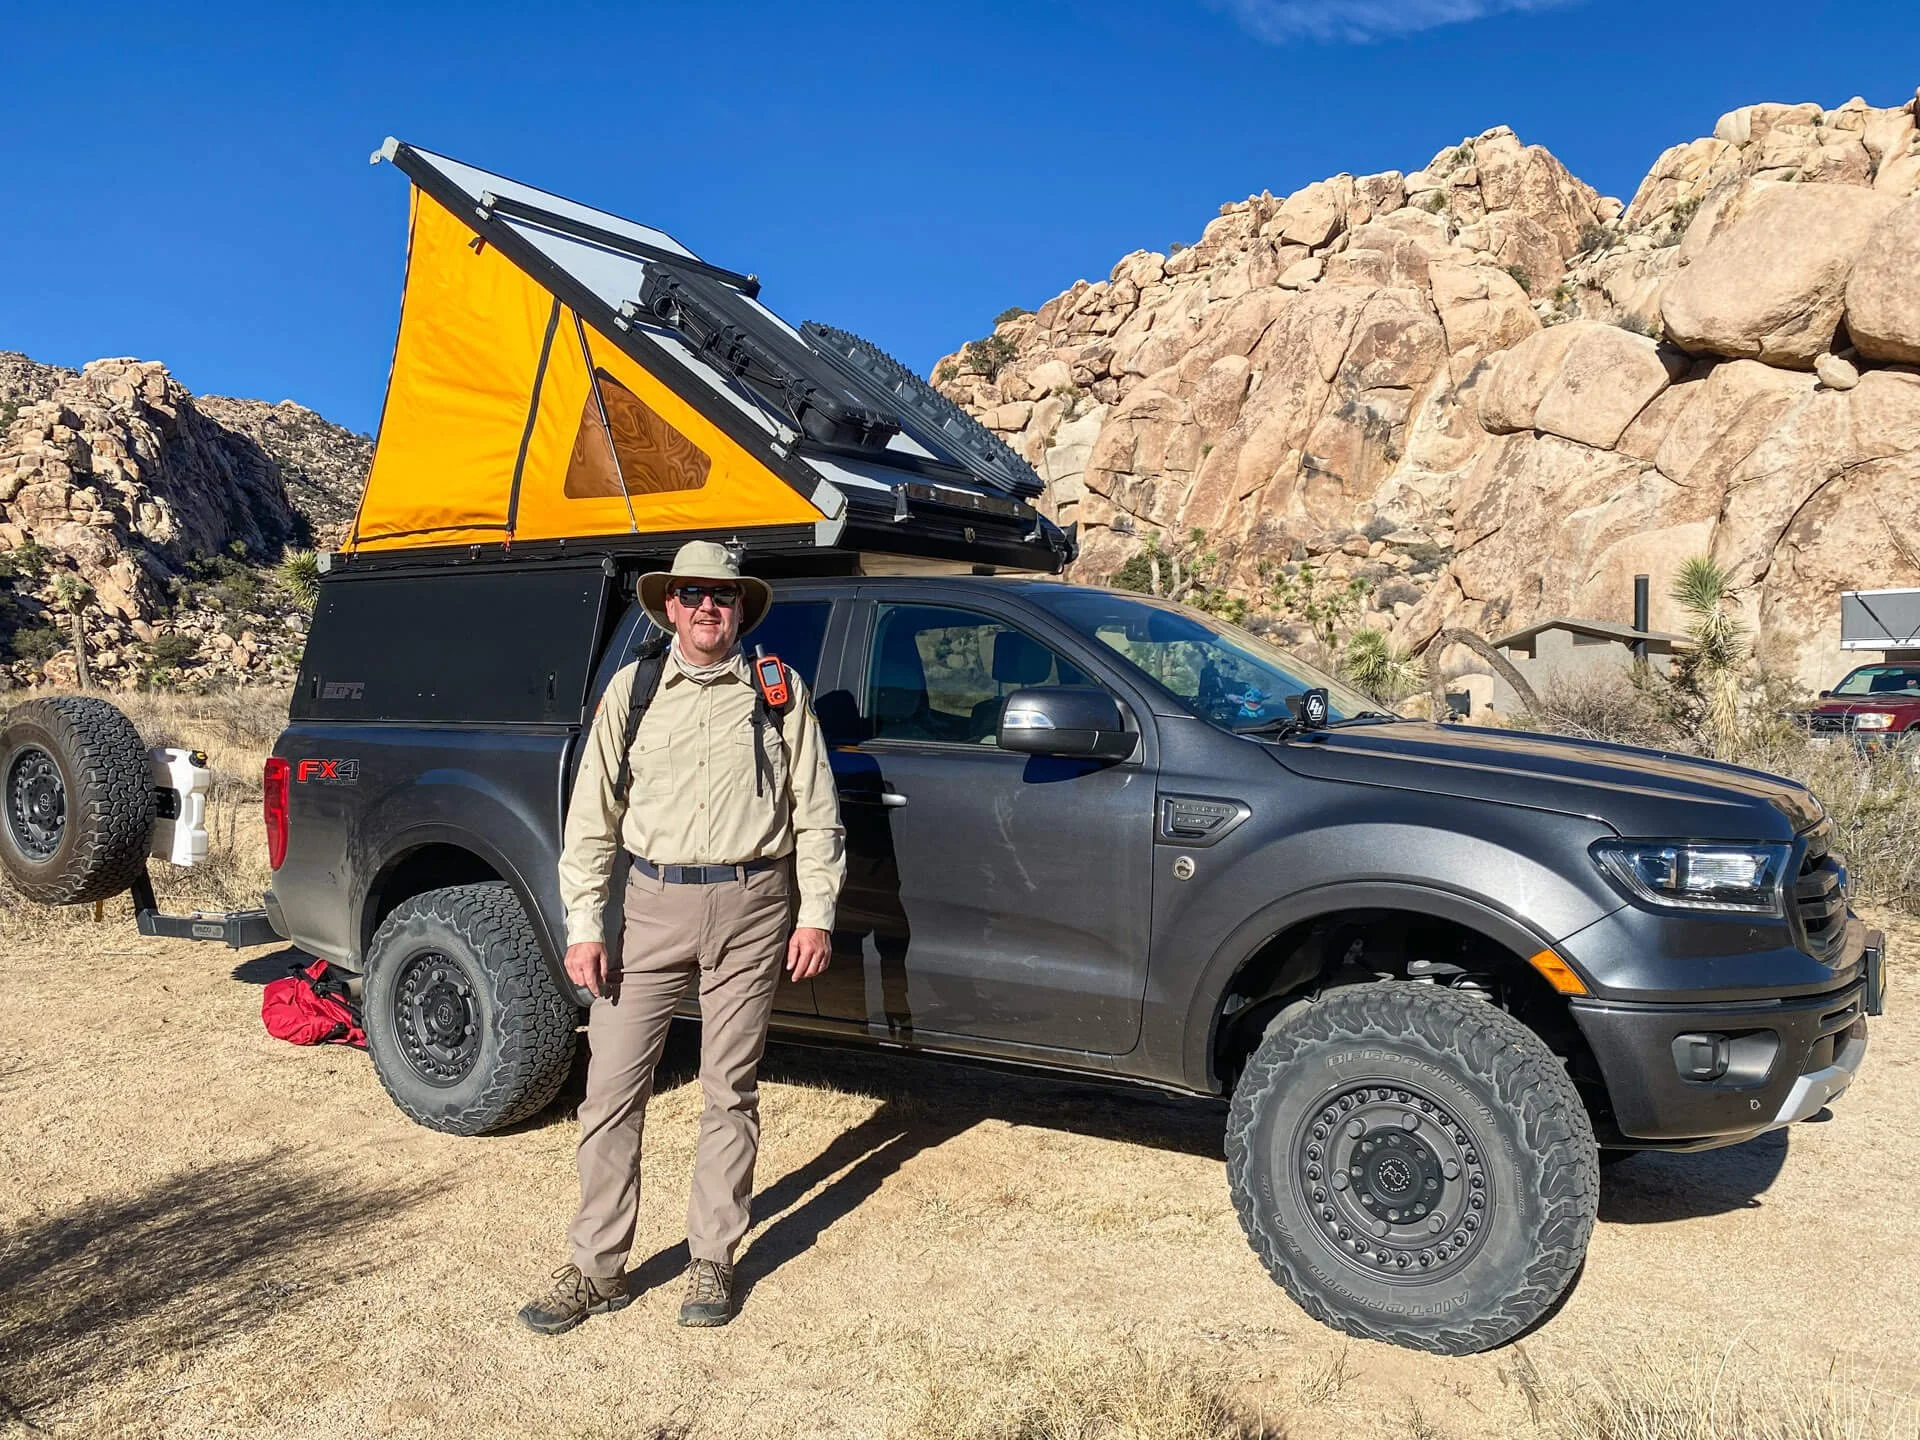
Ready to set off on a hike from the Lost Horse campground in Joshua Tree National Park | © 2022 Jon Norris
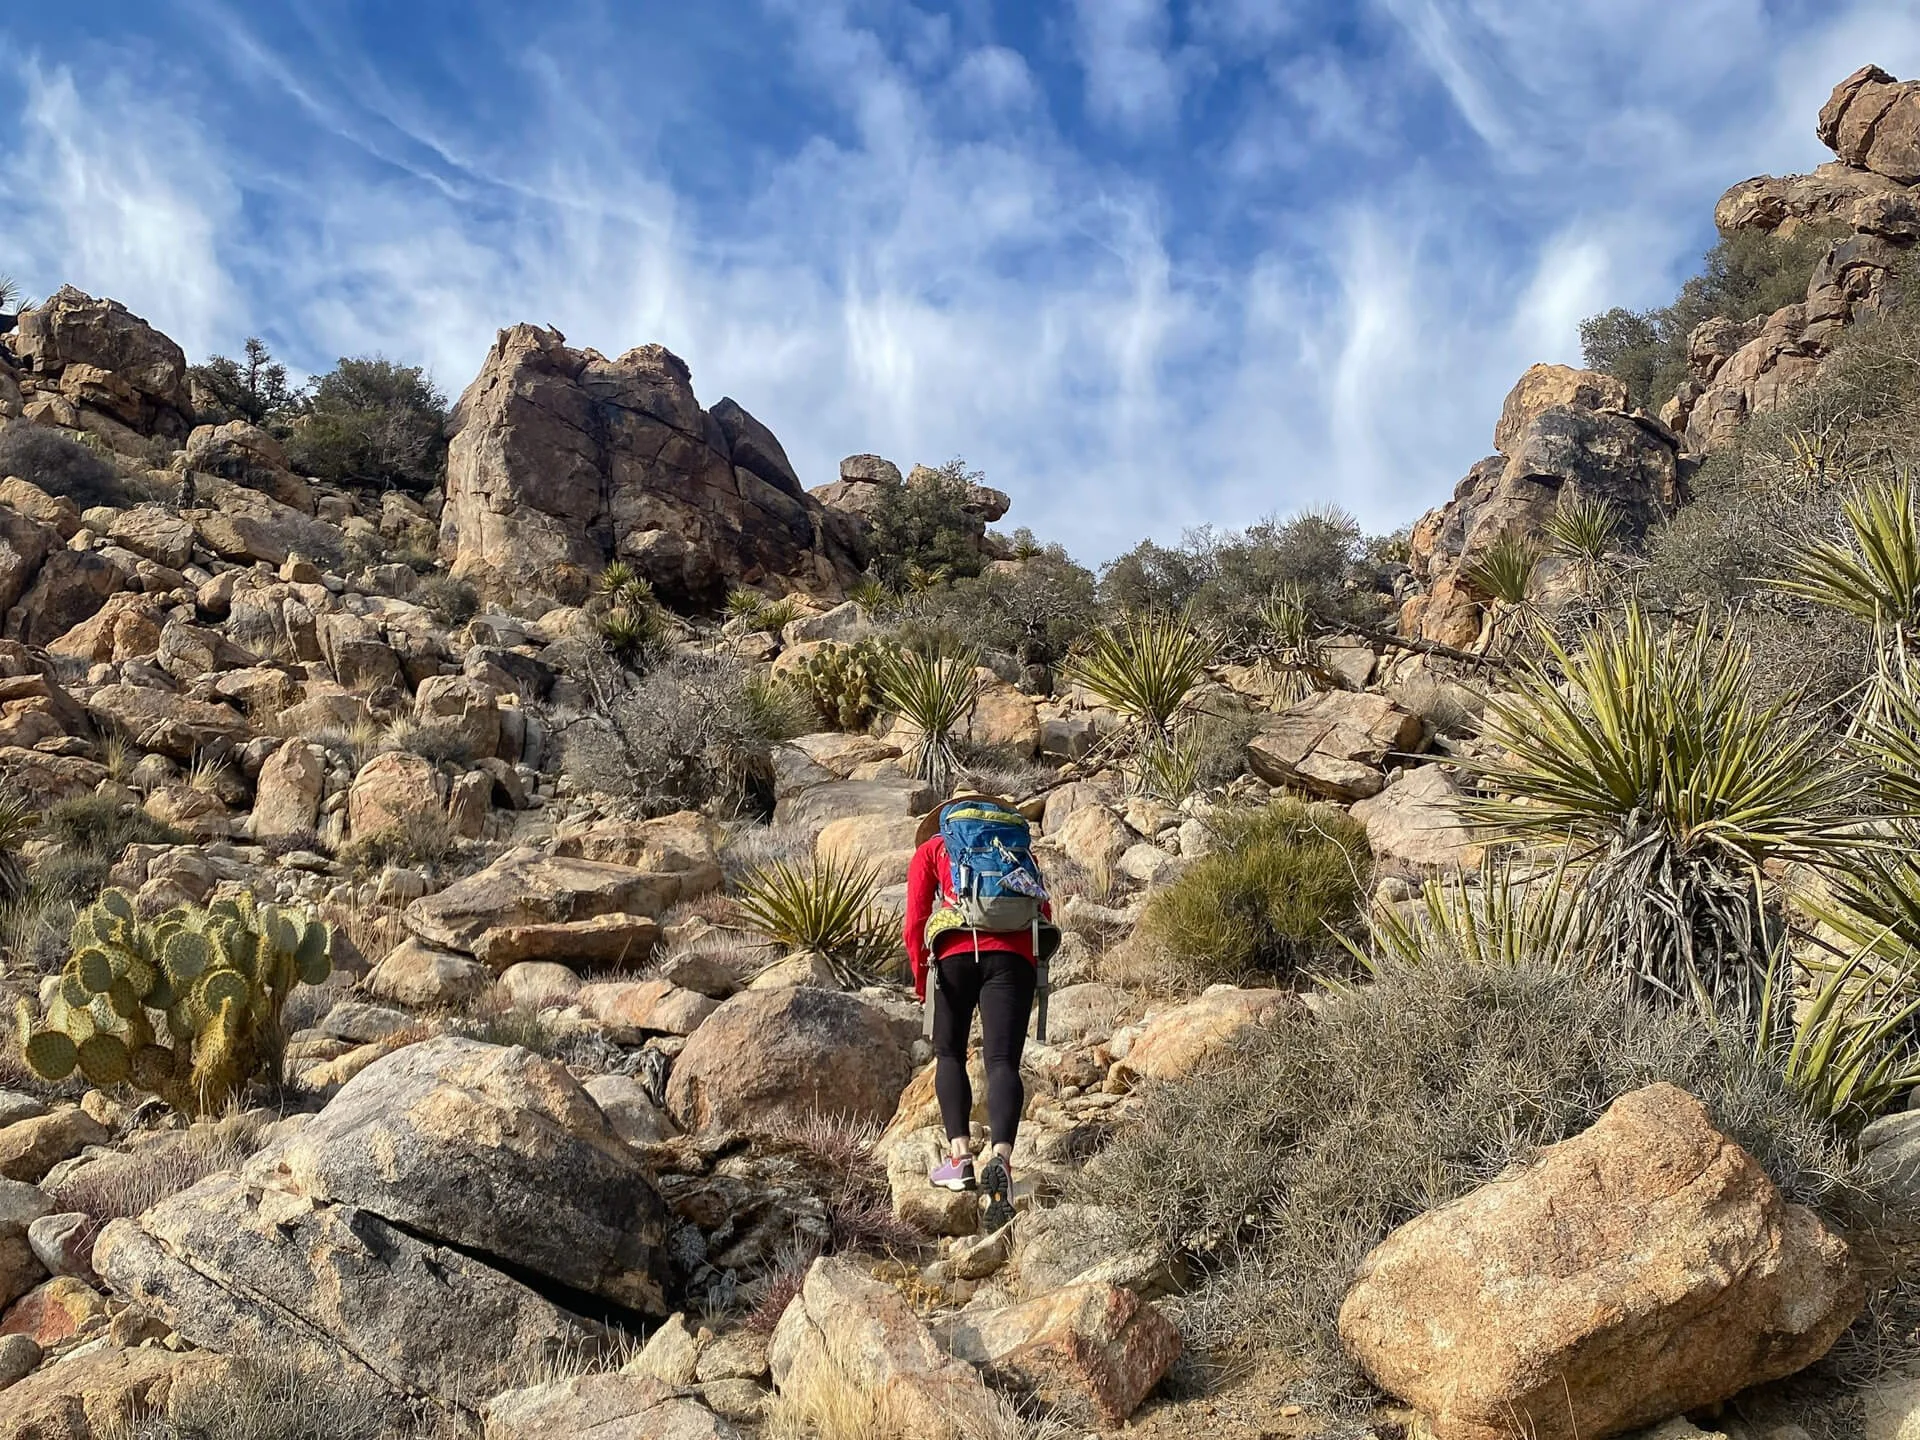
Wear pants rather than shorts, even if it’s hot out. The desert contains plenty of cacti and plants (like cat-claw) that will snag your skin if you get too close.
Wear close-toed boots or shoes rather than sneakers.
In general, hike in breathable, comfortable clothes. Regular gym or exercise clothes are fine - but avoid denim.
Learn to Love Maps
Carry a paper map and a compass and learn to use them. Don’t rely solely on a digital map on your phone, as you will most likely not have cell service, and your battery may die during your hike.
I highly recommend Wilderness Navigation and Wilderness GPS, both by Bob Burns and Mike Burns, for learning navigation.
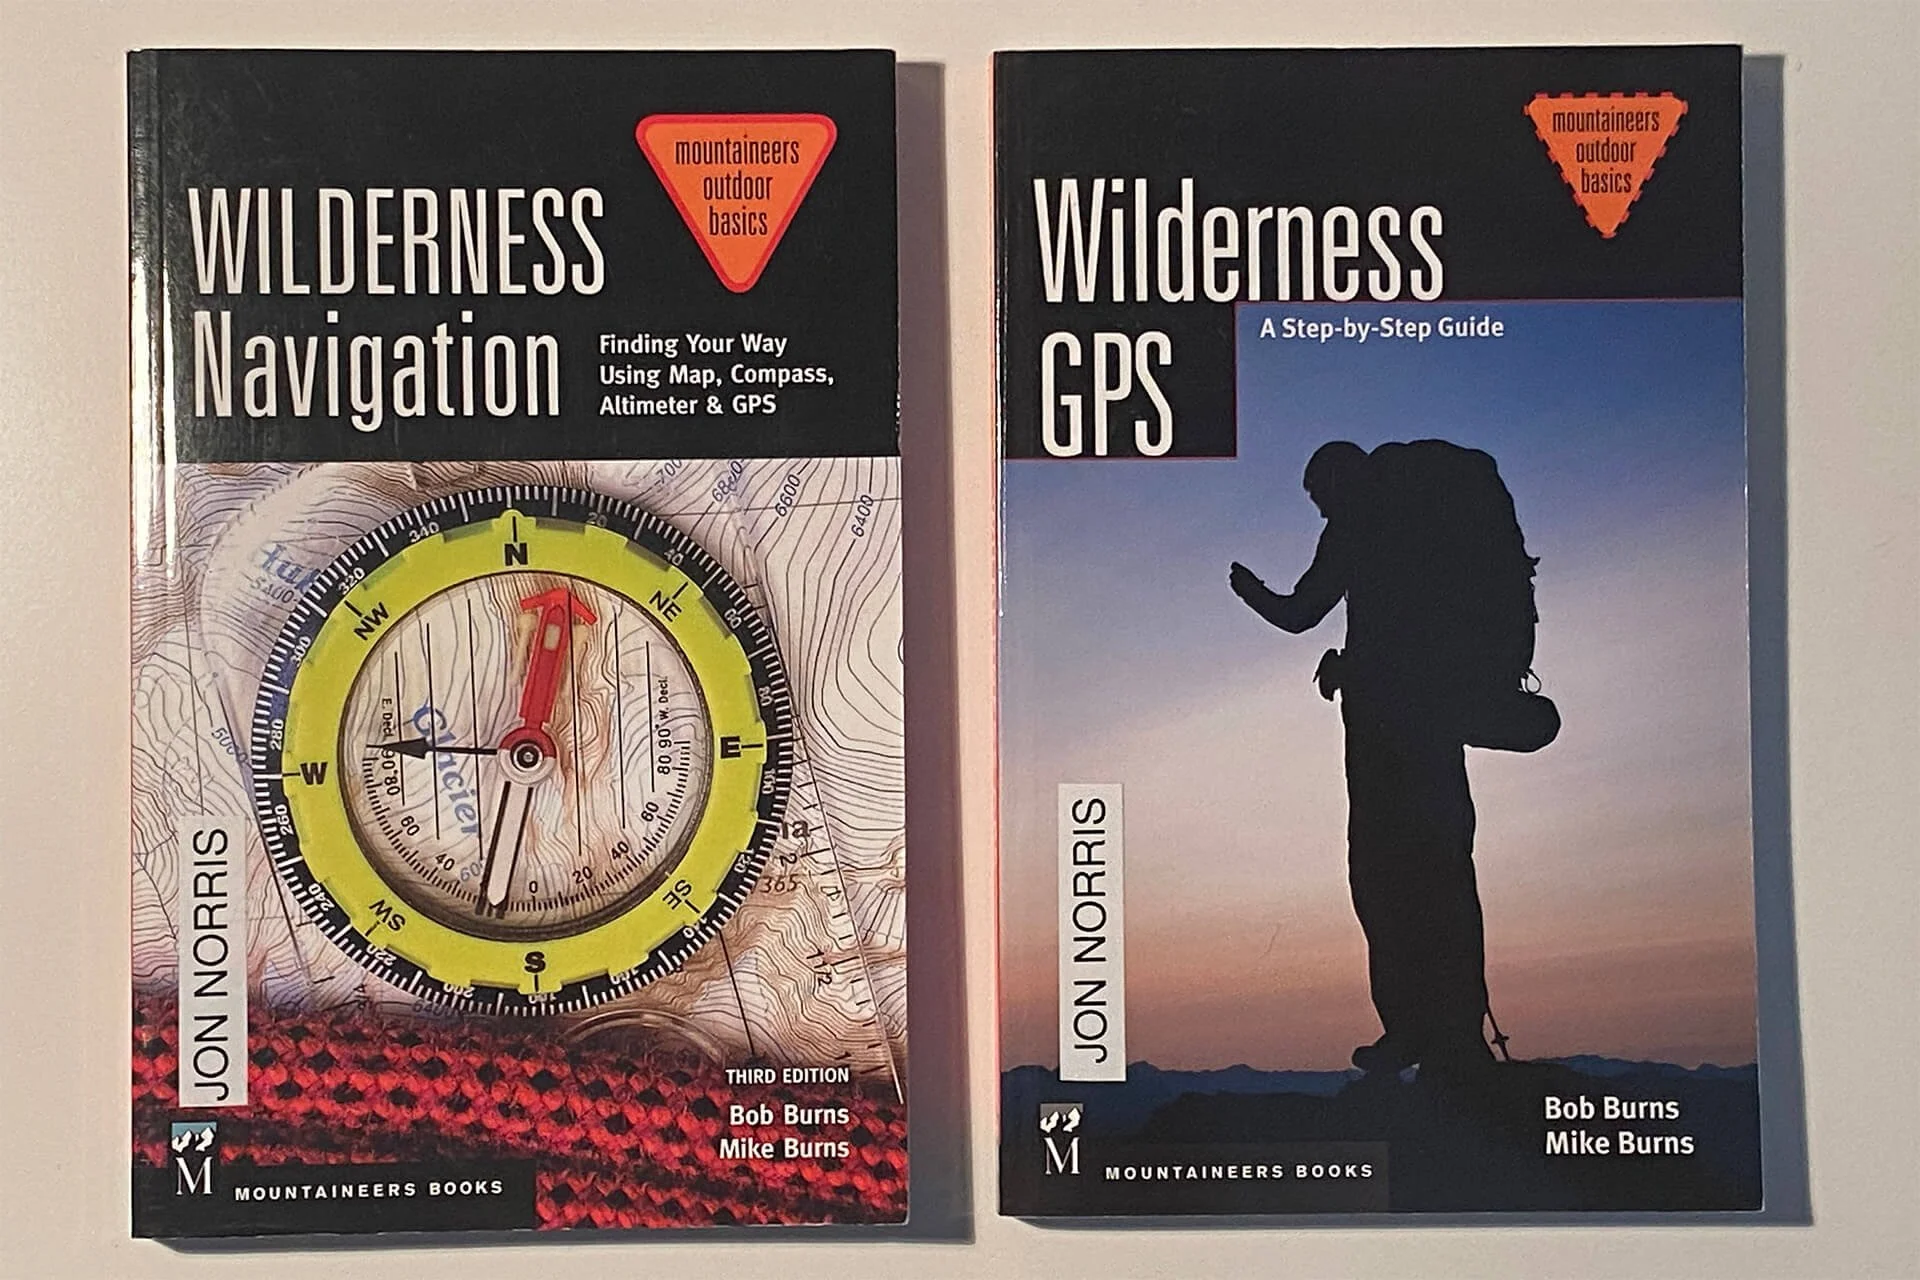
Two excellent navigation books by Bob and Mike Burns
Learn how to interpret color on maps:
Green means vegetation.
White or gray indicates barren areas, for example, at high elevations.
Blue means water; however, be aware that in the wilderness, water sources may not be visible above ground or may have shifted since the area was mapped.
Before hiking a trail, read the key on the map:
To understand the scale for distances and contour levels.
To know how much water you should pack.
To understand the difference between roads, trails, and unmaintained trails. Knowing this can make a big difference and save you from having a miserable hiking experience.
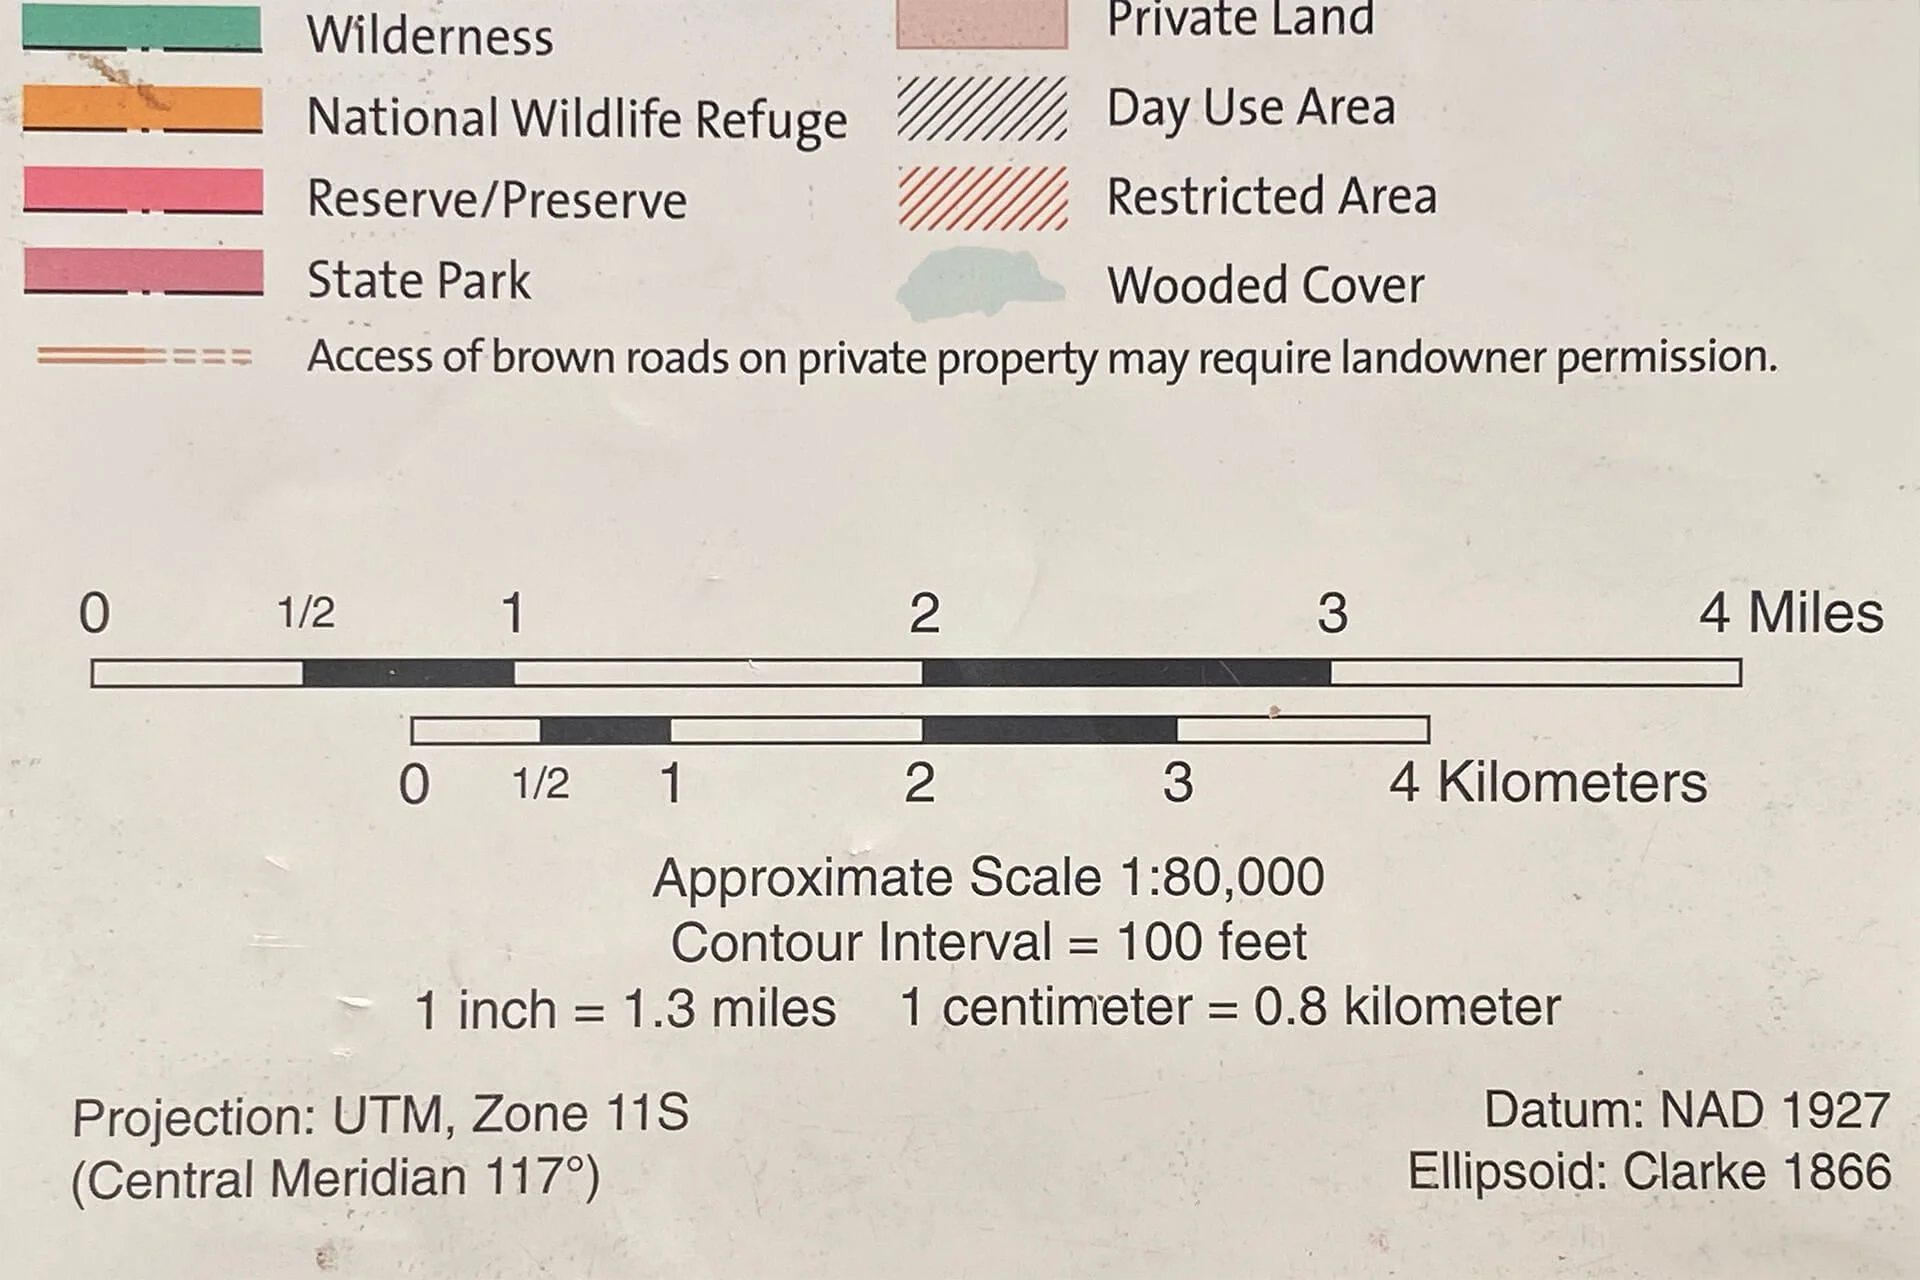
The map key on the National Geographic Trails Illustrated Joshua Tree National Park map shows the distance scale and contour interval
Contour intervals:
A contour line on a map joins all the points at the same elevation. If you were to hike following a contour line, you would stay at the same elevation.
On a map, each contour line adjacent to another contour line shows a different elevation, either uphill or downhill. Check the contour increments on the map key, as they are not always the same. Typical intervals are 80 or 100 feet, but that can vary between maps.
The closer the contour lines are together, the steeper the trail.
The further apart the contour lines, the flatter the terrain.
Remember that going downhill can be as challenging and time-consuming as going uphill.
Sarah Witt leading the way uphill, off-trail, towards Queen Mountain | © 2024 Jon Norris
Wayfinding:
Trails tend to follow the path of least resistance in the natural world.
Note that existing footprints don’t necessarily mean you’re on a trail.
The park maintenance team often creates trails using natural features, either already present or newly installed. For example, large rocks or a tree branch can create a barrier to a wash that intersects the trail.
Pick a Trail, but not any Trail
Factors to consider when picking your trail:
Where do you want to hike? What public lanes or trails are nearby (NPS, BLM, NFS)?
How rugged is the trail? How soft is the sand? What’s the terrain like? Go online and read guidebooks, and never rely on a single source. Visit the trail’s home park’s website before visiting other sites or blogs.
How many hours of daylight will there be? How much elevation gain is there? How many hours do you need to complete the hike?
To estimate my hikes, I assume that I’ll need 30 minutes for every mile hiked and 30 minutes for every 1,000 feet of ascent. This is my variation of Naismith’s Rule.
Sat atop the summit of Queen Mountain in Joshua Tree National Park | © 2024 Sarah Witt
What’s your base level of fitness? You may need to leave yourself more time to take into account your (or your group’s) fitness, rest, contemplation, or photography.
What’s the weather like, and what time of year is it?
How much additional weight are you carrying?
Tips for Success
Purchase a guidebook and detailed topographic map of the area where you plan to hike. Take plenty of time to read and get familiar with them.
Start small with 1-2 mile hikes and work up from there as you get more comfortable.
Track your progress with a trail log. Note what went well and what needs improvement for your next hike.
Hiking with Stephanie (my youngest daughter) | © 2021 Jon Norris
Invest in a GPS map app (e.g., Gaia GPS) and learn how to use it, but as said before, do not rely on it. I use Gaia GPS, and I discussed how I use it for navigation and photography in the post below.
Always notify someone of your hiking plans, and include:
The name of the park or area where you’re going to hike.
The trailhead location.
Your target start time.
A description of your hike plan, including mileage and how many hours you think it will take you.
When do you hope to be finished?
And, don’t forget, when you’re done and off the trail, to contact the person you shared your plans with so that they don’t worry about you and call out search and rescue.