Guide to Landscape Photography Composition: Framing the Landscape
Explore Landscapes #58
In this article, I share eight landscape photography composition rules (more accurately described as suggestions rather than absolute rules) that I use. So buckle up!

Many People Look But Only A Few See, Pennine Way (UK) | © 2019 Jon Norris
I wrote a previous article on composition that explored what I do when weighing up a landscape scene and thinking about how I want to photograph it.
In summary, the composed scene in my viewfinder feels right about 50% of the time (give or take). I haven’t had to try hard to determine a good composition - it’s just presented itself to me.
When I can’t make a composition ‘feel right,’ I pull out my mental ‘Rolodex’ of composition ‘rules’ and seek assistance. There are all kinds of composition ‘rules’ out there. In this article, I share eight landscape photography composition rules (more accurately described as suggestions rather than absolute rules) that I use.
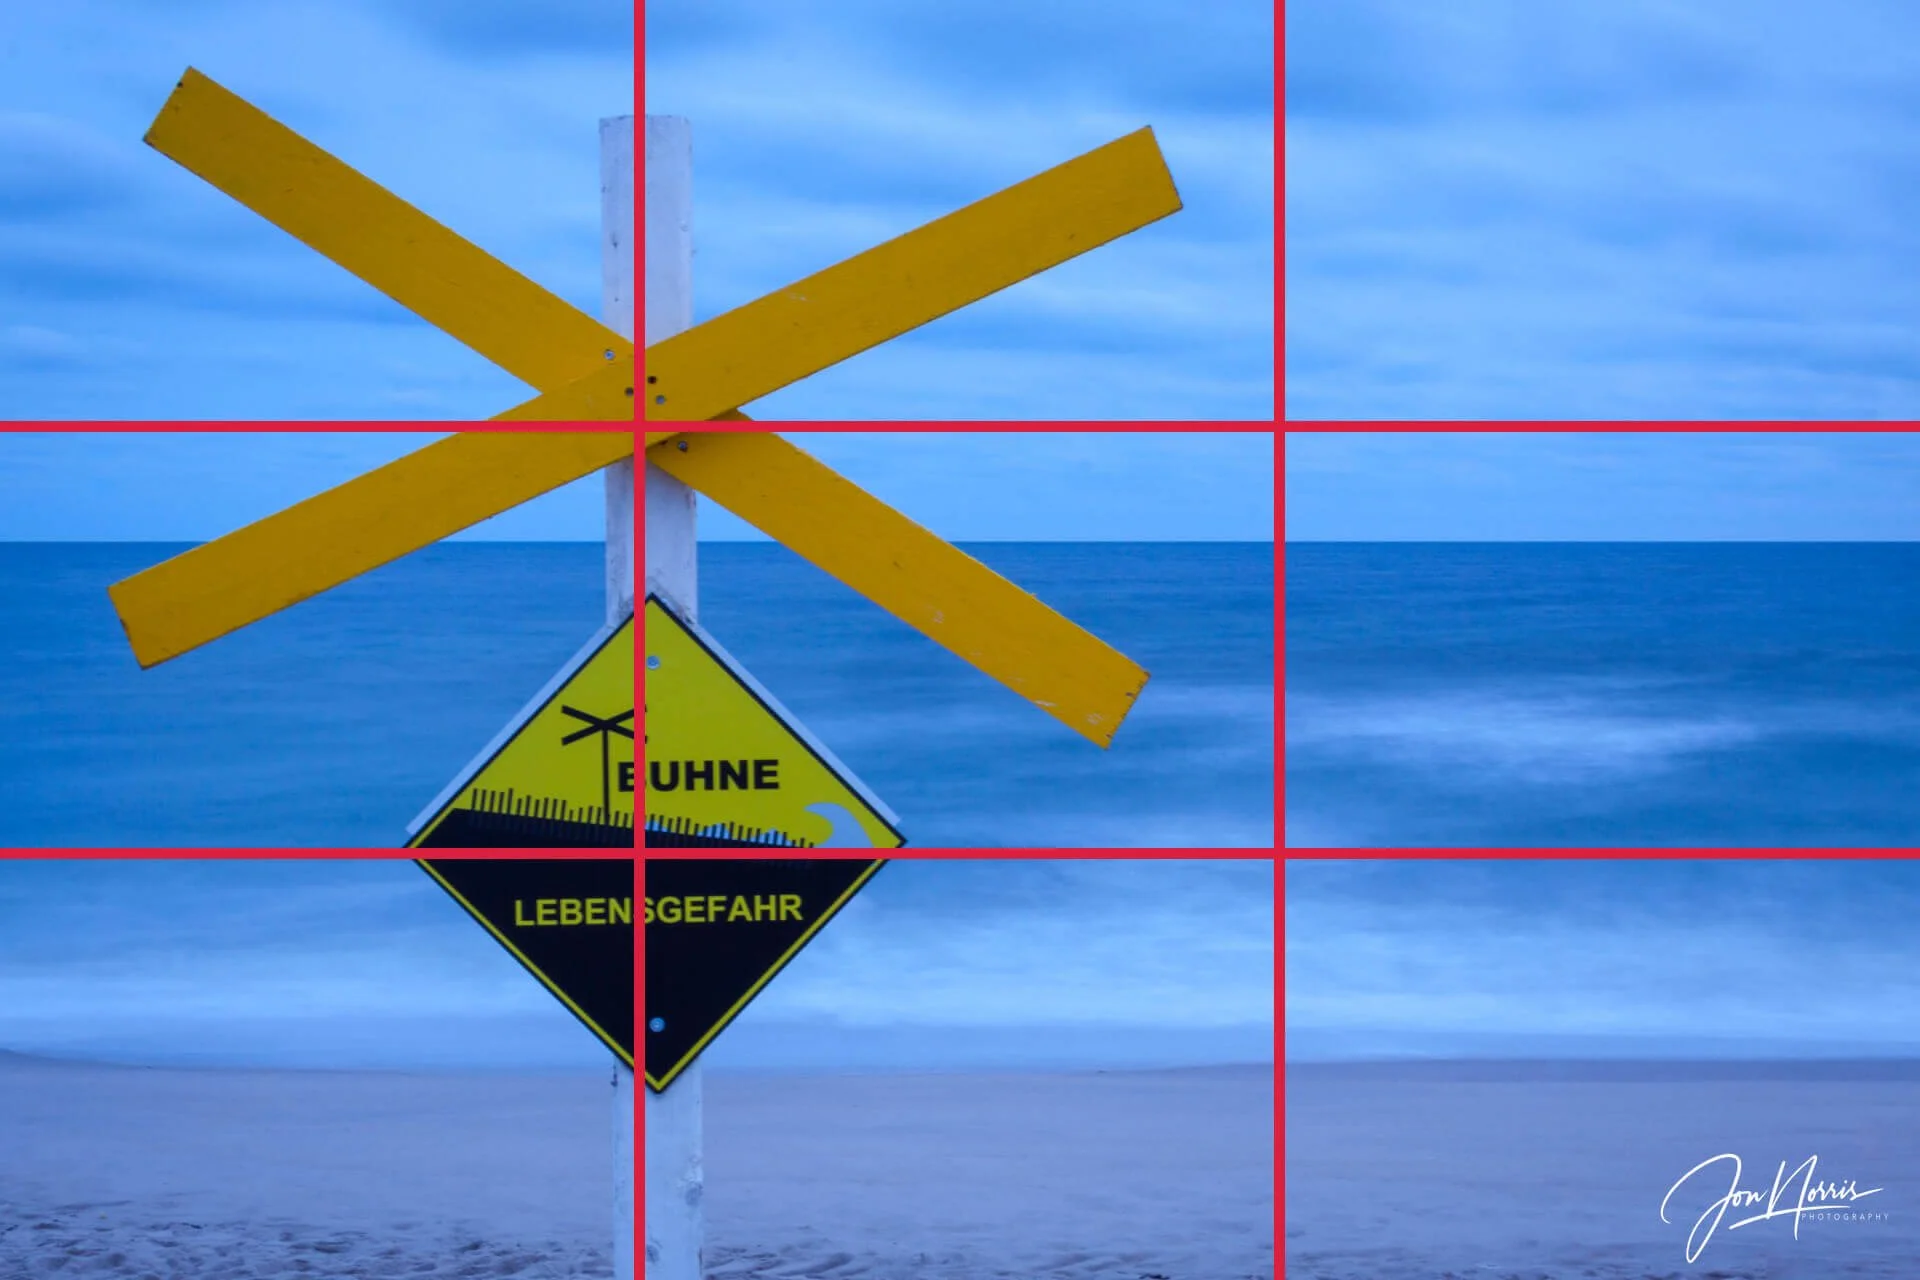
The Rule of Thirds | Sylt, Germany | © 2010 Jon Norris
1. Rule of Thirds: The Photographer’s Best Friend
Let’s begin with the golden rule of composition: the Rule of Thirds. It’s a tried-and-true method that works across all types of photography, but it’s especially important in landscapes. Imagine dividing your image into nine equal squares by drawing two horizontal and two vertical lines (your camera probably has a grid option to make this easier). Now, place the key elements of your landscape, like the horizon, a tree, or, in this case, the signpost, along these lines or at the intersections.
Why does this work? Because our eyes are naturally drawn to these intersections. A centered horizon can look a little bland, but shifting it up or down creates a more dynamic and engaging shot. Next time you’re out, give it a try!
Quick Tip: The Rule of Thirds isn’t really a rule. Think of it more as a guideline. Once you master it, feel free to break it for some creative magic!
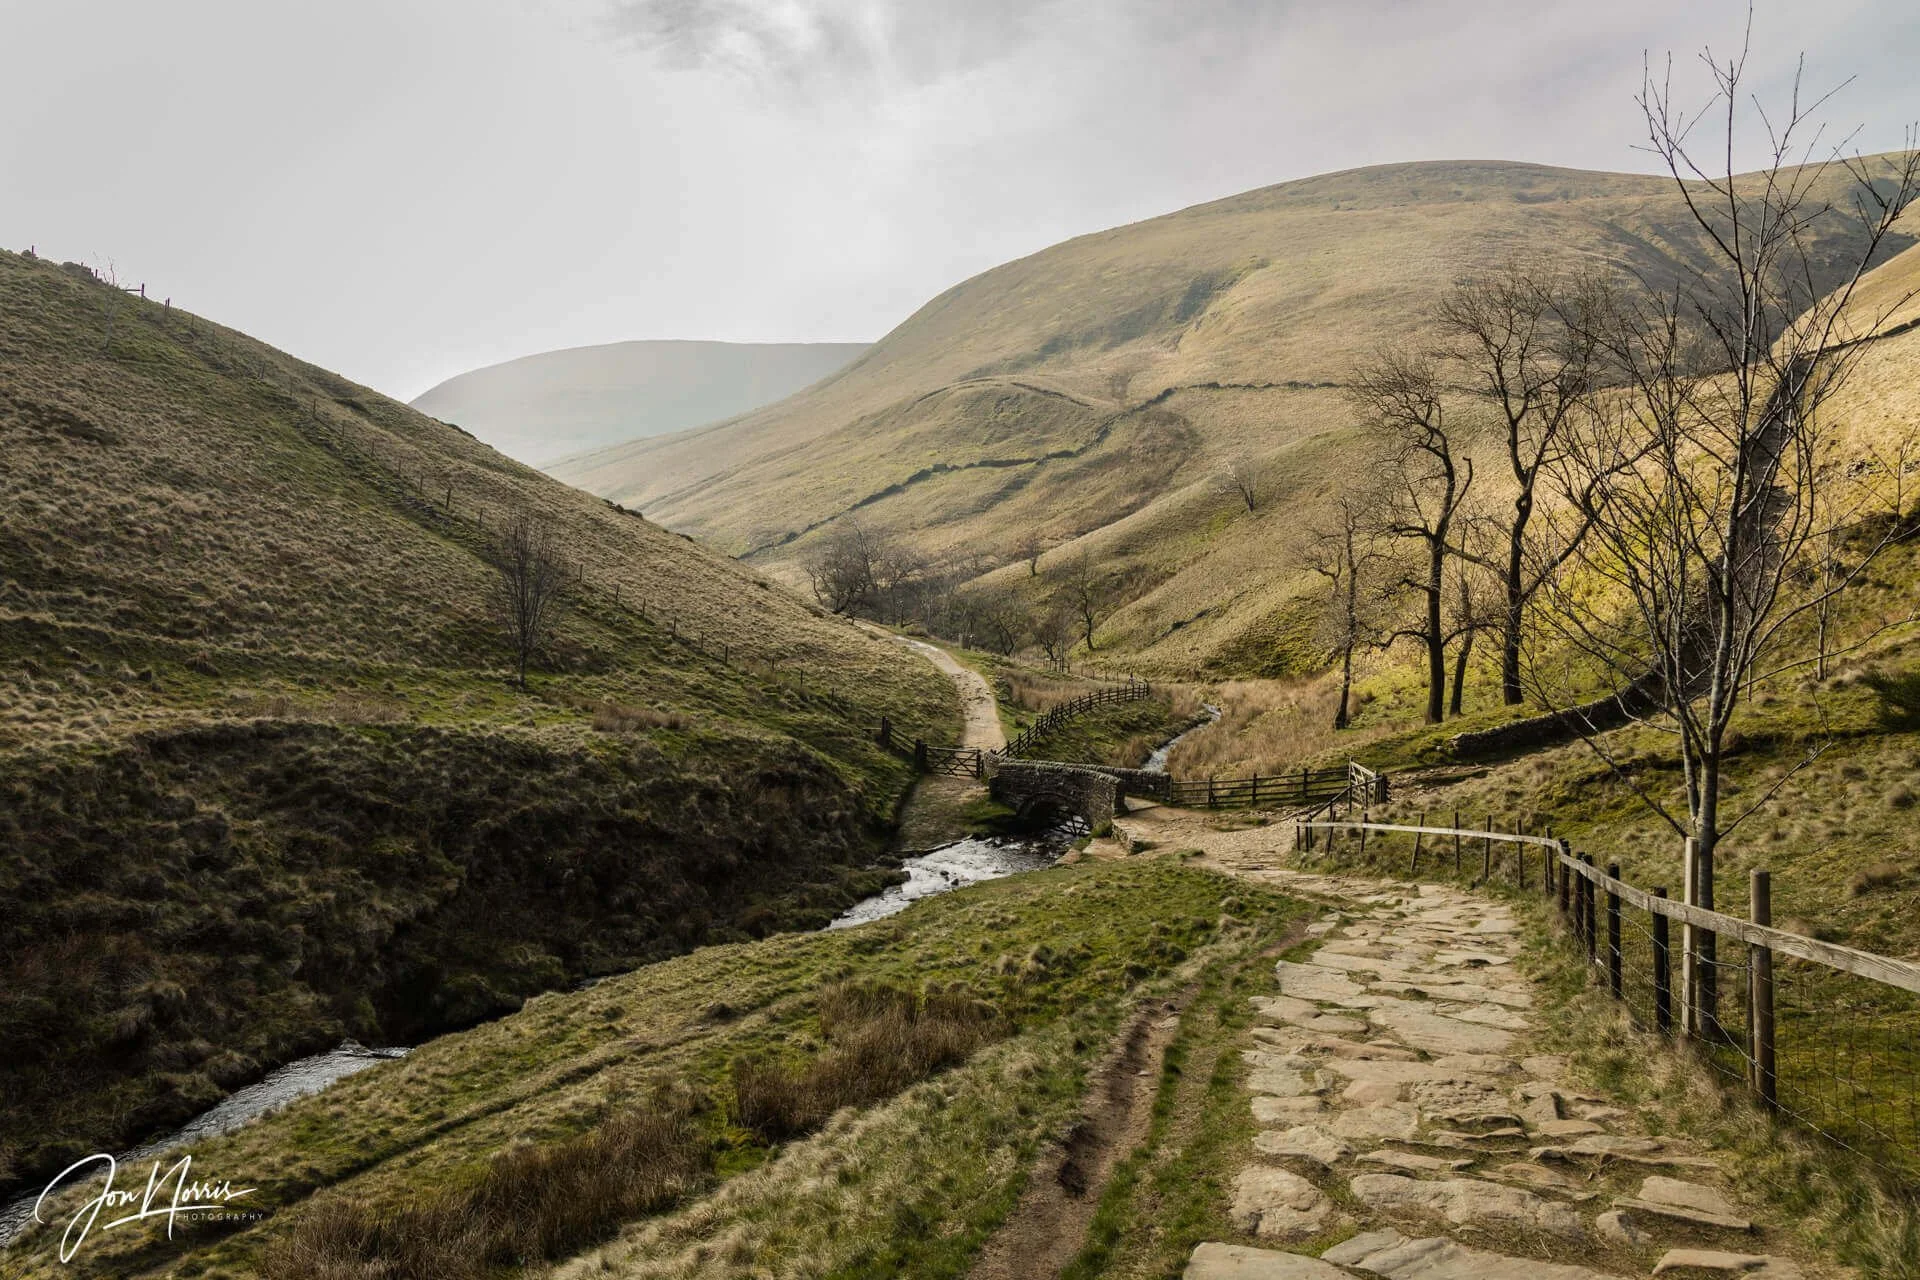
Looking back down Jacob’s Ladder, Pennine Way (UK) | © 2019 Jon Norris
2. Leading Lines: Invite Your Viewers In
Leading lines are like a red carpet for your audience. They draw the viewer’s eyes into the photo and guide them toward your subject. Roads, rivers, fences, or even a row of trees can serve as leading lines. The trick is to position these lines so they direct attention from the foreground into the background, creating depth and adding interest.
If you’ve ever looked at a photo where your eyes naturally followed a path or a road into the distance, you’ve experienced the magic of leading lines. They help transform a flat image into a dynamic one with layers and depth, making viewers feel like they’re in the scene.
Quick Tip: Curved lines can add an extra layer of elegance. They slow down the viewer’s gaze, letting them take in more of the scene.

Catalina Island, CA | © 2017 Jon Norris
3. Foreground, Middle Ground, and Background: Add Depth
Speaking of depth, a well-composed landscape photo often has distinct foreground, middle ground, and background elements. These layers help give your image a sense of scale and dimension, turning a 2D picture into a 3D experience.
For instance, if you’re photographing a mountain range, try to include something in the foreground, like wildflowers or rocks, to provide context. The mountains become the background, the wildflowers in the front create the foreground, and maybe there’s a shimmering lake or rolling hills in between for the middle ground. These layers create a sense of journey, guiding the viewer from the front to the back of the frame.
Quick Tip: When shooting wide-angle landscapes, don’t forget to check what’s happening in the foreground. A boring or cluttered foreground can ruin an otherwise stellar shot.
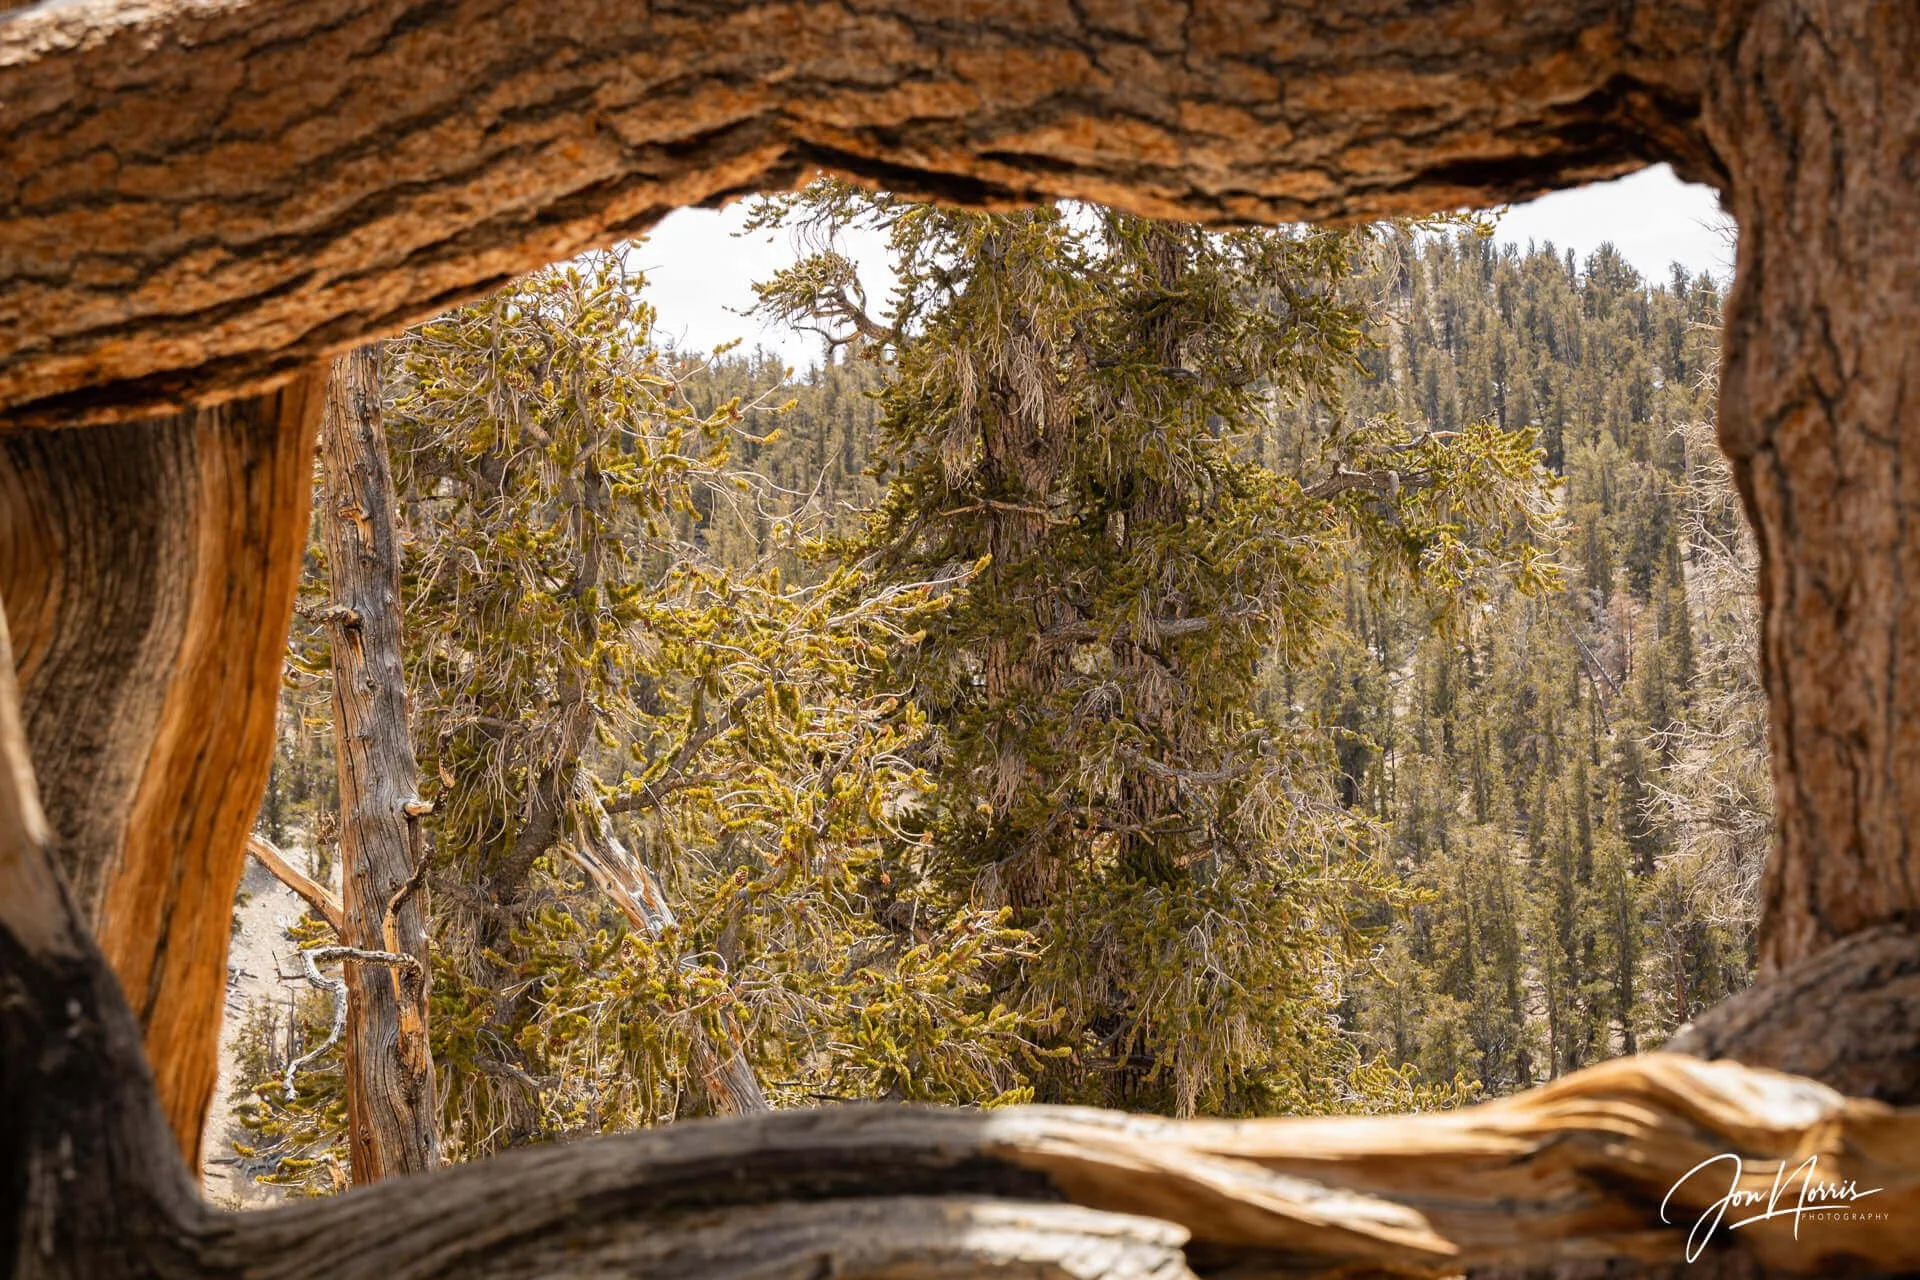
Ancient Bristlecone Pine Forest, CA | © 2021 Jon Norris
4. Framing: Nature’s Picture Frame
Framing is like putting a literal frame around your subject, except in this case, the frame is made out of natural elements like trees, rock formations, or even the arch of a cave. Using objects in the foreground to frame your subject draws attention directly to it and adds depth and context to your photo.
Think of it this way: you’re not just photographing a mountain; you’re capturing a mountain framed by towering trees or jagged cliffs. This adds a sense of scale and draws the viewer’s eye to your subject, making the photo more immersive.
Quick Tip: Don’t limit yourself to obvious frames. Experiment with different angles to find creative ways to use natural elements to encase your shot.
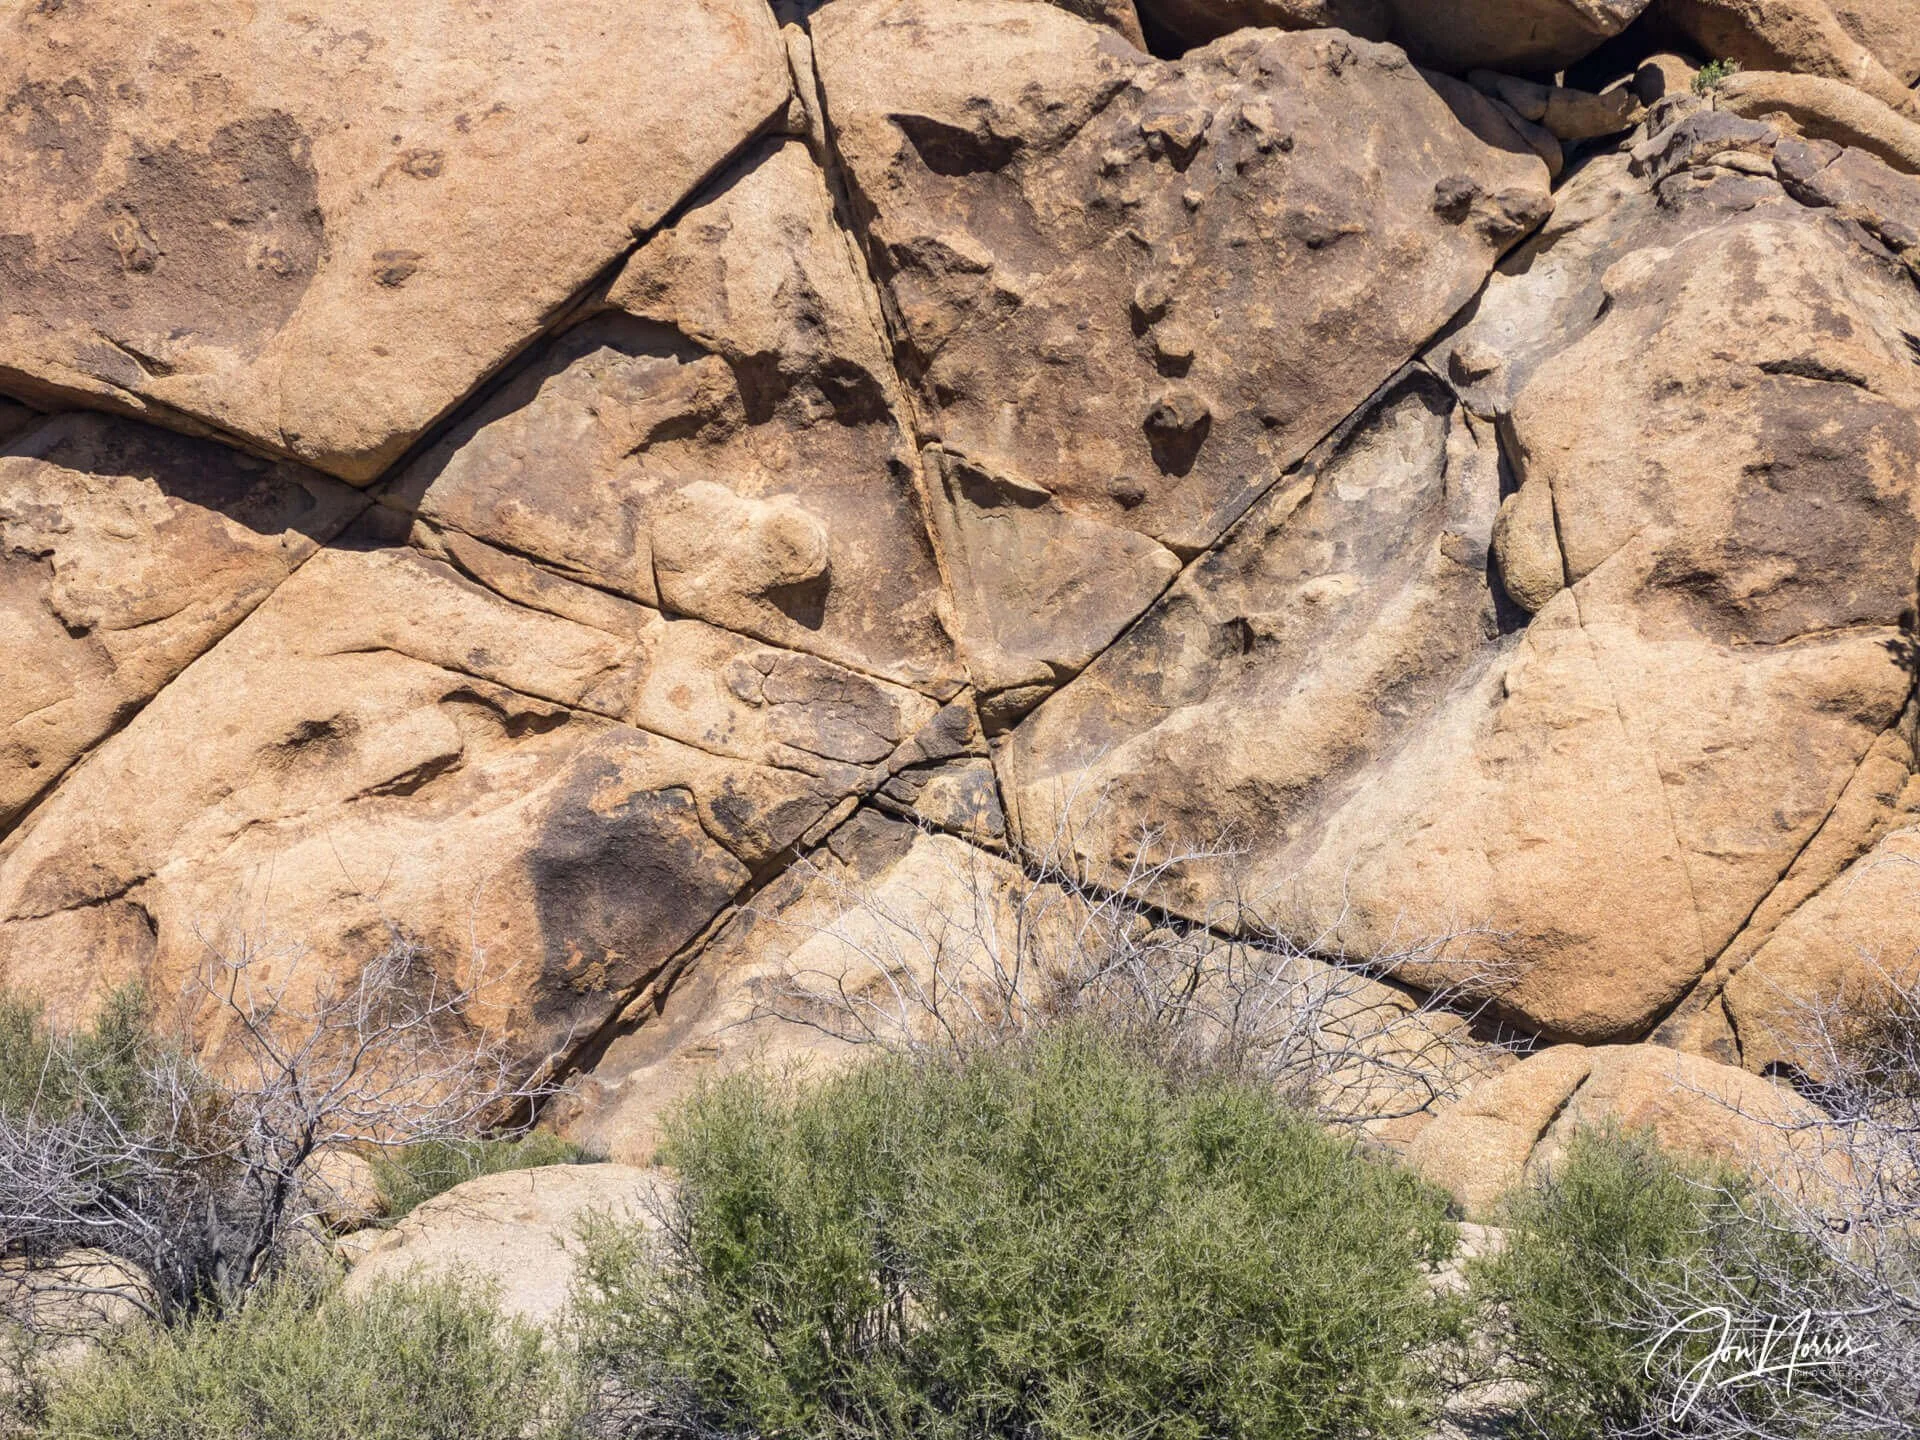
Joshua Tree National Park, CA | © 2024 Jon Norris
5. Symmetry and Patterns: Embrace Balance
There’s something undeniably satisfying about symmetry in nature. Whether it’s the reflection of a mountain in a lake or the perfect alignment of trees, symmetrical compositions can create a sense of peace and balance in your photos. However, too much symmetry can make a photo feel static and lifeless. The trick is to find just the right balance.
Patterns, on the other hand, offer a visually stimulating experience. Repeated elements in nature, like rows of crops, waves, or rock formations, can create rhythm and flow in your photograph. These patterns give your landscape photo an extra layer of complexity and intrigue.
Quick Tip: Use symmetry and patterns as a way to highlight the beauty of natural order. Just be careful not to overdo it. Sometimes, a little asymmetry adds character!
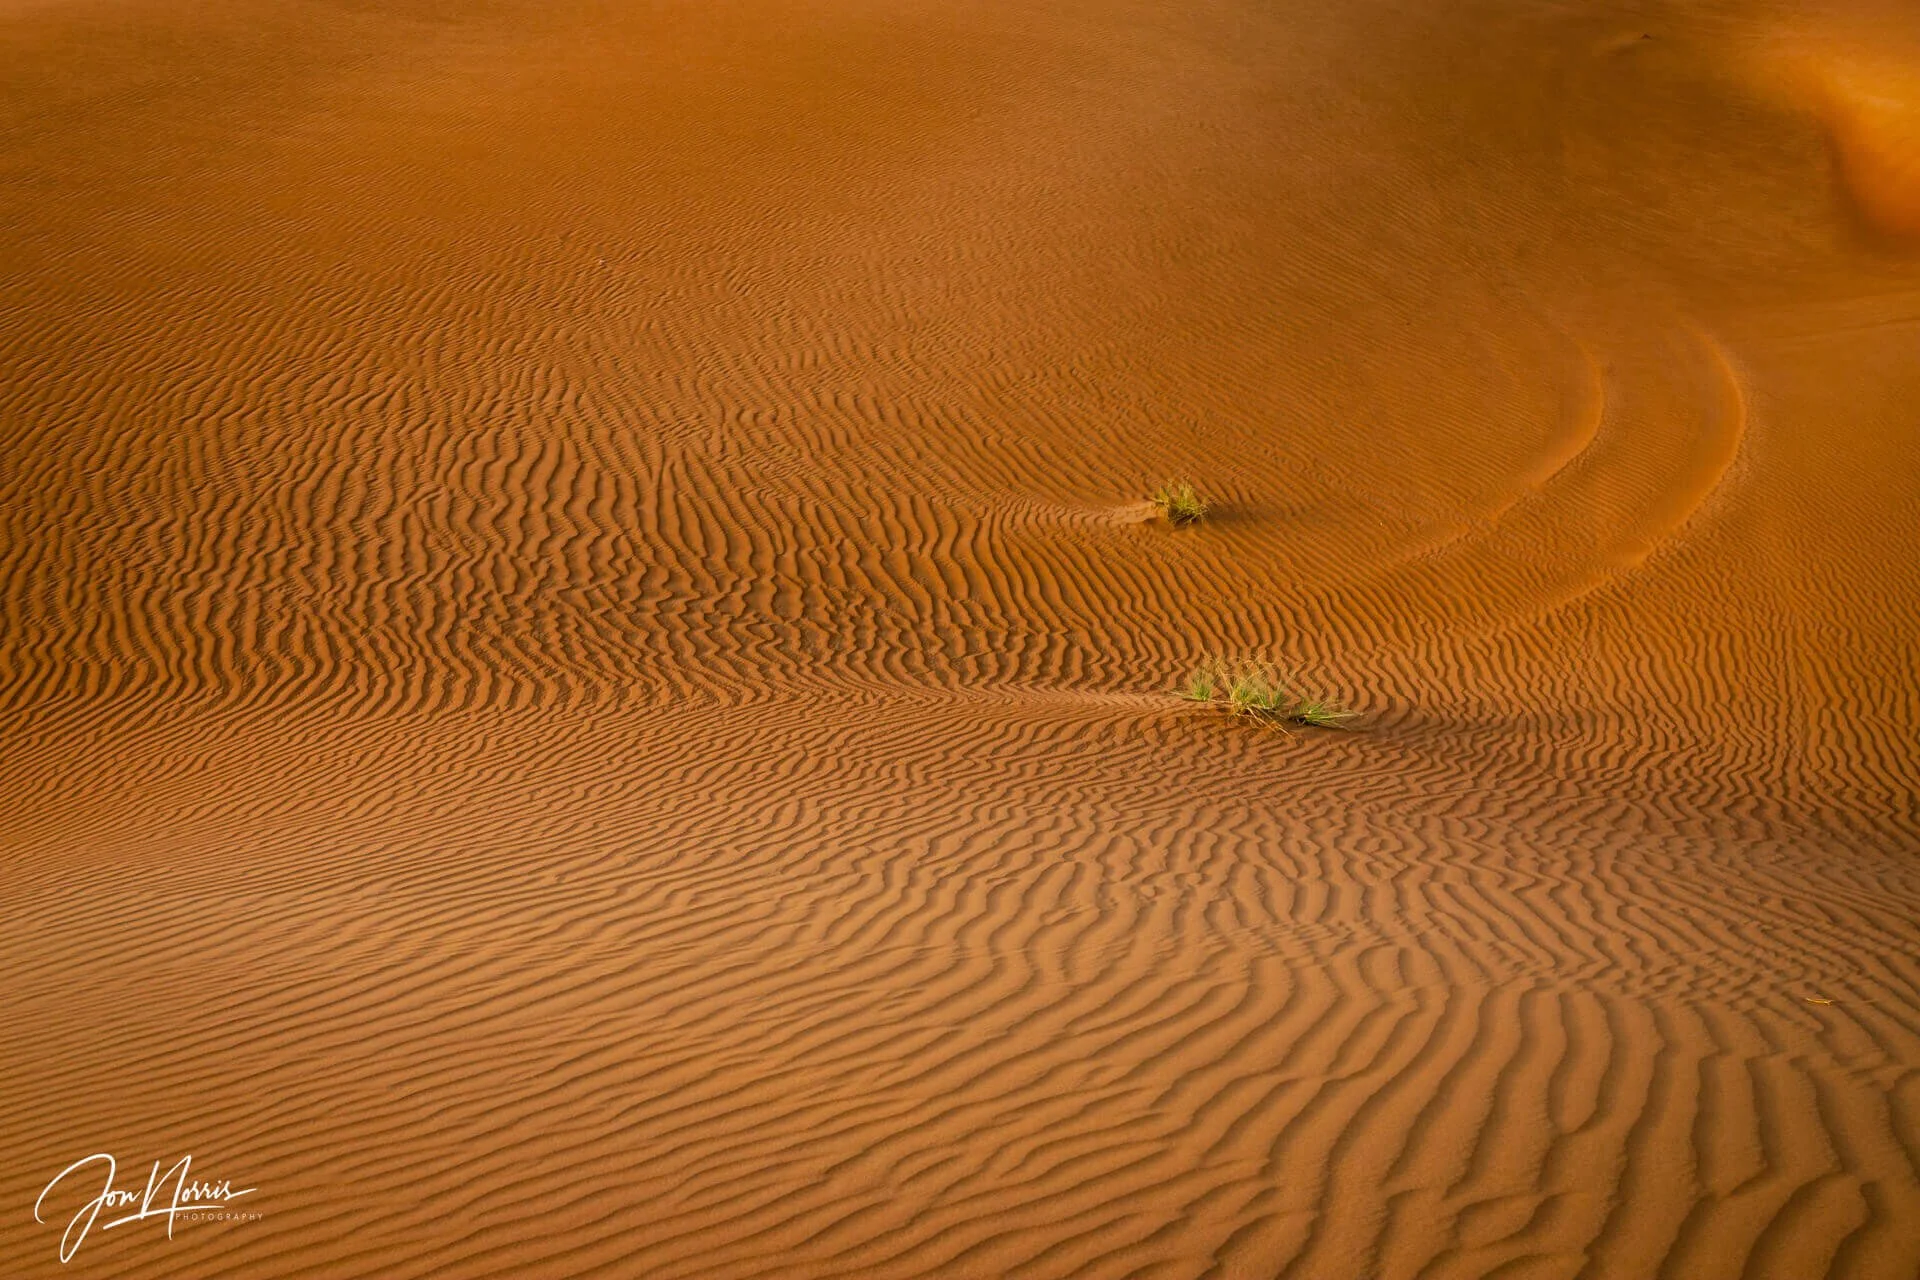
The Arabian Desert, Dubai, UAE | © 2008 Jon Norris
6. Use Negative Space: Let Your Subject Breathe
Sometimes, less really is more. Negative space refers to the empty or open space surrounding your main subject. In landscape photography, negative space can be as important as the subject. Whether it’s a vast open sky, an empty desert, or a calm stretch of water, this space allows your subject to “breathe” and stand out.
Negative space is especially powerful when conveying a sense of solitude, vastness, or tranquility. It can also help you avoid overcrowding your shot with too many competing elements.
Quick Tip: Negative space can be tricky to balance, so play around with how much you include. Too much, and your photo might look empty; too little, and it might feel cramped.
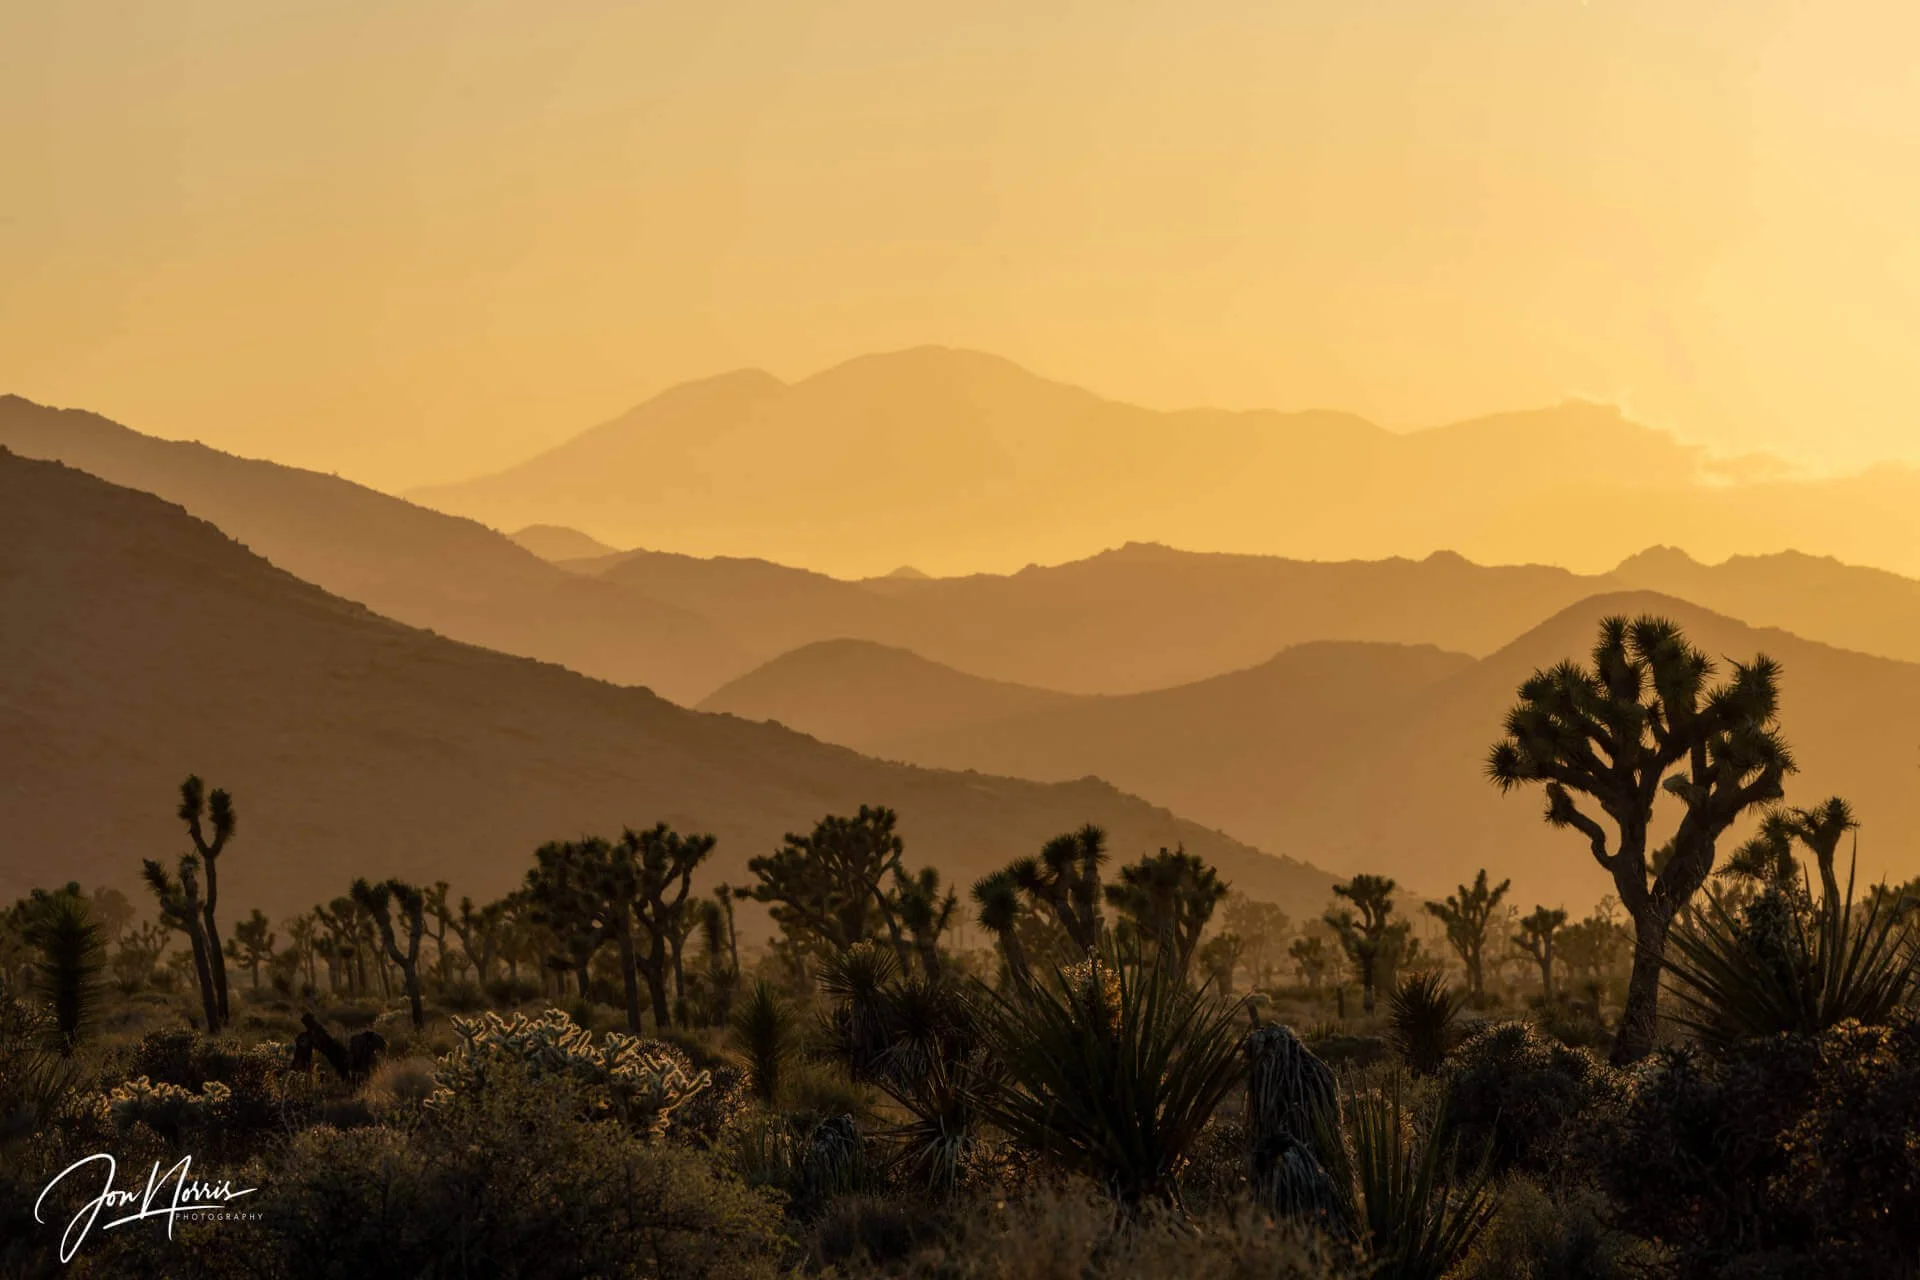
Sunset Layers | Joshua Tree National Park, CA | © 2024 Jon Norris
7. Golden Hour Magic: Play with Light
Let’s talk about lighting for a second because it’s arguably one of the most critical aspects of photography. The quality of light can make or break your landscape composition. For those who don’t know, the *golden hour* refers to the short window just after sunrise and just before sunset when the light is soft, warm, and diffused. It’s nature’s filter.
During the golden hour, shadows are longer, colors are richer, and everything looks more magical. The soft light is perfect for bringing out the textures and details in your landscape while keeping the contrast balanced. The best part? You don’t need fancy filters or post-processing tricks—Mother Nature’s got you covered.
Quick Tip: Golden hour isn’t the only good light. Moody, overcast days can create stunning landscapes with soft, diffused lighting and dramatic clouds.

Hamburg Dock Crance, Germany | © 2012 Jon Norris
8. The Power of Perspective: Change Your Angle
When you find a breathtaking view, your first instinct might be to capture it from eye level. But why not experiment with different perspectives? Climb a hill for a bird’s-eye view or crouch low to emphasize the foreground.
Changing your perspective can help you discover unique compositions that most people overlook. For example, a low-angle shot of a flower field with towering mountains in the background can create a dramatic, larger-than-life feeling. Conversely, shooting from a higher vantage point gives you a sweeping view perfect for expansive landscapes.
Quick Tip: Don’t forget about vertical compositions! Not every landscape needs to be horizontal. A tall waterfall or towering trees might benefit from a vertical shot.
Wrapping Up
Landscape photography composition is as much about creativity as it is about technique. I would encourage you to remember that these are not absolute rules; they are suggestions and things to try when looking to find (or strengthen) a composition. Try one or more of them, and see if you like the result and how you feel. Don’t like it? Try something else.
Let me know how you get on.