Experimenting with Kodak TMax 100 B&W Film, Polarizing, and Color Filters
Explore Landscapes #108: Nerding out on learning all I can about black and white medium format film photography - and enjoying every minute of it!
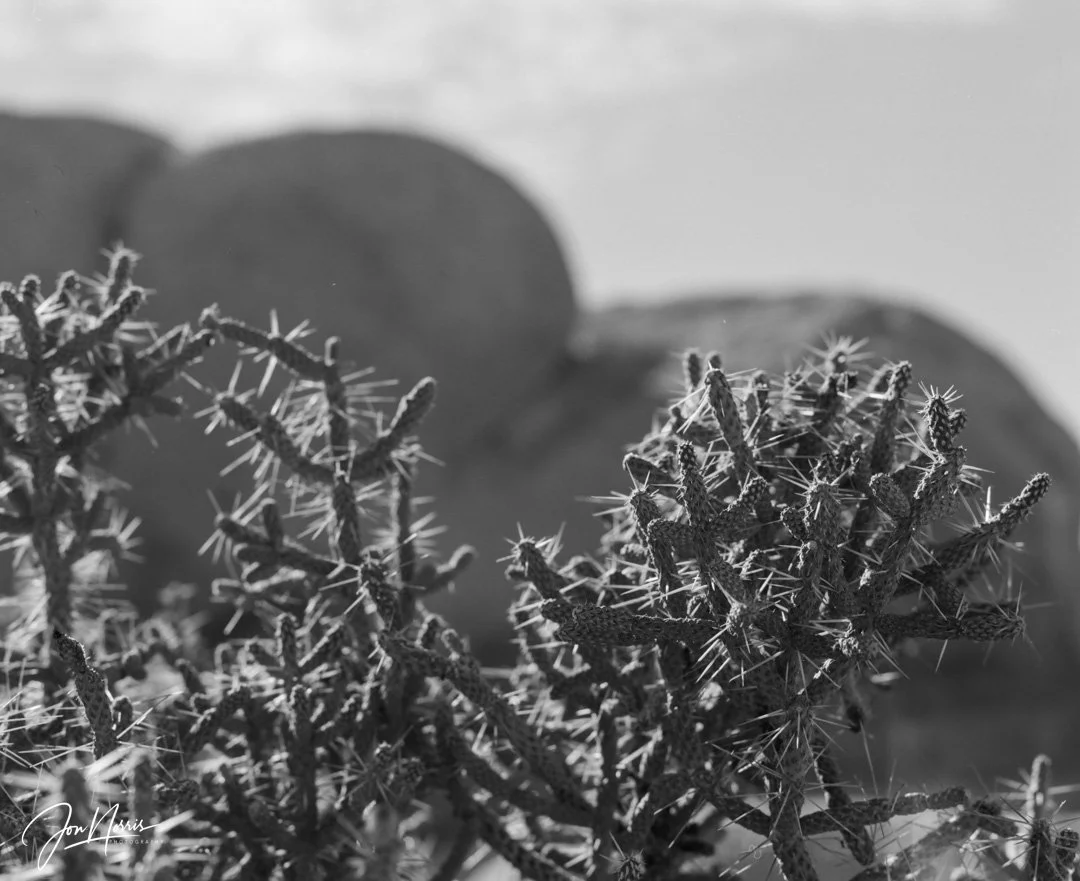
Pencil Cholla Cactus and Granite Boulder | © 2025 Jon Norris
In November I wrote about my experience of shooting my first roll of 120 B&W film with my Mamiya RZ67 Pro II medium format film camera - see linked article below.
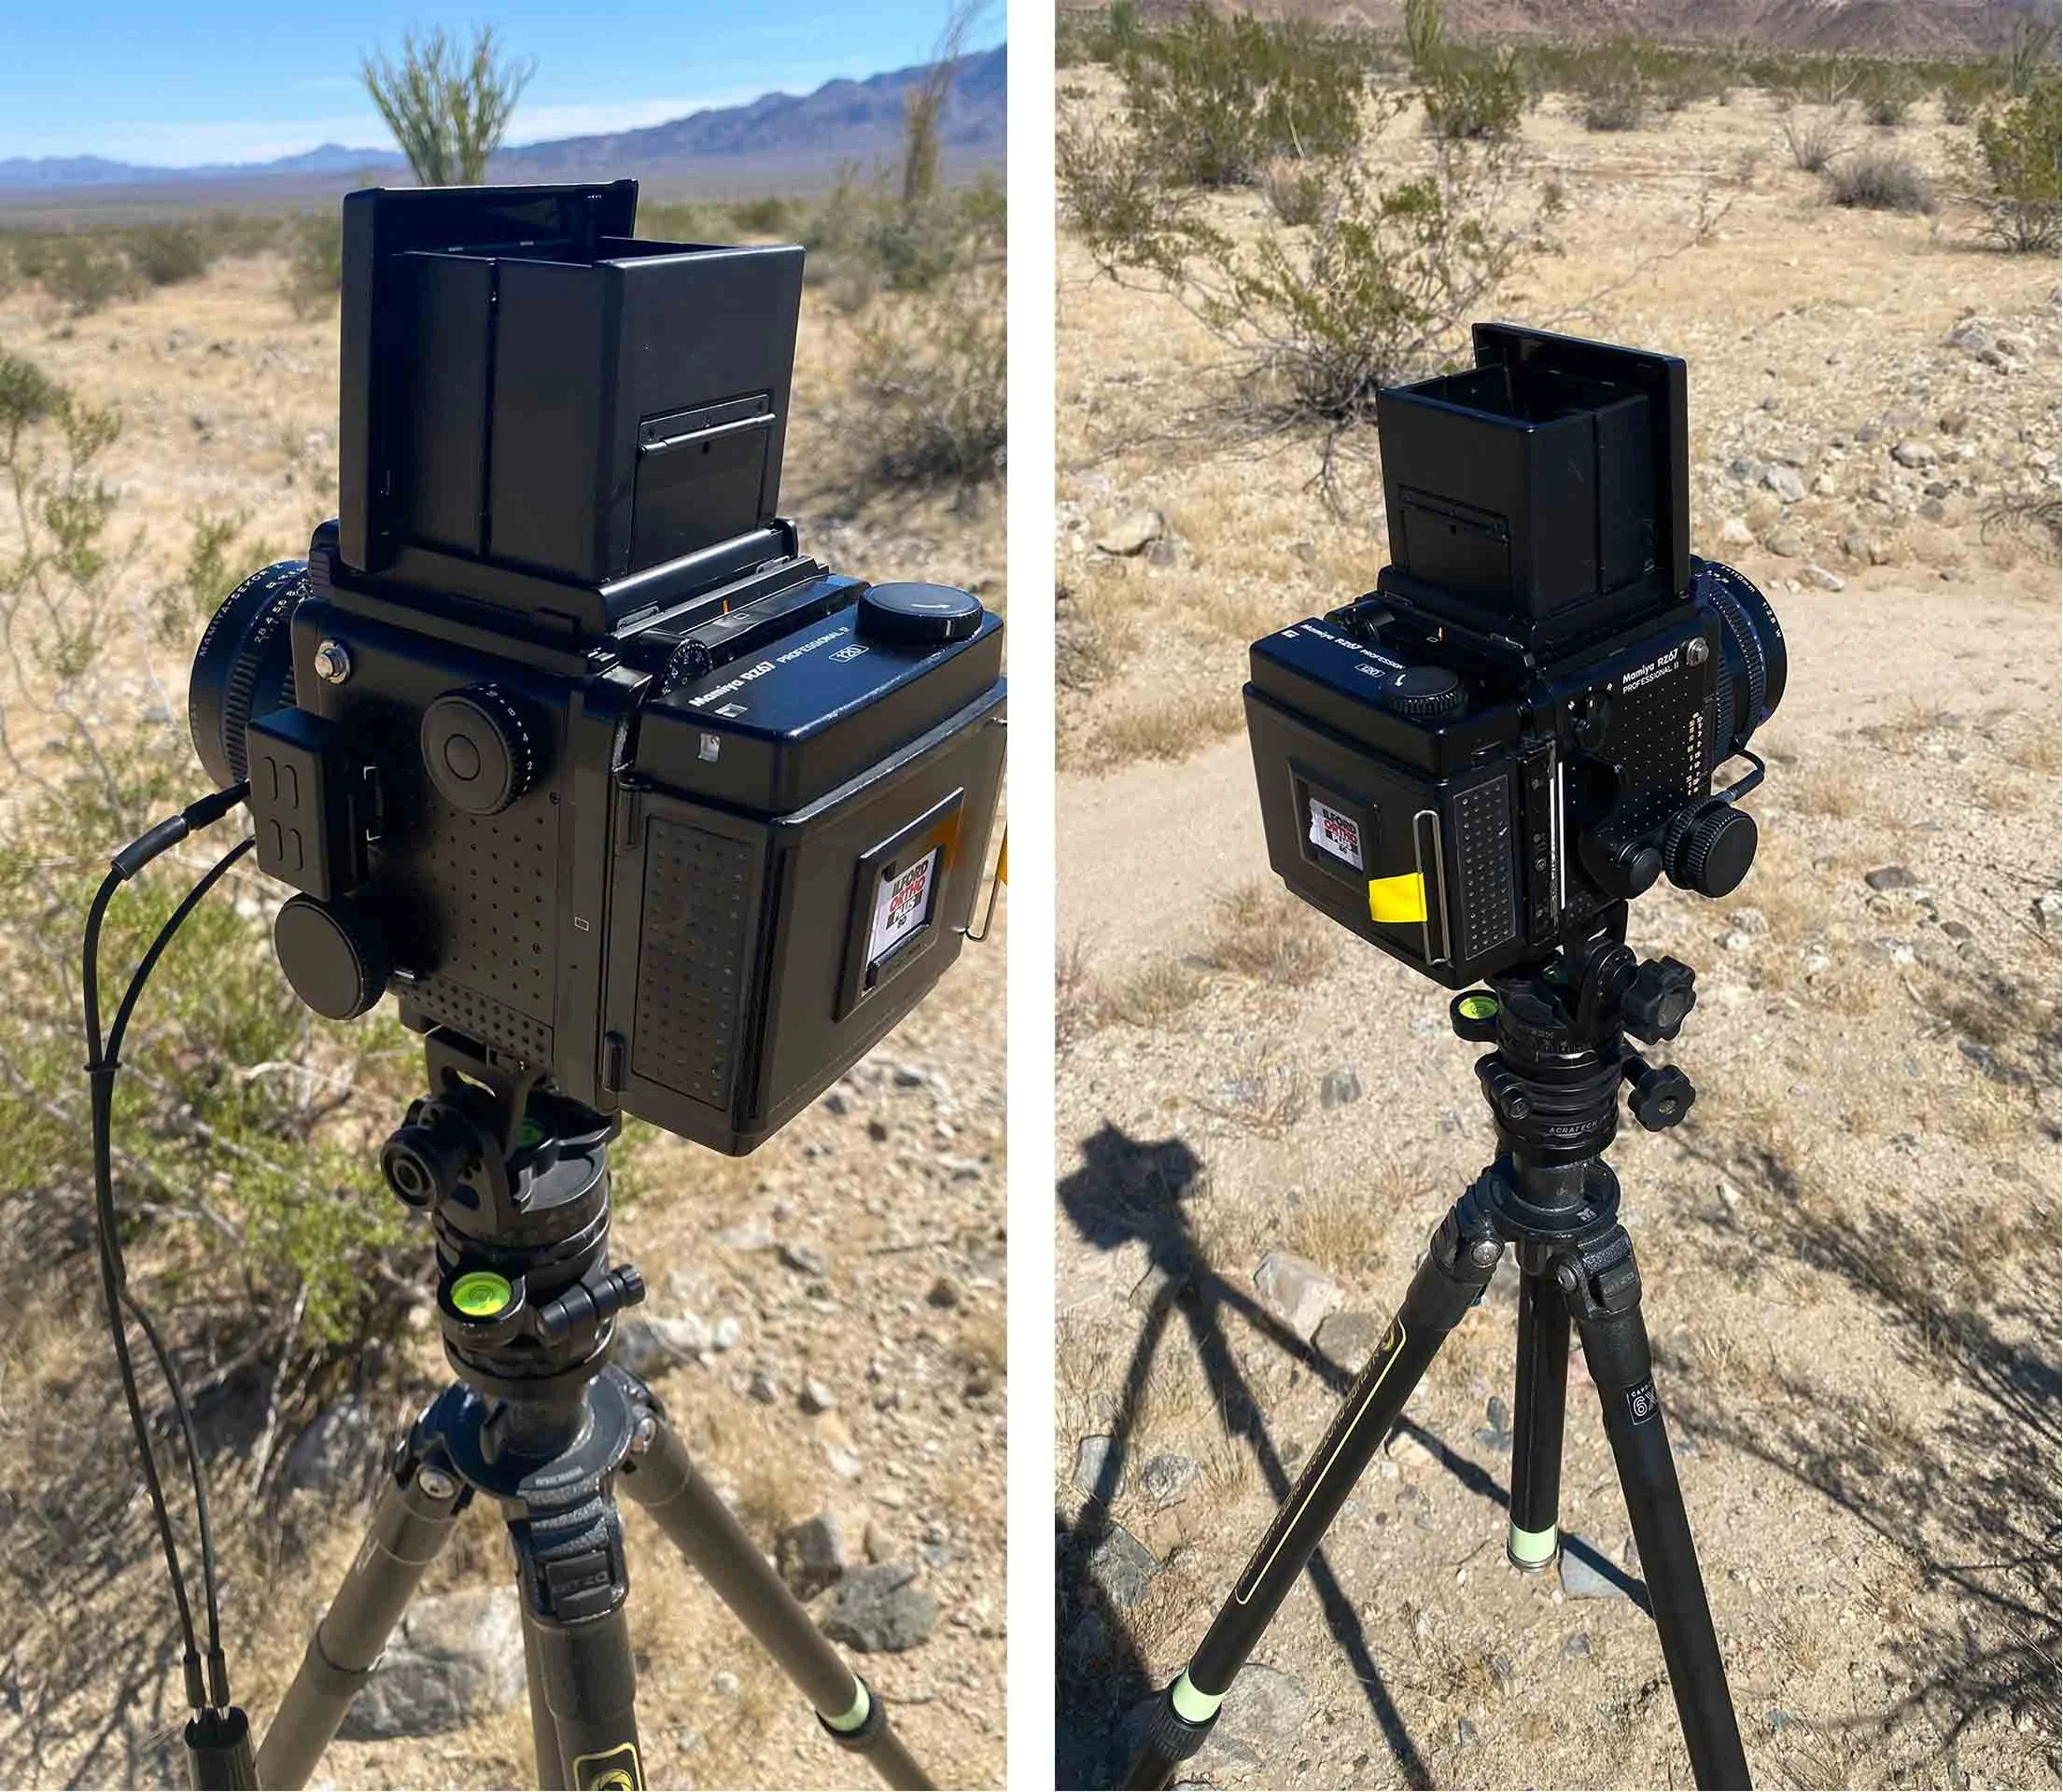
Left and right hand side view of the RZ67 Pro II | © 2025 Jon Norris
Having learnt some hard lessons shooting my first two rolls of film (ahem) I was keen to get back out with the RZ67. My first field experiment was to see how the same composition ‘changed’ when using different filters, and also to start getting used to adjusting exposure compensation for the filters.
With a digital camera it’s easy to take all the EXIF metadata that’s created automatically for you for granted. I wanted to be able to compare different images and understand what had changed between frames. This is where my Lochby mini field journal came in (I love this little notebook and it goes everywhere with me) - good old fashioned analog metadata.
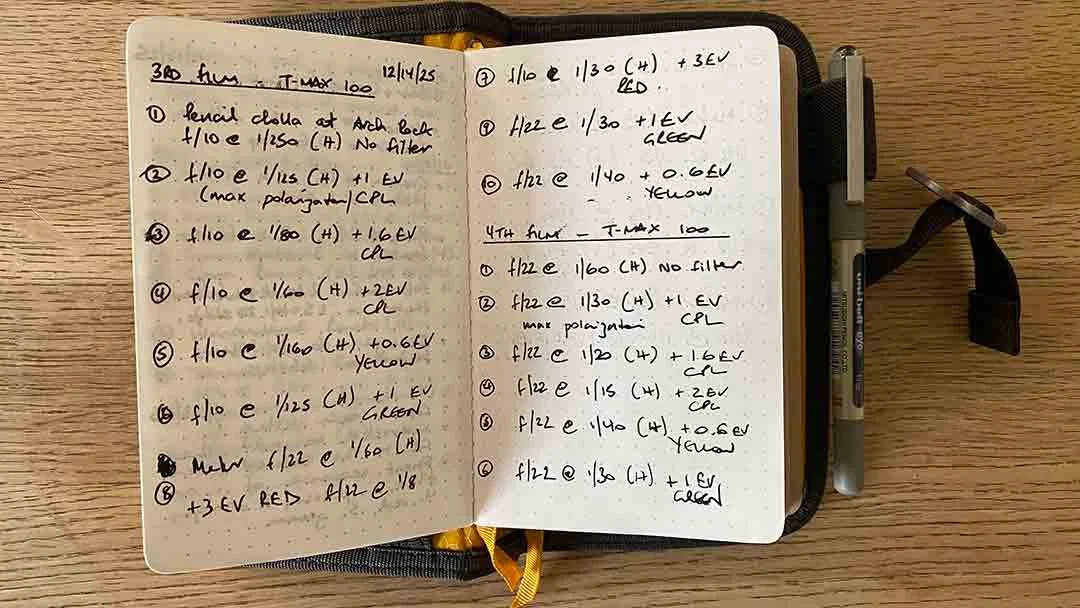
Analog metadata for my 3rd and 4th 120 films | © 2026 Jon Norris
For each frame I recorded my exposure settings (shutter speed and aperture, frame orientation, exposure compensation, and filter).
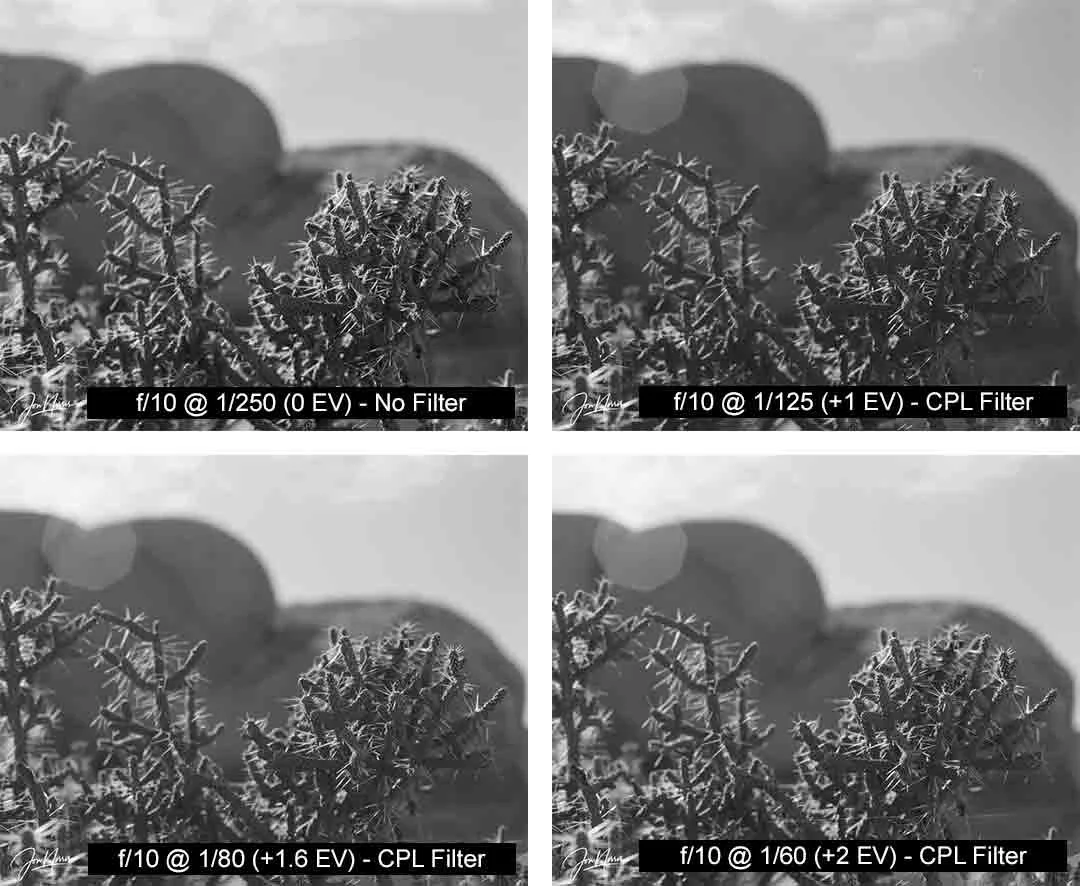
Pencil Cholla Cactus and Granite Boulder (with CPL filter and varying exposure compensation) | © 2026 Jon Norris
Firstly, yes I need to invest in a lens hood for my 110mm lens. Every image from these two rolls of film (apart from two) have sun flares. This was something I obviously take for granted with my mirrorless camera lenses as they all have lens hoods. Now I know why!
I shot three different exposure compensations with the CPL (circular polarizing) filter to see what level of compensation best matched the exposure without a filter. Slowing the shutter speed by 1.6 stops seemed to be the sweet spot for this shot - but I have to say that +2 stops also works well.
Unsurprisingly, based on my subject, there was not a significant difference in saturation of the greens and blues in the shot - but there is a slight darkening of the sky (and therefore contrast with the clouds). Also, I wasn’t shooting at a 90-degree angle to the camera’s direction so the amount of polarization was reduced.
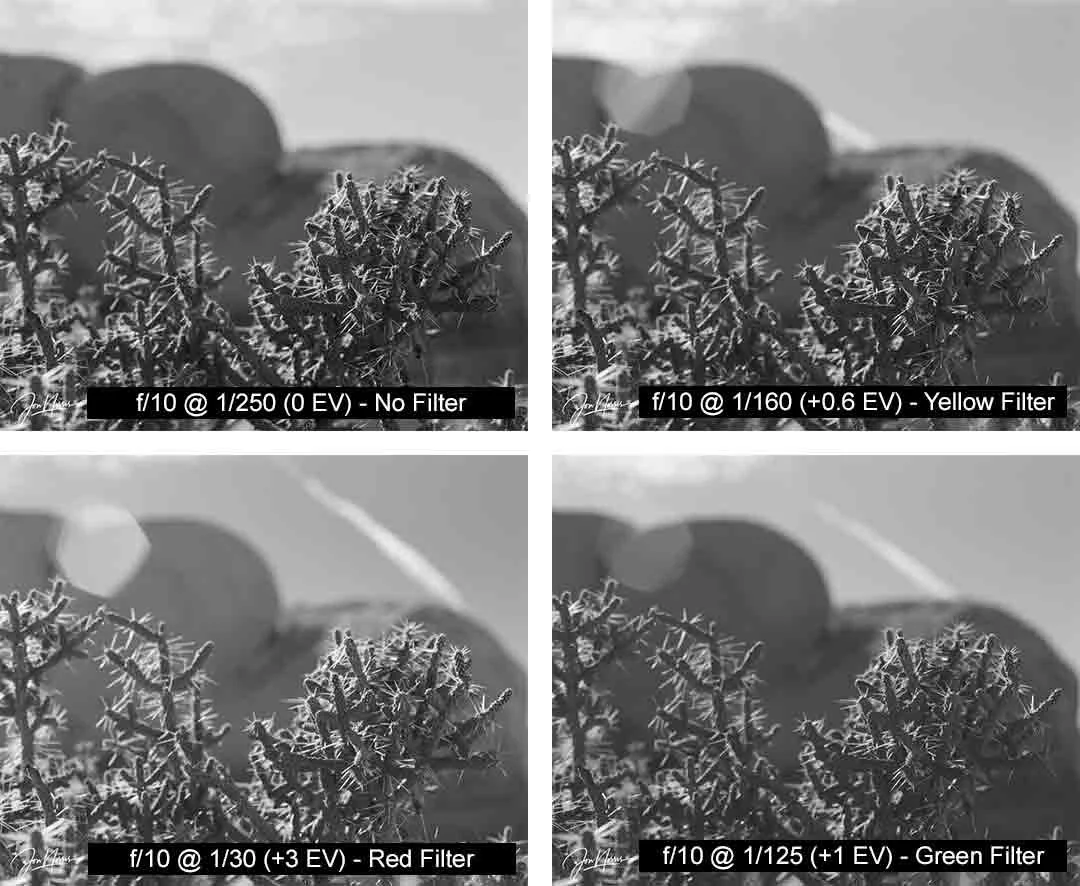
Pencil Cholla Cactus and Granite Boulder (with color filters and varying exposure compensation) | © 2026 Jon Norris
With the color filters there was a more perceivable shift in contrast due to the darkening of blues and the corresponding lightening of greens. This is most noticeable with the red filter. I really like how the shift in contrast has given more separation between the granite boulders in the background and the cholla cactus in the foreground. I’m seeing more depth in the image.
The yellow filter darkened the sky slightly creating a little more contrast with the clouds (as its supposed to). To my eyes, it didn’t have a perceivable impact on the greens in the cactus.
I think I will need to shoot some foliage to really be able to discern how the Green filter render leaves. In tis test shot the image with the green filter is the least appealing of the four for me.
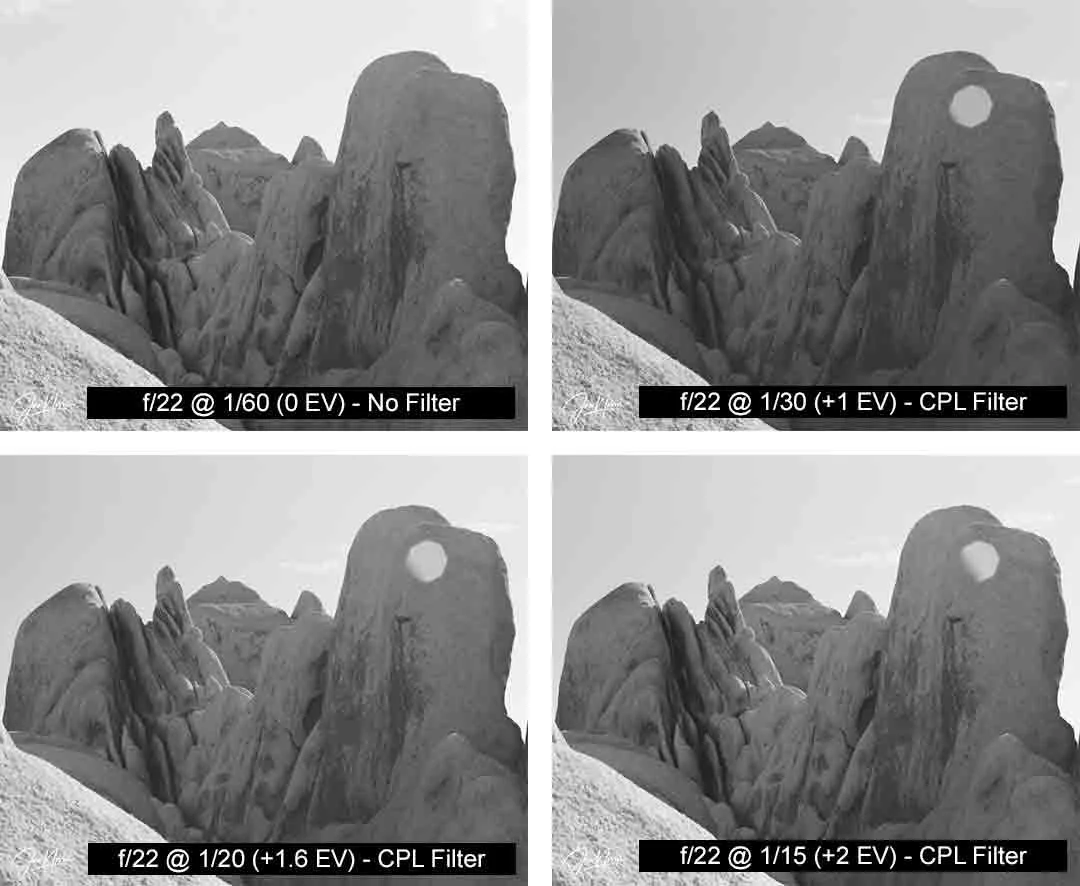
Granite Boulders (with CPL filter and varying exposure compensation) | © 2026 Jon Norris
For the granite boulder images, slowing the shutter speed by 2 stops seemed to be the sweet spot for this shot - with +1.6 stops a little darker than the first image shot without the CPL.
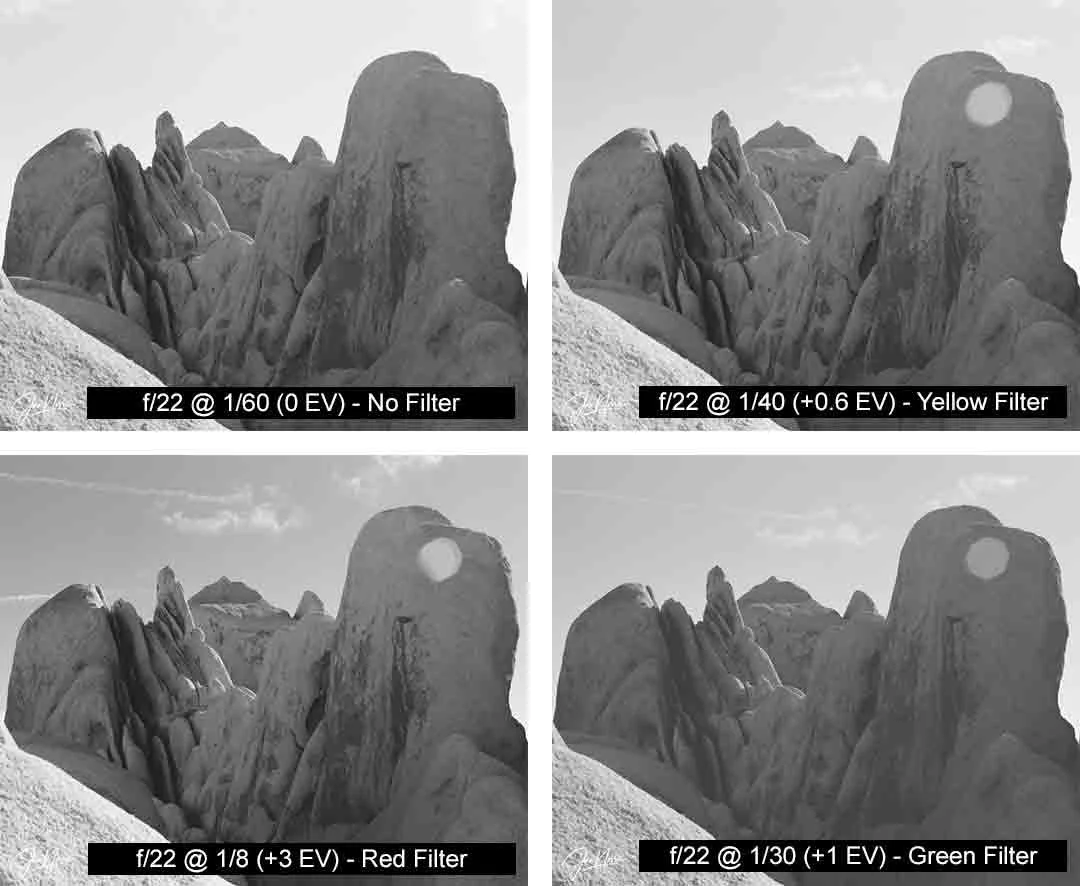
Granite Boulders (with color filters and varying exposure compensation) | © 2026 Jon Norris
Now applying the color filters to the granite boulder images there’s a clear winner - the red filter! Clouds that were not visible without a filter show clearly against a darker sky, and the boulders have more definition and depth.
Unsurprisingly, as there’s no green in the image, the green filter did nothing positive for the image. No filter was better than applying the green filter.
The yellow filter starts to bring out the contrast between the sky and clouds - but no where near as clearly as the red filter. Since shooting this series of images I’ve tracked down an orange filter for my next field test. The orange filter should result in tones/contrast between the yellow and red filters.
I’m sure this was too far down the photography rabbit hole for many readers but hopefully some of you will appreciate it.
If you share my nerdiness for black and white film photography I’d welcome your comments, feedback, and suggestions on how you use filters within your photography practice.
Until next time go explore, experience, and enjoy our wildlands responsibly, and create some fantastic images.
Bye for now - Jon