Expanding Your Horizons - Shooting Panoramas
Explore Landscapes #98
I love the wide-open vistas of Joshua Tree with the plains covered in trees, shrubs, and rock formations. Panoramas let you capture that broad expanse in one final image.
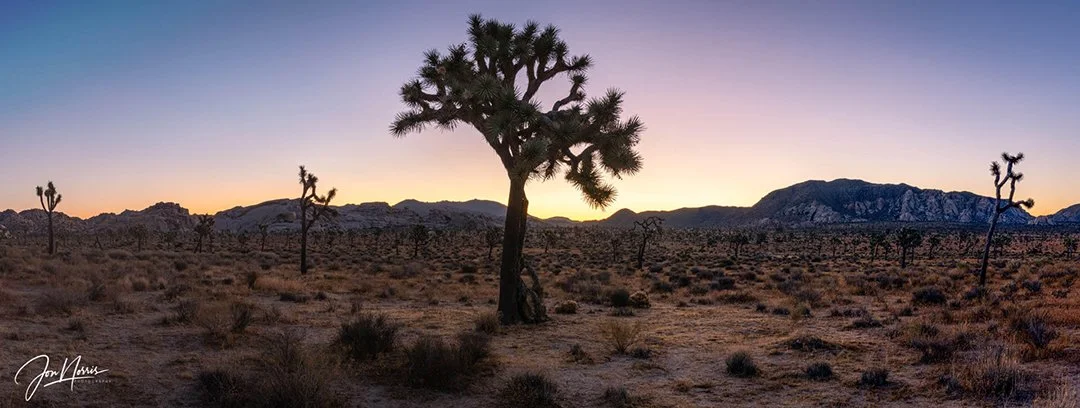
Sunrise panorama at Hidden Valley | © 2019 Jon Norris
Introduction
Shooting panoramas is a technique that I use fairly often while shooting images in Joshua Tree National Park. In a panorama you stitch together multiple images of a wide scene to create a photograph that exceeds the conventional (built-in) aspect ratio of your camera.
A characteristic of the park that I particularly love are the wide-open vistas of the plains covered in Joshua Trees, shrubs, and rock formations. One of the most effective ways of capturing the wide expanse of these plains is to shoot a panorama.
In this article I’ll run through the technique I use to capture panoramas using just your camera, lens, and a tripod, without the need for additional equipment.
Choosing the Right Gear for Panorama
As I mentioned before you can shoot panoramas with the minimum of equipment (just a camera, lens, and a tripod) if you follow a few rules.
You can use a DSLR, mirrorless camera, a smartphone, or even a film camera (providing you create digital scans of your negatives after processing), to shoot panoramas.
No matter what camera you use, you’ll be shooting multiple, overlapping images of the scene that you’ll later combine in post-processing.
Typically you’ll want to use a wide-angle lens (full frame 24-35mm, crop 16-24mm, MFT 12-18mm) to maximize the amount of the scene that you can fit into a single frame, without distortion (which may occur if you choose to use an ultra-wide or super-wide lens).
The third, and an important piece of equipment, is a sturdy tripod, that will allow you to keep the camera level with the ground, steady, and permit you to rotate the tripod head incrementally to overlap your images.
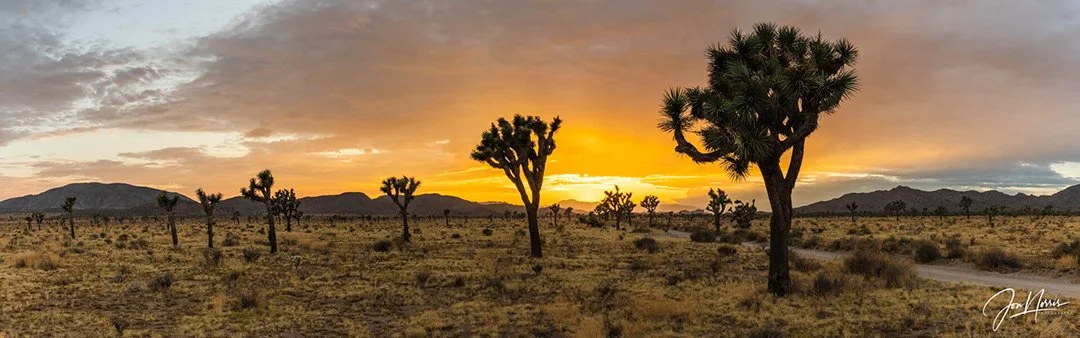
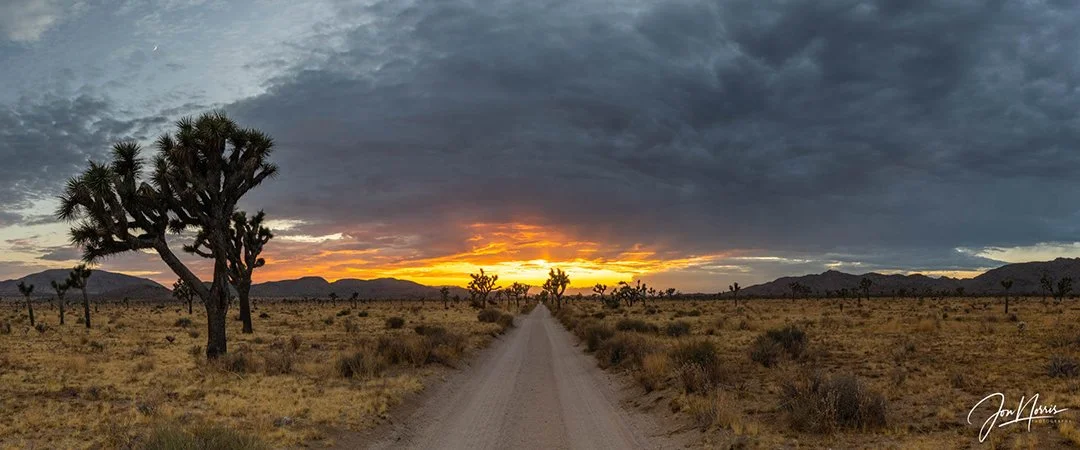
Sunset panorama on Queen Valley Road | © 2019 Jon Norris
Finding the Perfect Landscape for a Panoramic Shot
When looking for a potential panorama location you’ll first want to find an expansive vista (of a desert, mountains, seascape, cityscape etc).
I’m typically looking for a vista with at least a 180 degree view. To put this into perspective (pun intended) the field of view of a 24mm full-frame wide-angle lens is approximately 84 degrees on a full-frame (35mm) camera sensor.
I select a subject in the scene that I want to shoot as a panorama and position my tripod to make sure that I’m at least 30 to 40 ft (9 to 12 m) away from the subject. This is to avoid parallax error and warping of the final panorama image when it’s processed.
Note: If you want to shoot a panorama with your camera much closer to the subject, then you’ll need to use a nodal shift plate (also known as a panorama parallax plate, or nodal slide). This is a specialized accessory designed to eliminate parallax errors in panoramic photography by allowing the camera and lens to rotate precisely around the lens’s nodal point, also referred to as the no parallax point (NPP).
This ensures that the relative positions of foreground and background elements remain consistent across multiple images, resulting in seamless stitching without ghosting or misalignment at the join points.
I like to shoot my panoramas during either golden hour, or blue hour, as the lighting and resulting coloring can transform your images. I’m also always on the watch out for weather conditions like clouds, mist, or interesting foregrounds, that draw the viewer into the panorama.
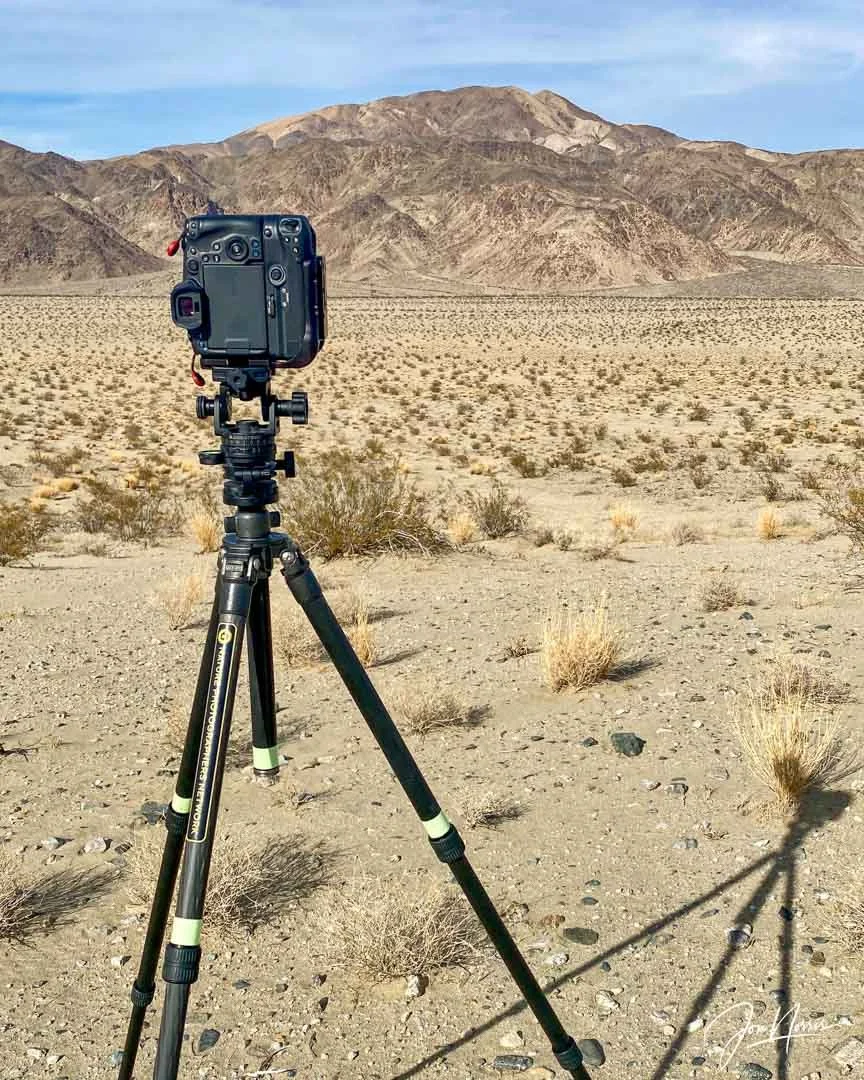
Canon EOS R5 and Gitzo Mountaineer tripod (with Acratech leveling base and pan/tilt head) | © 2024 Jon Norris
Setting Up Your Camera for Panorama Mode
I usually shoot my panoramas with the camera orientated vertically (portrait). This is to give me more room in the frame above and below the main subject area of the panorama. This can be useful if you need room for cropping the image later.
In the example I’m going to share, I actually shot each of the images with the camera orientated horizontally (landscape). This was because the scene I was shooting was very shallow and I didn’t need extra room for cropping in post.
It’s a good idea to get your tripod as level as possible, so that as you rotate the tripod head, you can keep the horizon straight. This makes stitching the images together easier in post and reduces the amount of cropping that will be required.
To ensure that all of the images are consistent in terms of exposure you’ll want to shoot in manual mode, with a fixed ISO, aperture, and shutter speed. I would recommend shooting at your lowest (base) ISO, which is ISO 100 on my Canon EOS R5. I typically shoot all of my landscape images at one of the sharpest apertures for my lenses, which is in the range of f/8 to f/11.
I always use the histogram to measure my exposure - see this article for more information.
You will also want to shoot with a fixed white balance (I typically use Cloudy) and not AWB (auto white balance), so that there’s no change in color throughout the images.
I also recommend you shoot with manual focus and choose your focus point so that the desired depth of field is maintained throughout all of the images. As you’ll be shooting with a wide-angle lens, with an aperture of f/8 to f/11, you’ll have a deep depth of field as your subject is at least 30 to 40 ft (9 to 12 m) away from you.
Finally, don’t use a polarizing filter on your lens when shooting a panorama as each image in the sequence will be at a different angle to the sun making the sky appear differently in each image - and giving some strange color casts in the sky.
Shooting the Panorama: The Art of Overlap
Once you have your camera setup and level on your tripod, and have all the relevant settings on manual (see previous section), you’re ready to start shooting your panorama.
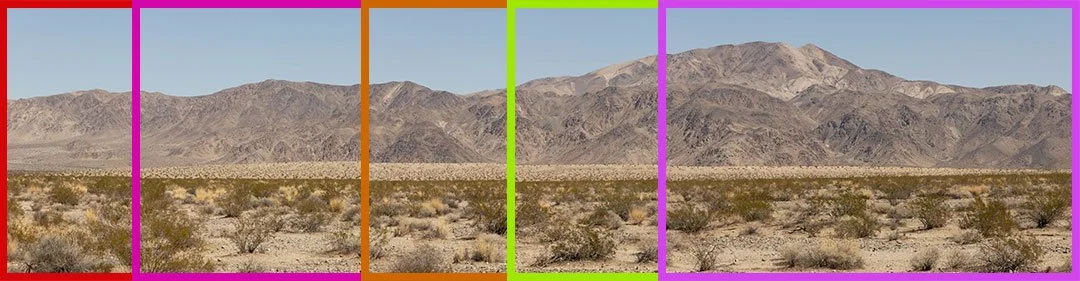
I like to shoot from left to right - but right to left works just as well. I rotate the camera so it’s about half a frame beyond the furthest point I want to have in the final panoramic image. I take the first image (normally with a 2-second delay so that I don’t introduce any movement into the camera). I then rotate my camera to the right, ensuring that I have about a third to a half frame overlap with the previous image (see the colored frame outlines in the image above).
You repeat this process with overlapping frames until you’re about half a frame to the right of the final part of the scene that you want to be included in the panorama.
These overlapping images will ensure that the software can seamlessly stitch them together to create your panorama.
Note: Before you start your panorama sequence of shots, rotate the camera around the scene that you want to shoot, and verify that your manual exposure settings that you’d like to use don’t clip the histogram (i.e. under or overexpose the frame). If you’re shooting in light with a very high dynamic range, you’ll have to shoot an exposure bracketed (also known as HDR) panorama. This involves shooting multiple images at each rotation location with different exposure values. See this article for more information on exposure bracketing.
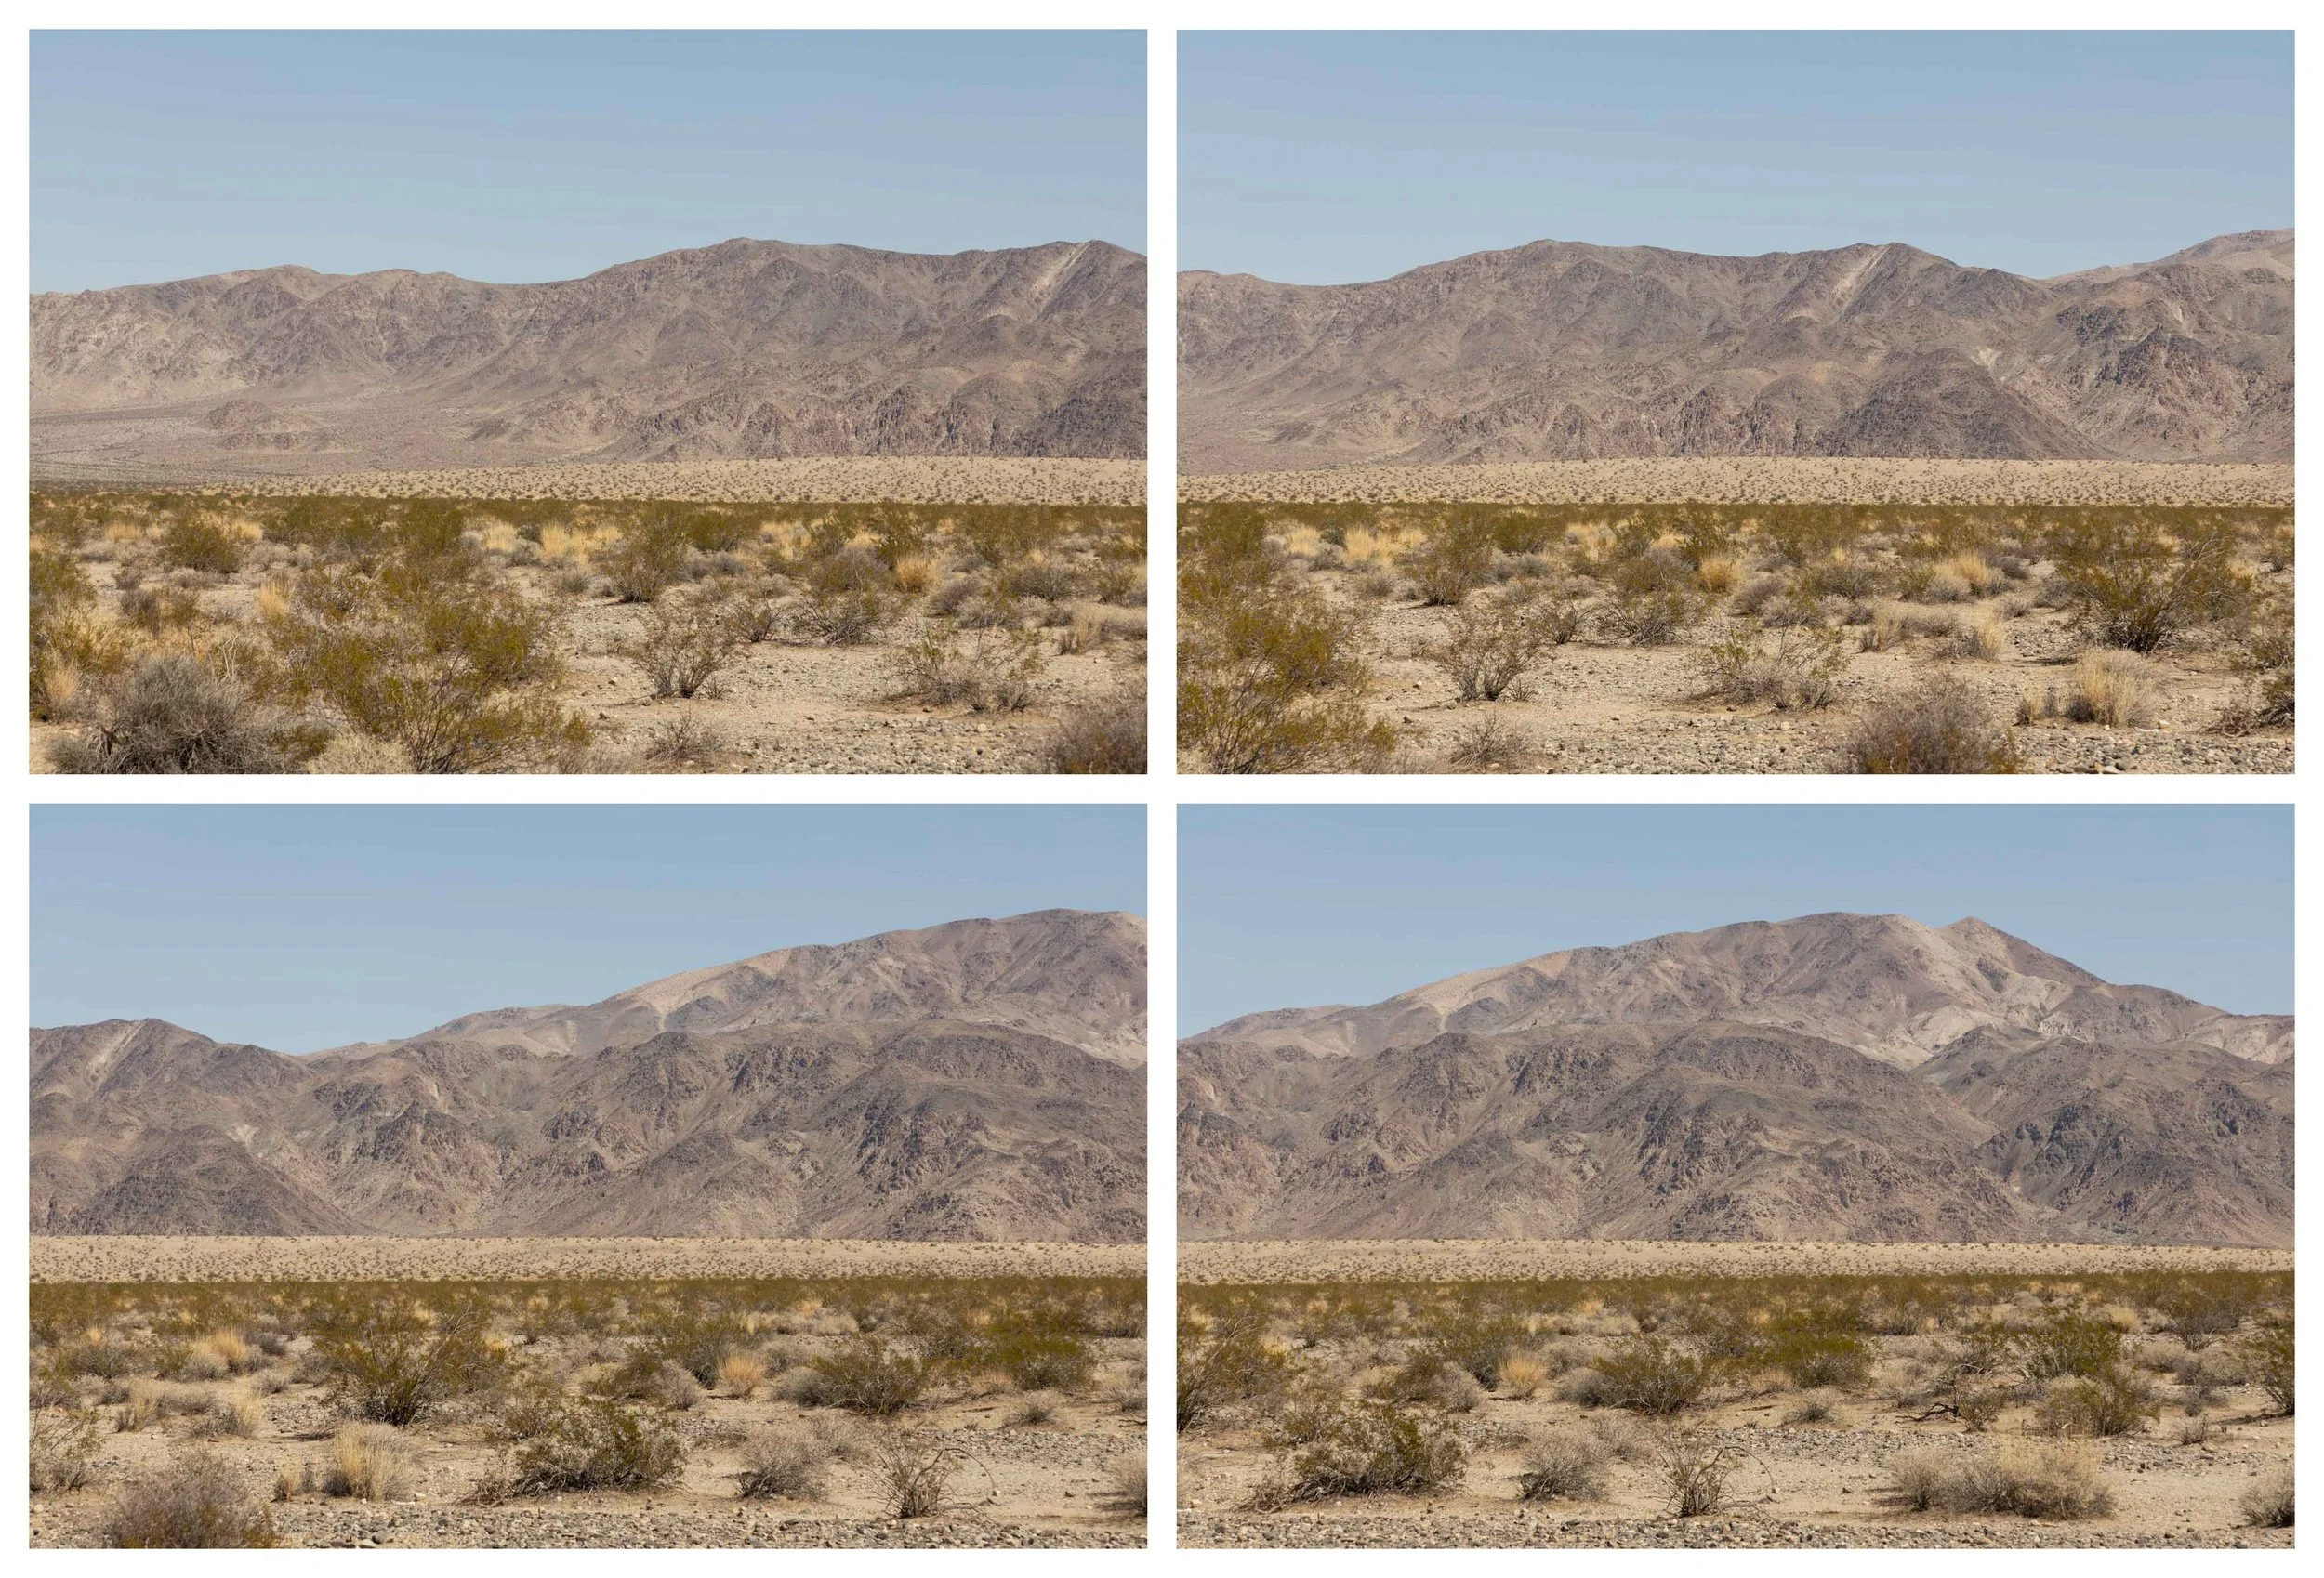
Four of the eight overlapping images that I shot to create the final panorama of Pinto Mountain | © 2019 Jon Norris
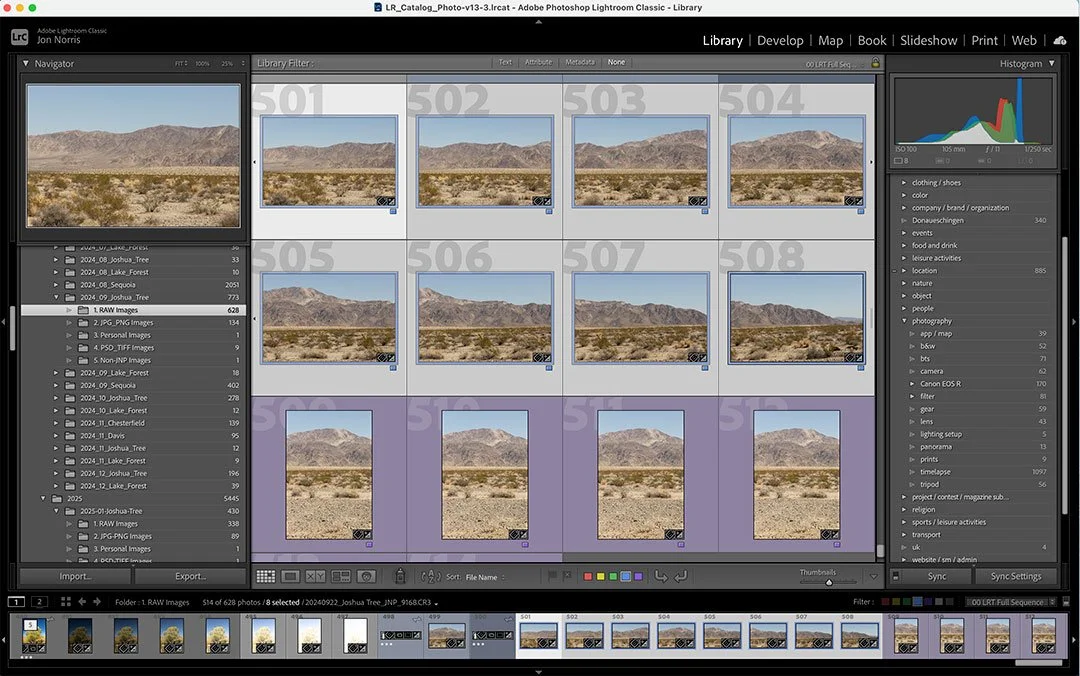
Selecting the overlapping images in Adobe Lightroom to create the panorama | © 2025 Jon Norris
Editing Your Panorama and Stitching It All Together
There are a number of different software applications that can be used to stitch together panoramic images. I use Adobe Lightroom, and have found it to do a pretty good job, providing that you avoid the parallax issues that I mentioned before (and kept the subject at a good distance)
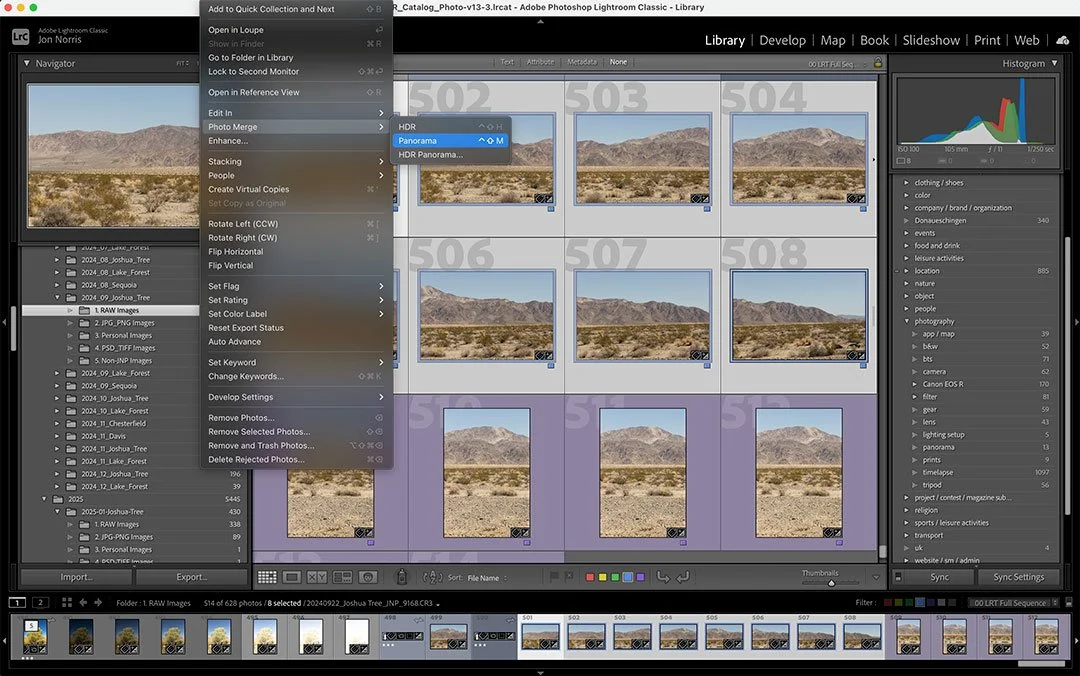
Creating the panorama: Photo Merge > Panorama | © 2025 Jon Norris
With all of the images selected that are to be combined, select Photo > Photo Merge > Panorama. Lightroom will open a new window and show a preview of your panorama.
Note: if you used exposure bracketing (because of high dynamic range in your scene), you select Photo > Photo Merge > HDR Panorama. Lightroom will create HDR images of each of your overlapping frames and create the panorama in one action.
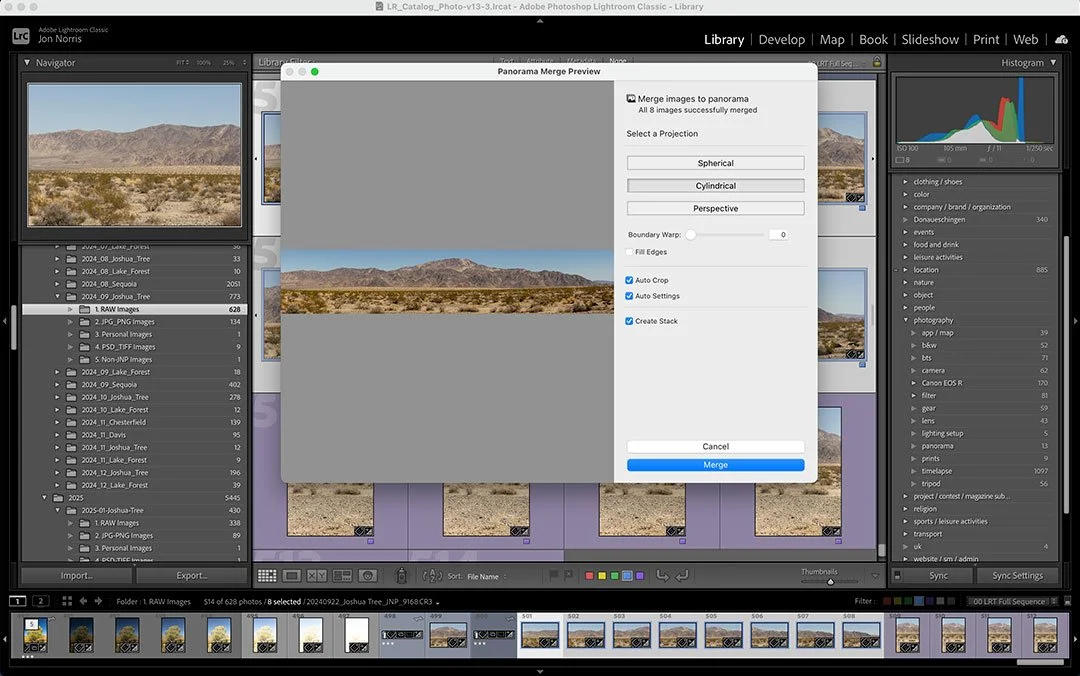
Lightroom Panorama Merge Preview and Options | © 2025 Jon Norris
There are three projection options that Lightroom gives you with your panorama preview. I typically use Cylindrical which seems to give the most consistent results. Try each of them to see which you prefer.
The boundary warp slider can be used to straighten out the panorama if there is any warping present in the preview. I haven’t found it necessary to do this very often.
I keep Auto Crop, Auto Settings, and Create Stack ticked, and then click Merge to generate the panorama image. In that one action, Lightroom aligns the overlapped images, crops the final image to remove any steps in the edges (if images weren’t all shot with a level horizon) and creates a stack of all the individual images with the panorama on top in your library grid.
Once Lightroom has created the panorama image (which will be a new DNG file in your Library) I will do my editing—color grading, contrast, and sharpening, for example.
Here’s my article on essential Adobe Lightroom Editing and Workflow.


Above are two versions of the final panorama of Pinto Mountain in Joshua Tree National Park—one color and one black and white.
Road to Somewhere | © 2019 Jon Norris
Common Panorama Mistakes (And How to Avoid Them)
Misalignment of images showing as steps in the top and bottom of the unedited panorama image. This is due to the tripod based not being level as you rotate the camera between images. Take the time to level your tripod to reduce the amount of cropping required to remove the steps along the edges of the frames.
Gaps in the panorama scene. This is due to the individual images not overlapping by a sufficient amount so that Lightroom can stitch the images together smoothly. Repeat the sequence of frames but this time make sure that you have a third of a frame (minimum) overlap between each frame.
Warped horizon in the final panorama image. Try shooting again but with the tripod level, and the camera and lens parallel to the ground.
Color and/or focus shifts throughout the panorama. Check that you are using manual exposure, manual focus, a fixed white balance (for example, cloudy), and that you don’t have a polarizing filter on your lens.
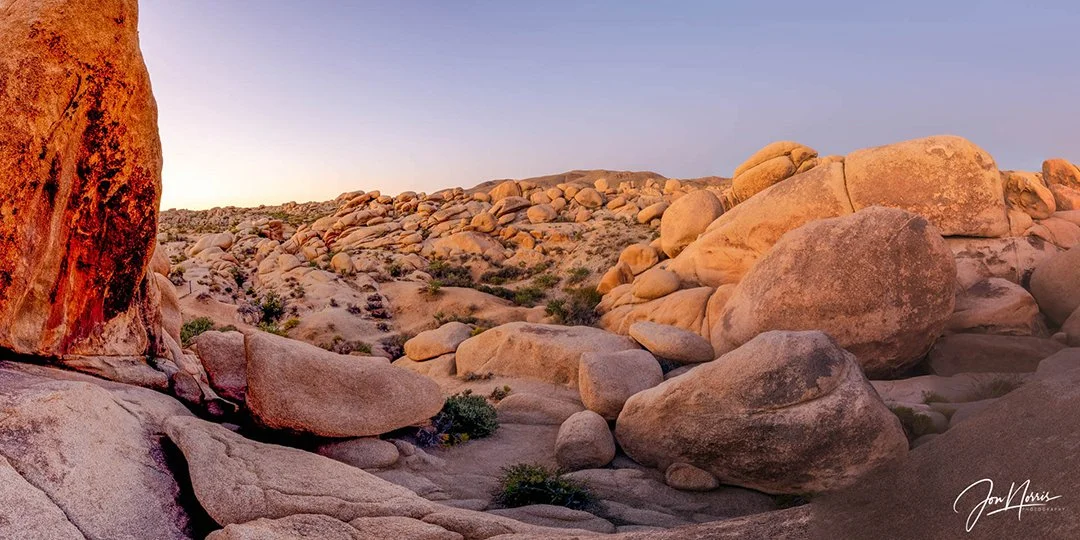
Golden hour by Arch Rock | © 2019 Jon Norris
Conclusion
Here’s a quick recap of the key points for shooting amazing panoramas:
Setup your camera on a stable, level tripod and fir a wide-angle lens.
Select a scene with at least a 180 degree field of view, and position your camera at least 30 to 40 ft (9 to 12 m) away from your subject.
Using your histogram select ISO, aperture, and shutter speed combination (exposure bracket of high dynamic range in scene requires it).
Use manual focus, manual white balance and check you don’t have a polarizer attached.
Overlap each image by one-third to one-half of a frame.
Use Photo Merge in Lightroom to combine individual images into your panorama.
In Lightroom, port-process your image—color grading, contrast, and sharpening, for example.
I hope you found this article useful and I encourage you to go out and give it a try—because the world looks better in wide view!
This is one of the techniques that’s included in my landscape photography weekend workshops - click the linkfor more information.