Reducing Noise in Milky Way Images
Explore Landscapes #37
Last week's paid post detailed my Milky Way Editing Workflow. Here's a little addition to that workflow on how to reduce noise in your images before you start editing.
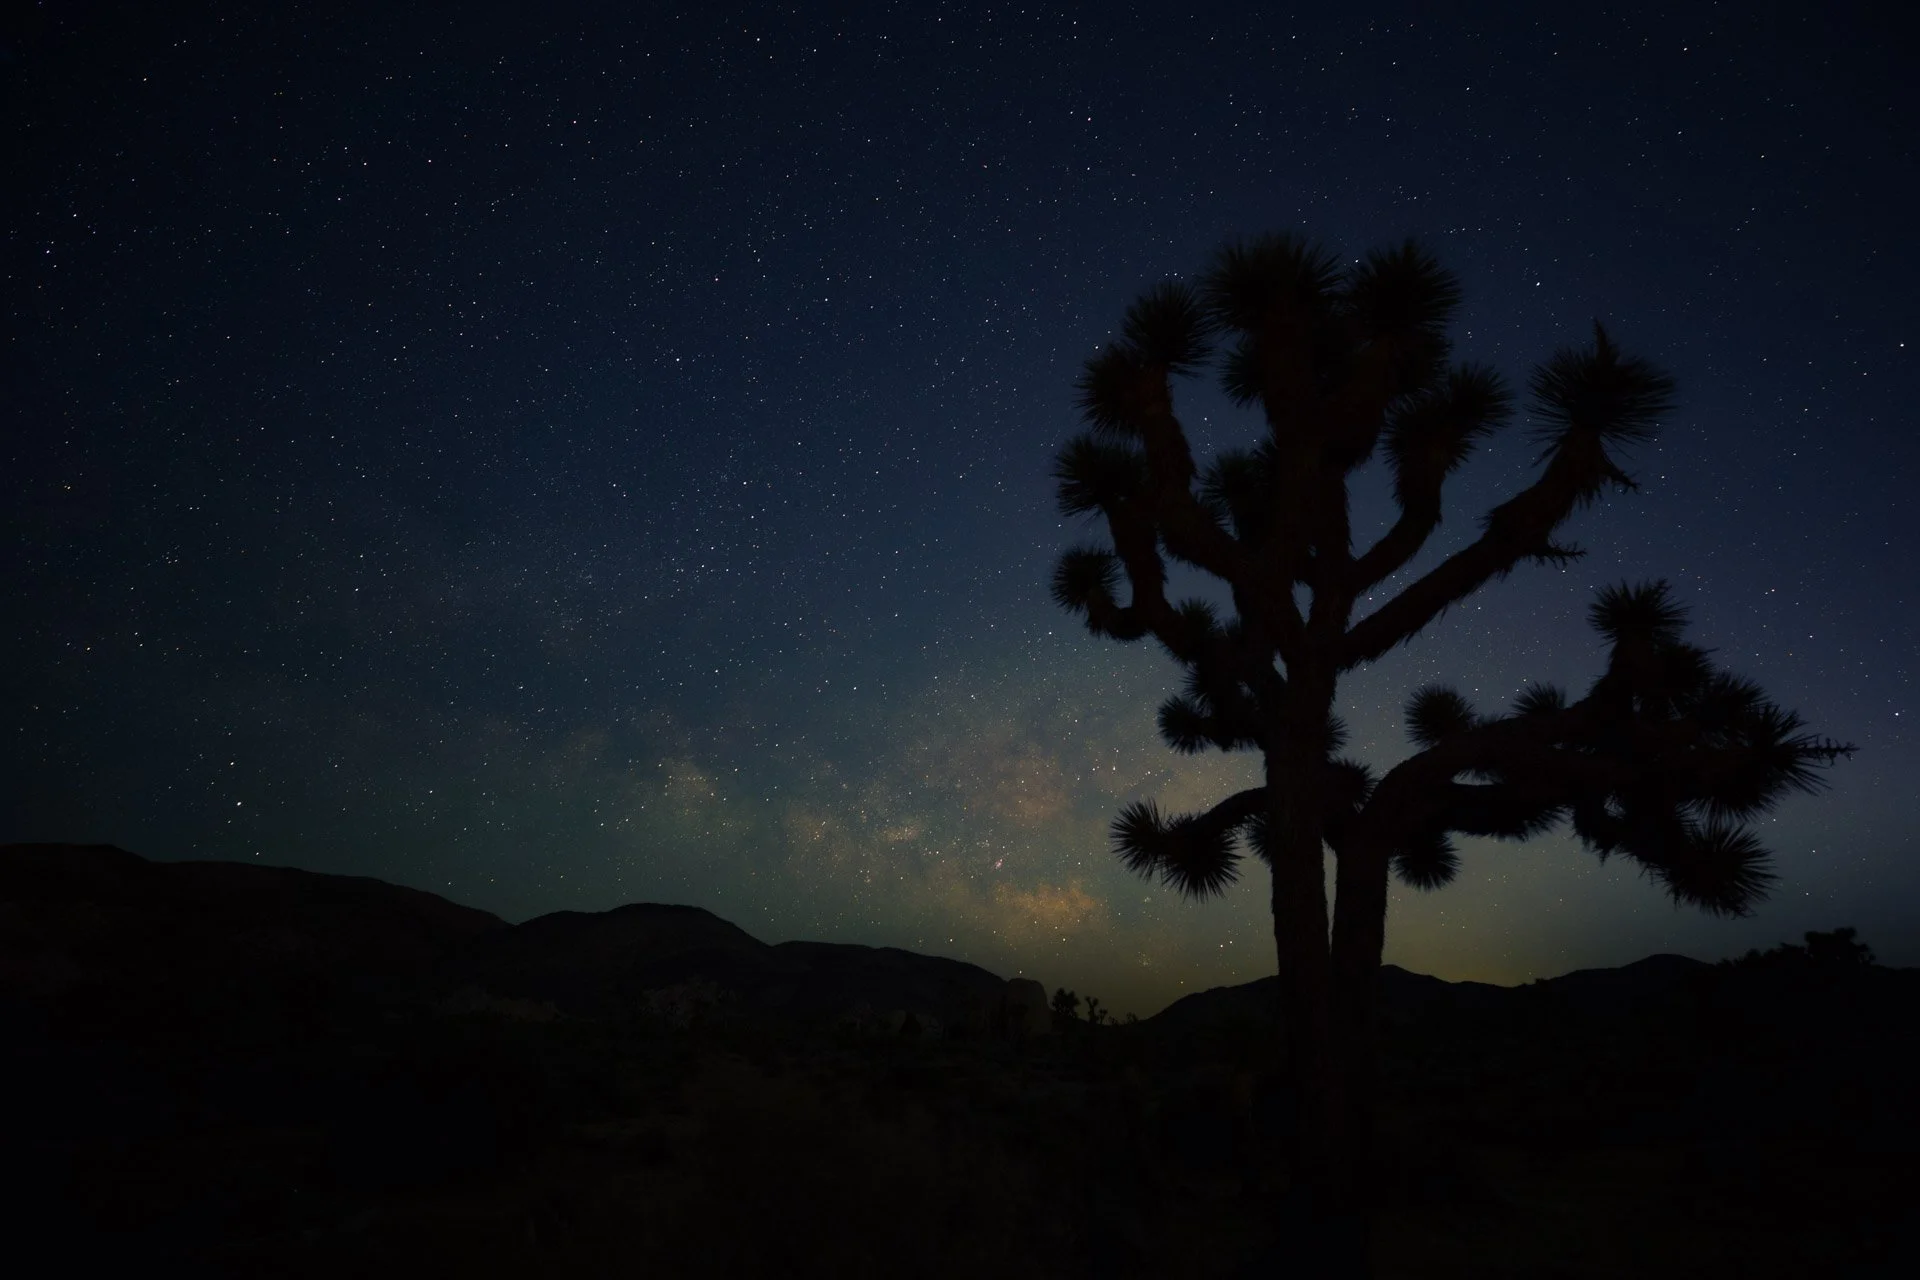
When using a high ISO for dark sky photography, you want to do all you can to reduce digital noise in your images. Assuming you’re not using a star tracker when photographing the Milky Way, you must push the ISO high to register sufficient light on the sensor and maintain spot stars (i.e., sharp stars that do not show the earth’s rotation).
To reduce digital noise, you can shoot batches of photographs of each of your Milky Way compositions and then combine these in software that uses multiple images to compute and reduce the digital noise.
I edit all my images on a Mac, so I use Starry Landscape Stacker. If you’re a PC user, then take a look at Sequator. This post shows the steps to reduce noise using Starry Landscape Stacker; the software interface looks a bit different on Sequator, but the steps should be broadly similar.
You take multiple images of the same composition (at least 10; more is better), each one of which is noisy, and then the software averages these images. The averaging process reduces the noise.
Your camera must be in a fixed position on a tripod, all of the exposures must be identical, and the total capture time should not exceed 10 minutes.
This could be done with conventional image editing software (e.g., Photoshop), but it’s difficult as the stars are moving relative to the ground, and therefore it’s a slow and tedious process. You must separate the sky from the ground and align the stars before averaging the sky and ground portions of all the images. Starry Landscape Stacker does this for you. See the developer’s website for more info on the software and FAQs.
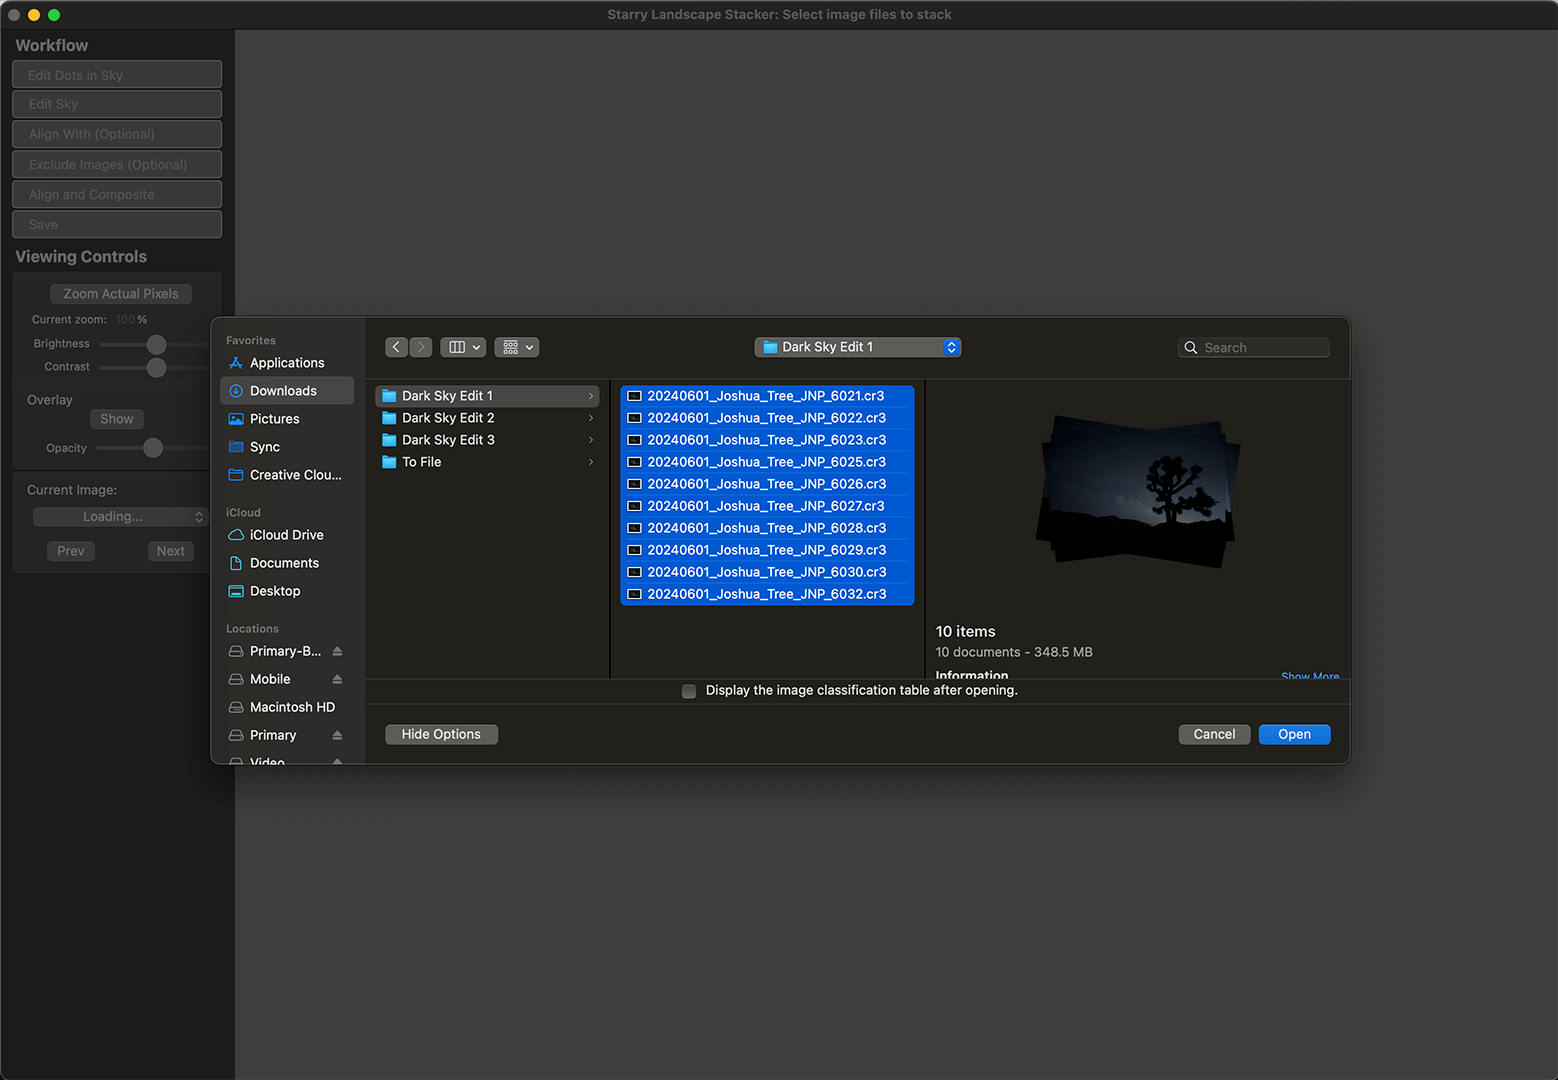
For this post, I’m using 10 images from a recent Milky Way workshop and have selected them to load into Starry Landscape Stacker.
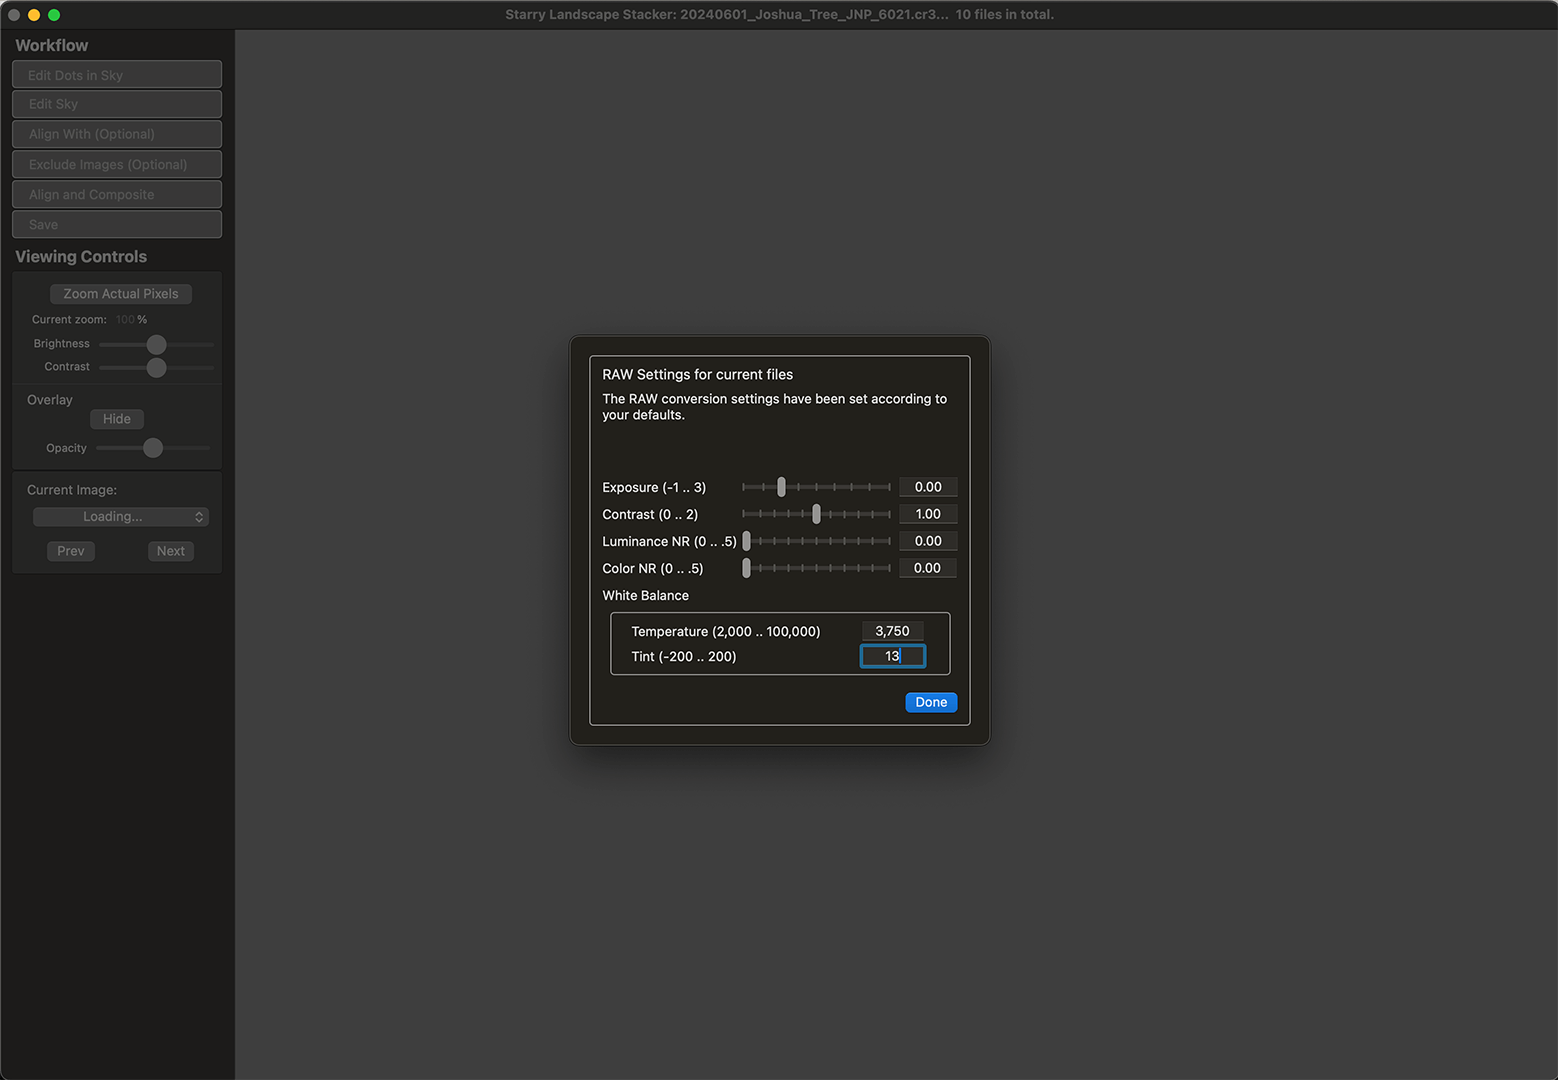
You can enter the color temperature and tint settings for the RAW images you’re importing, or alternatively, have the software take the as-shot values in settings.
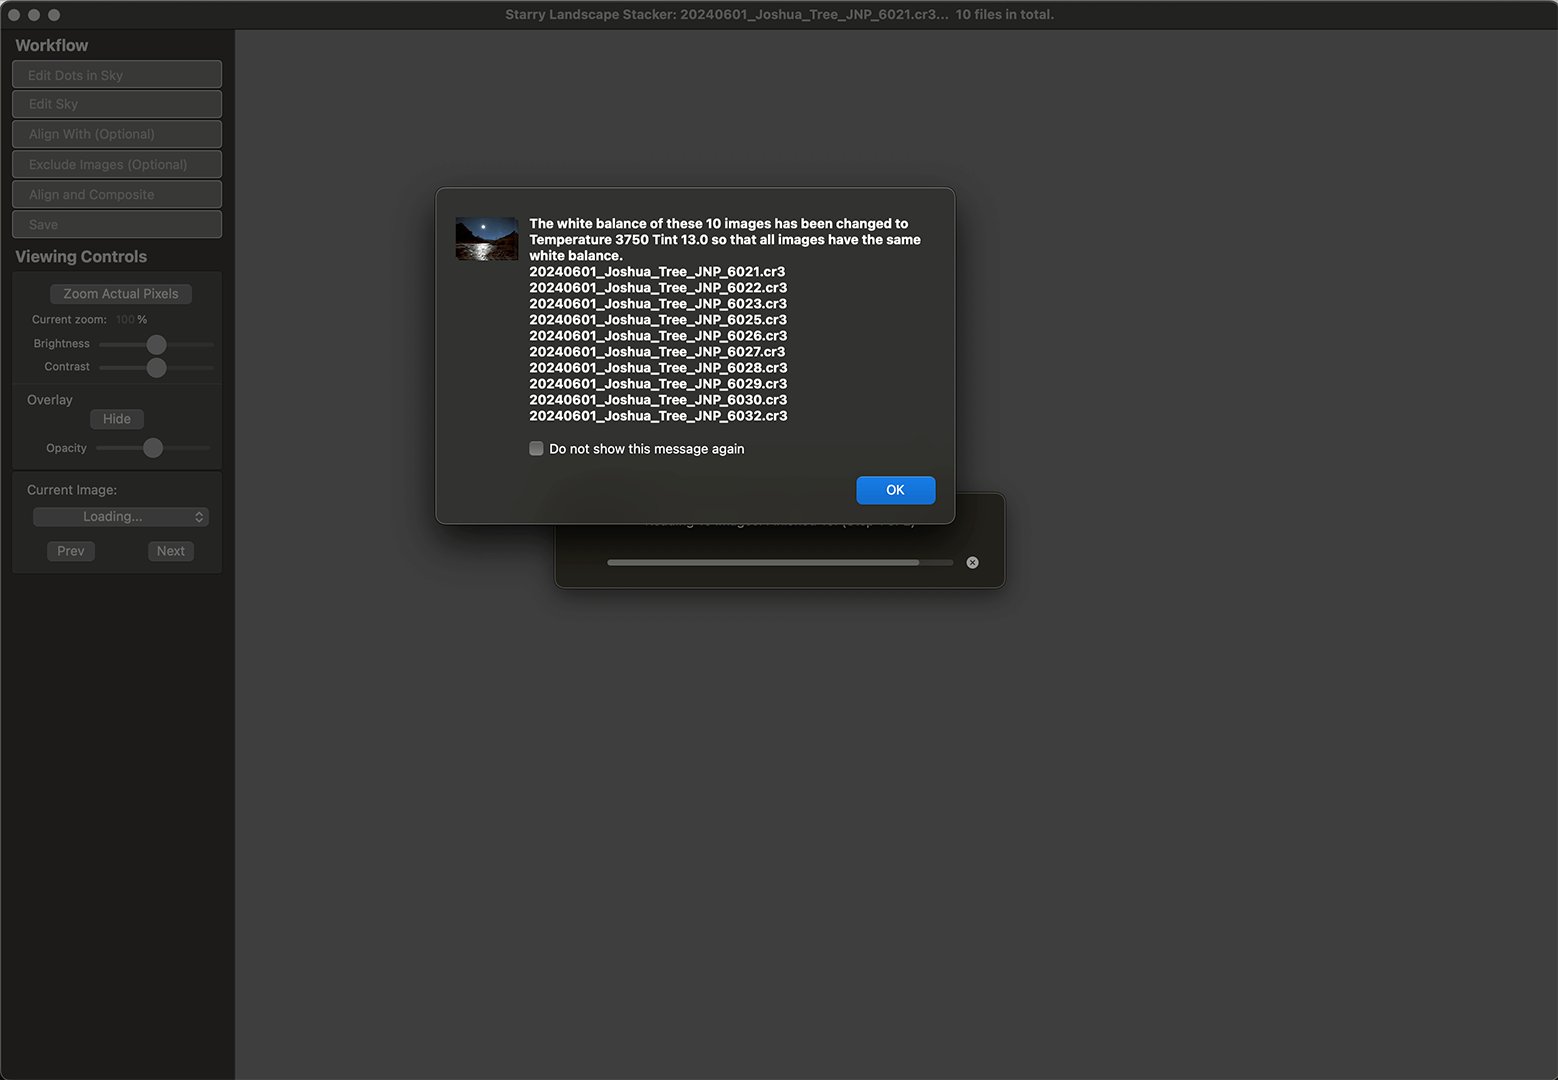
You’ll see a pop-up confirming that your RAW files have been imported and confirming the color temperature and tint being used. Click on OK to go to the next screen.
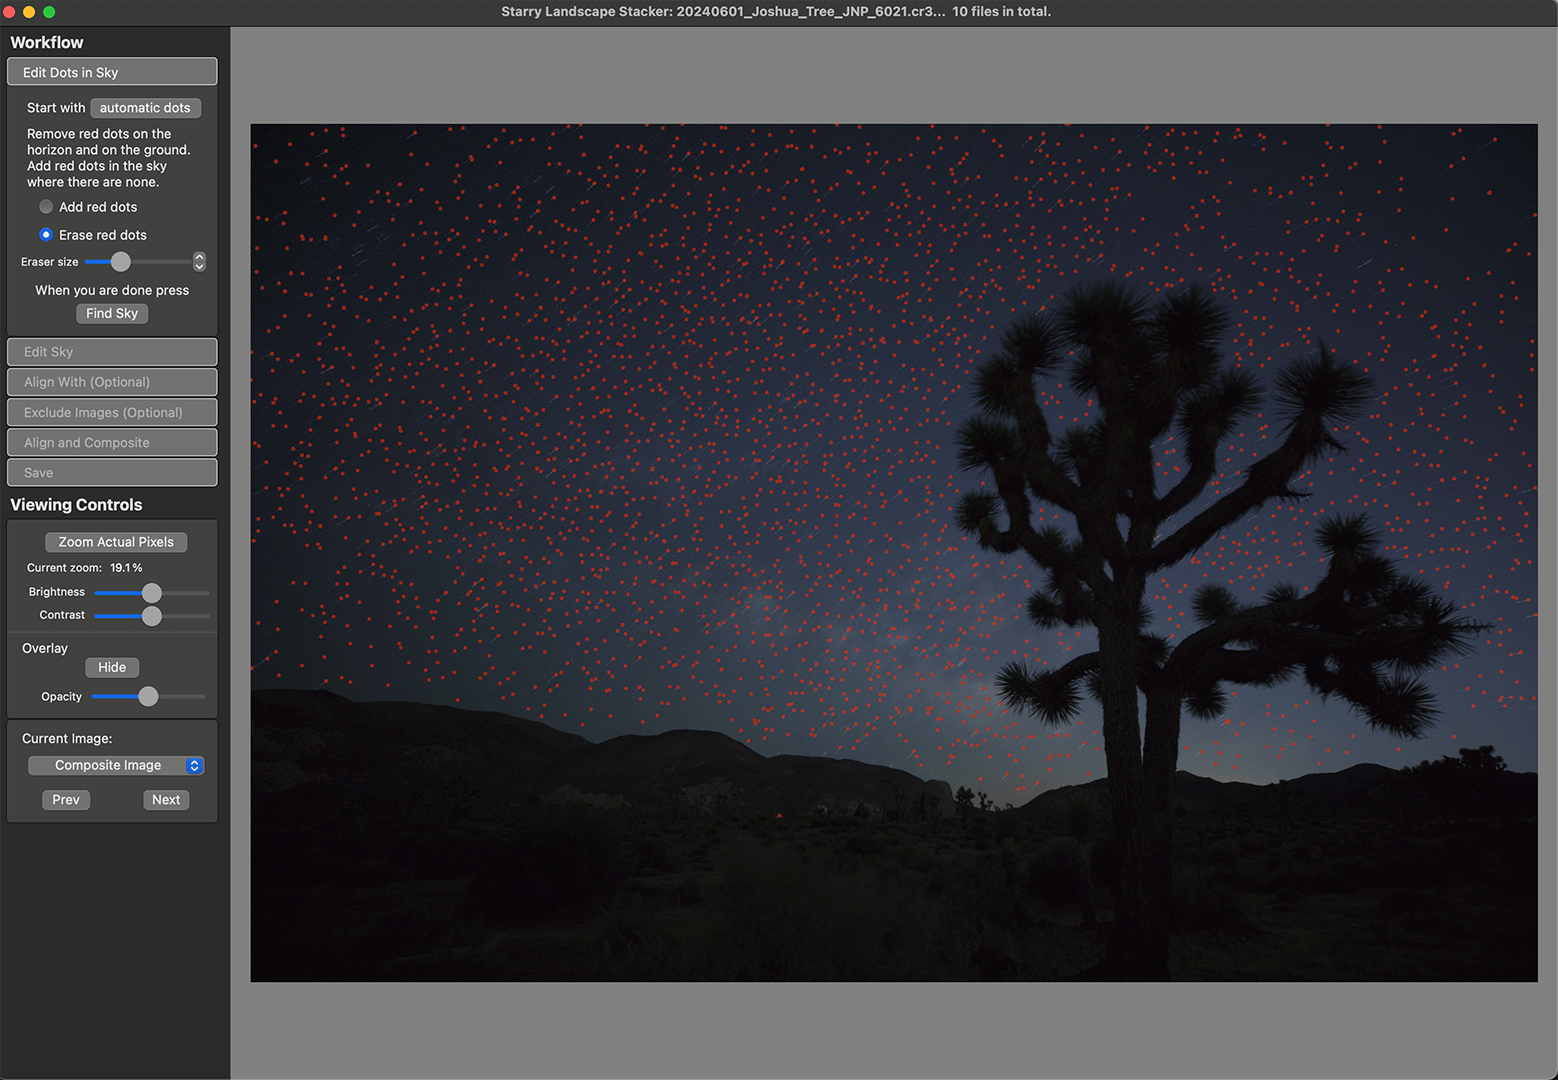
Starry Landscape Stacker then analyzes all of the images and identifies all of the stars and other celestial objects with a red dot.
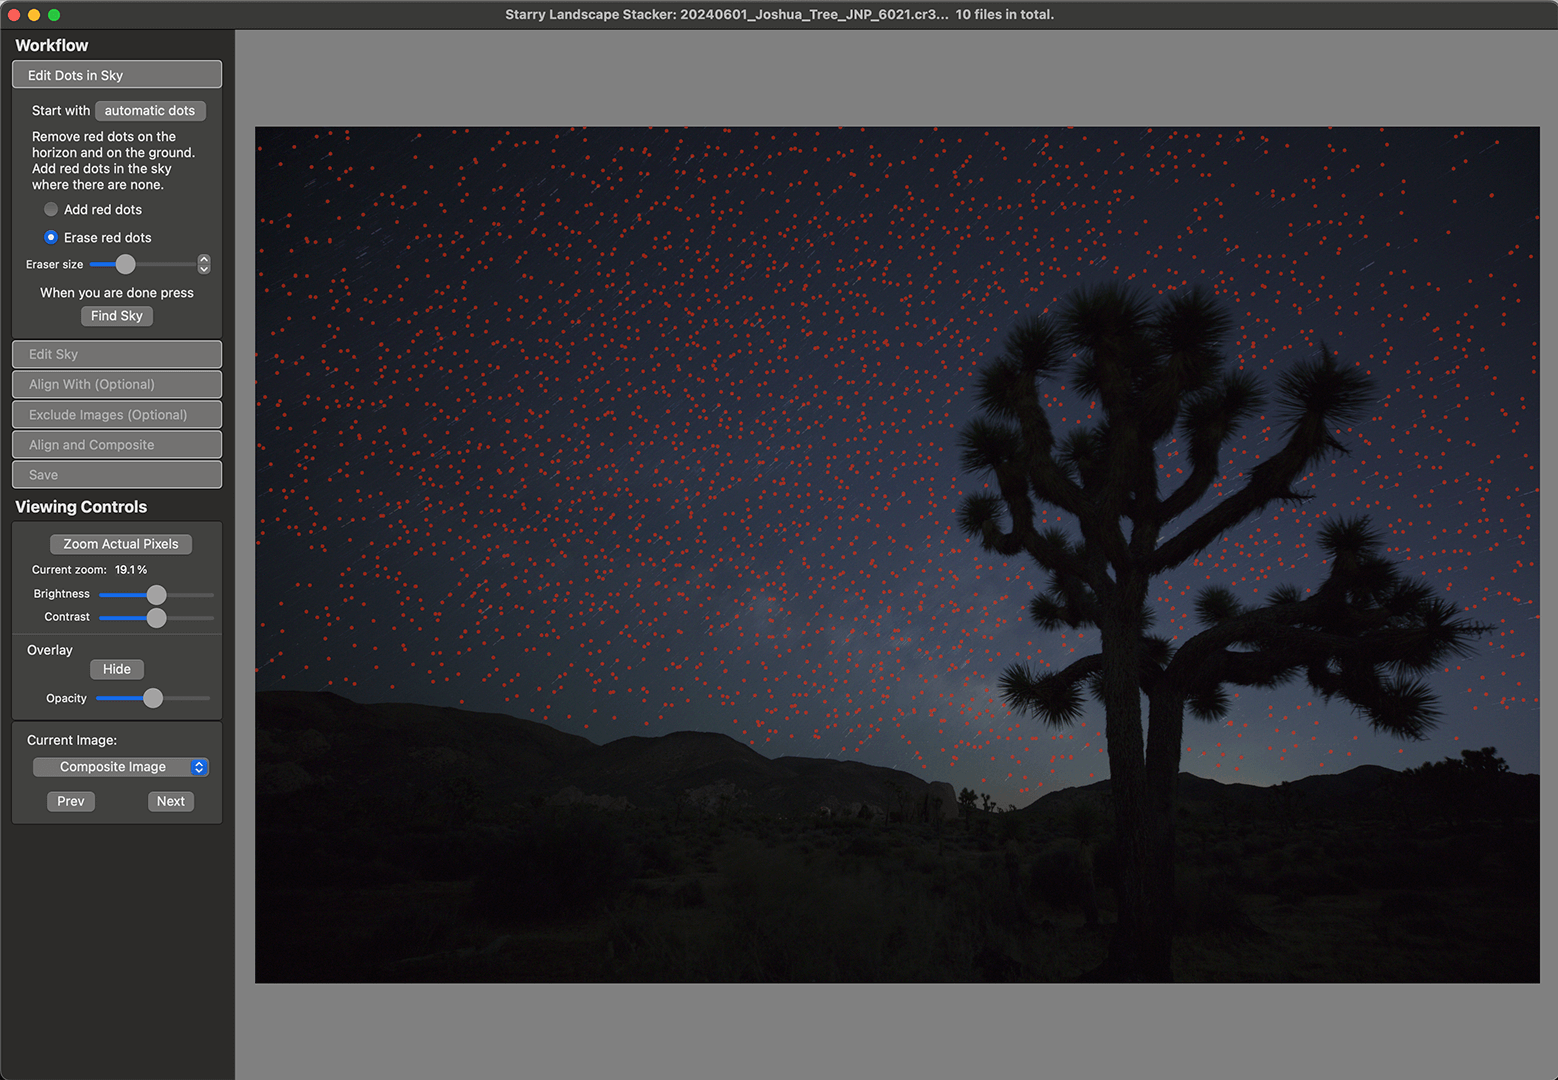
If you see any red dots in your foreground, select ‘Erase red dots,’ move the cursor with a green ring over them, and left-click to remove them. Then click on the button, ‘Find Sky’.

Starry Landscape Stacker will create a blue mask where it thinks the sky is. Select sky or ground and paint in or remove the mask to fine-tune it. In this example, the top right-hand corner of the sky isn’t in the mask (i.e., it’s shown as black). Paint over it so it turns blue.
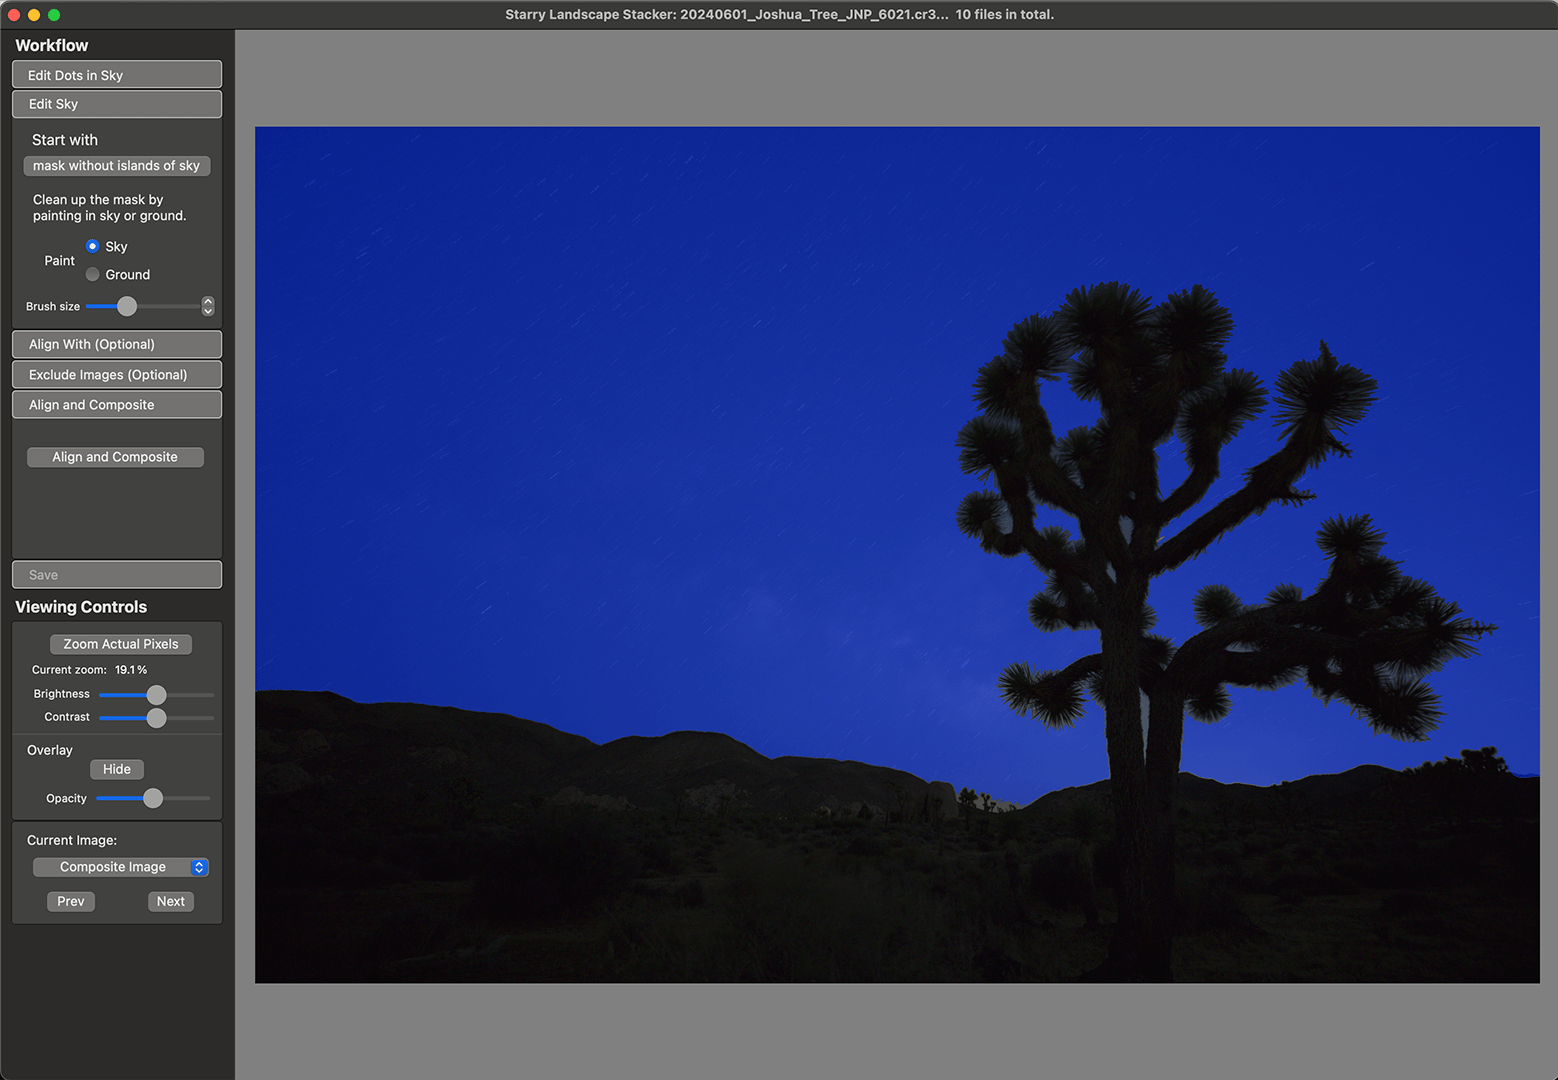
Now, you should have a clean blue mask that includes all the sky. Click on ‘Align and Composite’. The software will cycle through all your uploaded images and create a new TIFF image that is sharper and has less digital noise. You can select from six different Composition Algorithms - I normally use Min Horizon Noise.
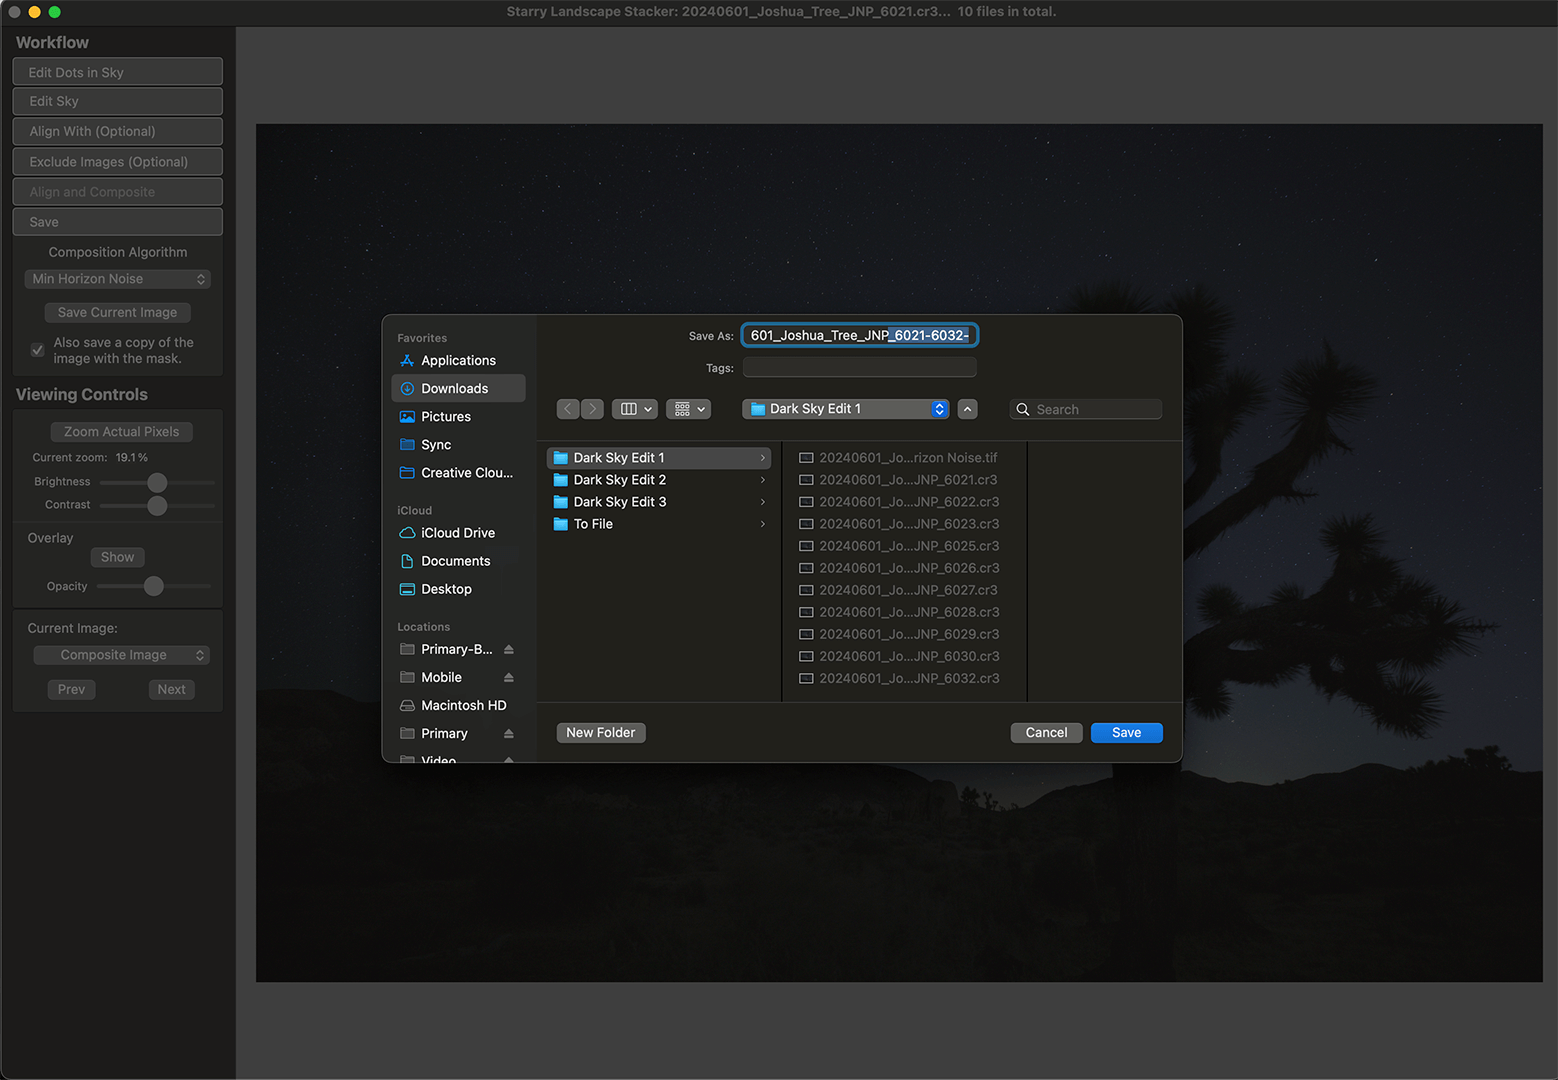
Click on ‘Save Current Image’. In addition to the reduced noise image, you can also choose to save the mask (the foreground in your image). This is very useful if you want to create a composite image using a foreground image shot in the blue hour (with more foreground detail) with a dark sky image of the Milky Way.
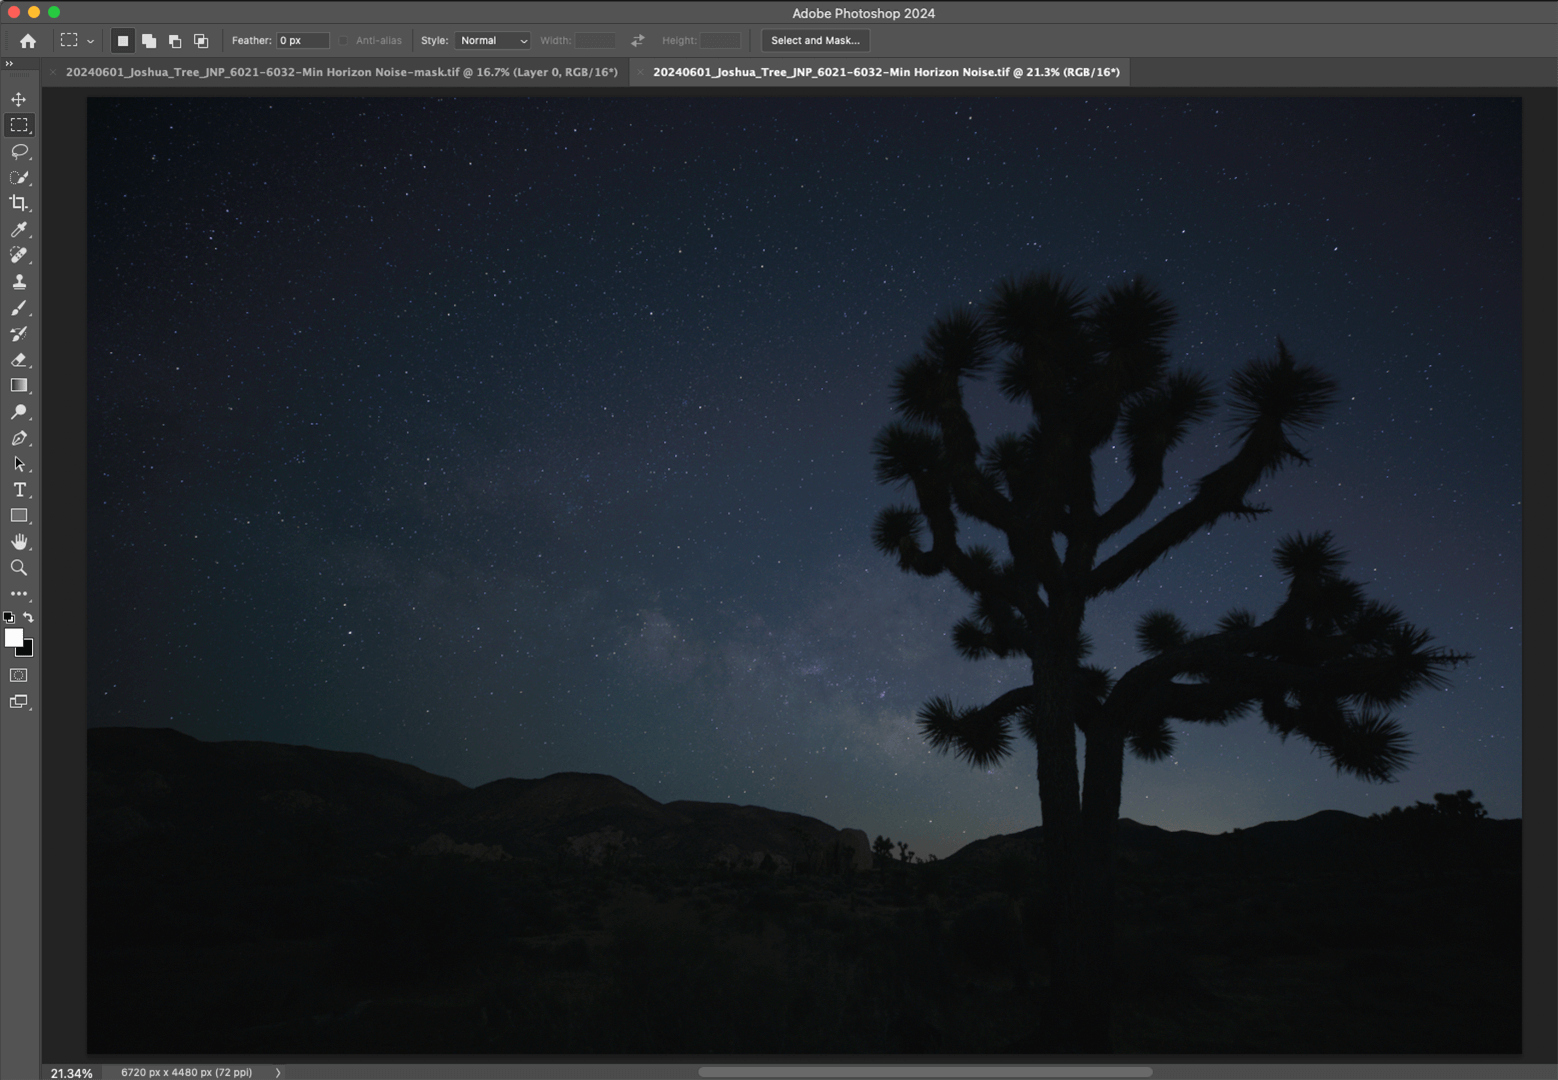
The reduced noise image is now ready for editing. Refer to my Milky Way Editing Workflow post for details on how to edit.
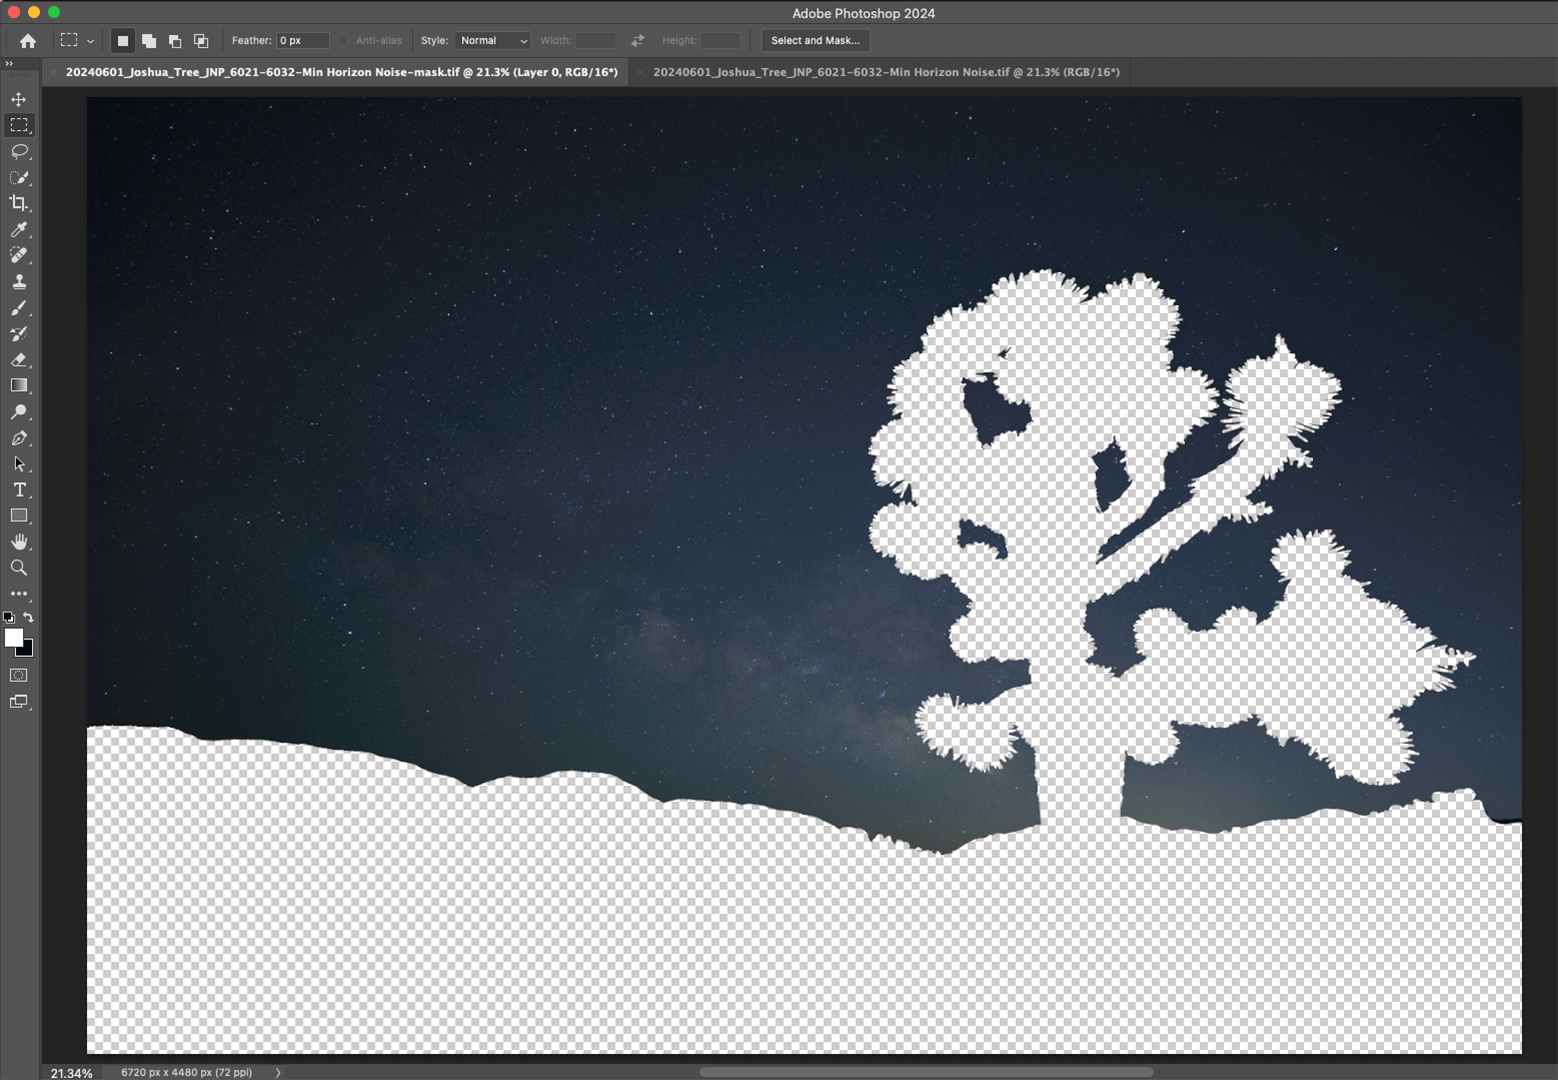
The foreground mask is saved in parallel (optional) with the reduced noise image.