Milky Way Editing Workflow
Explore Landscapes #35
As you get into dark sky photography/astrophotography, whichever term you prefer, there’s much to learn. In this post I focus on post-processing/editing.
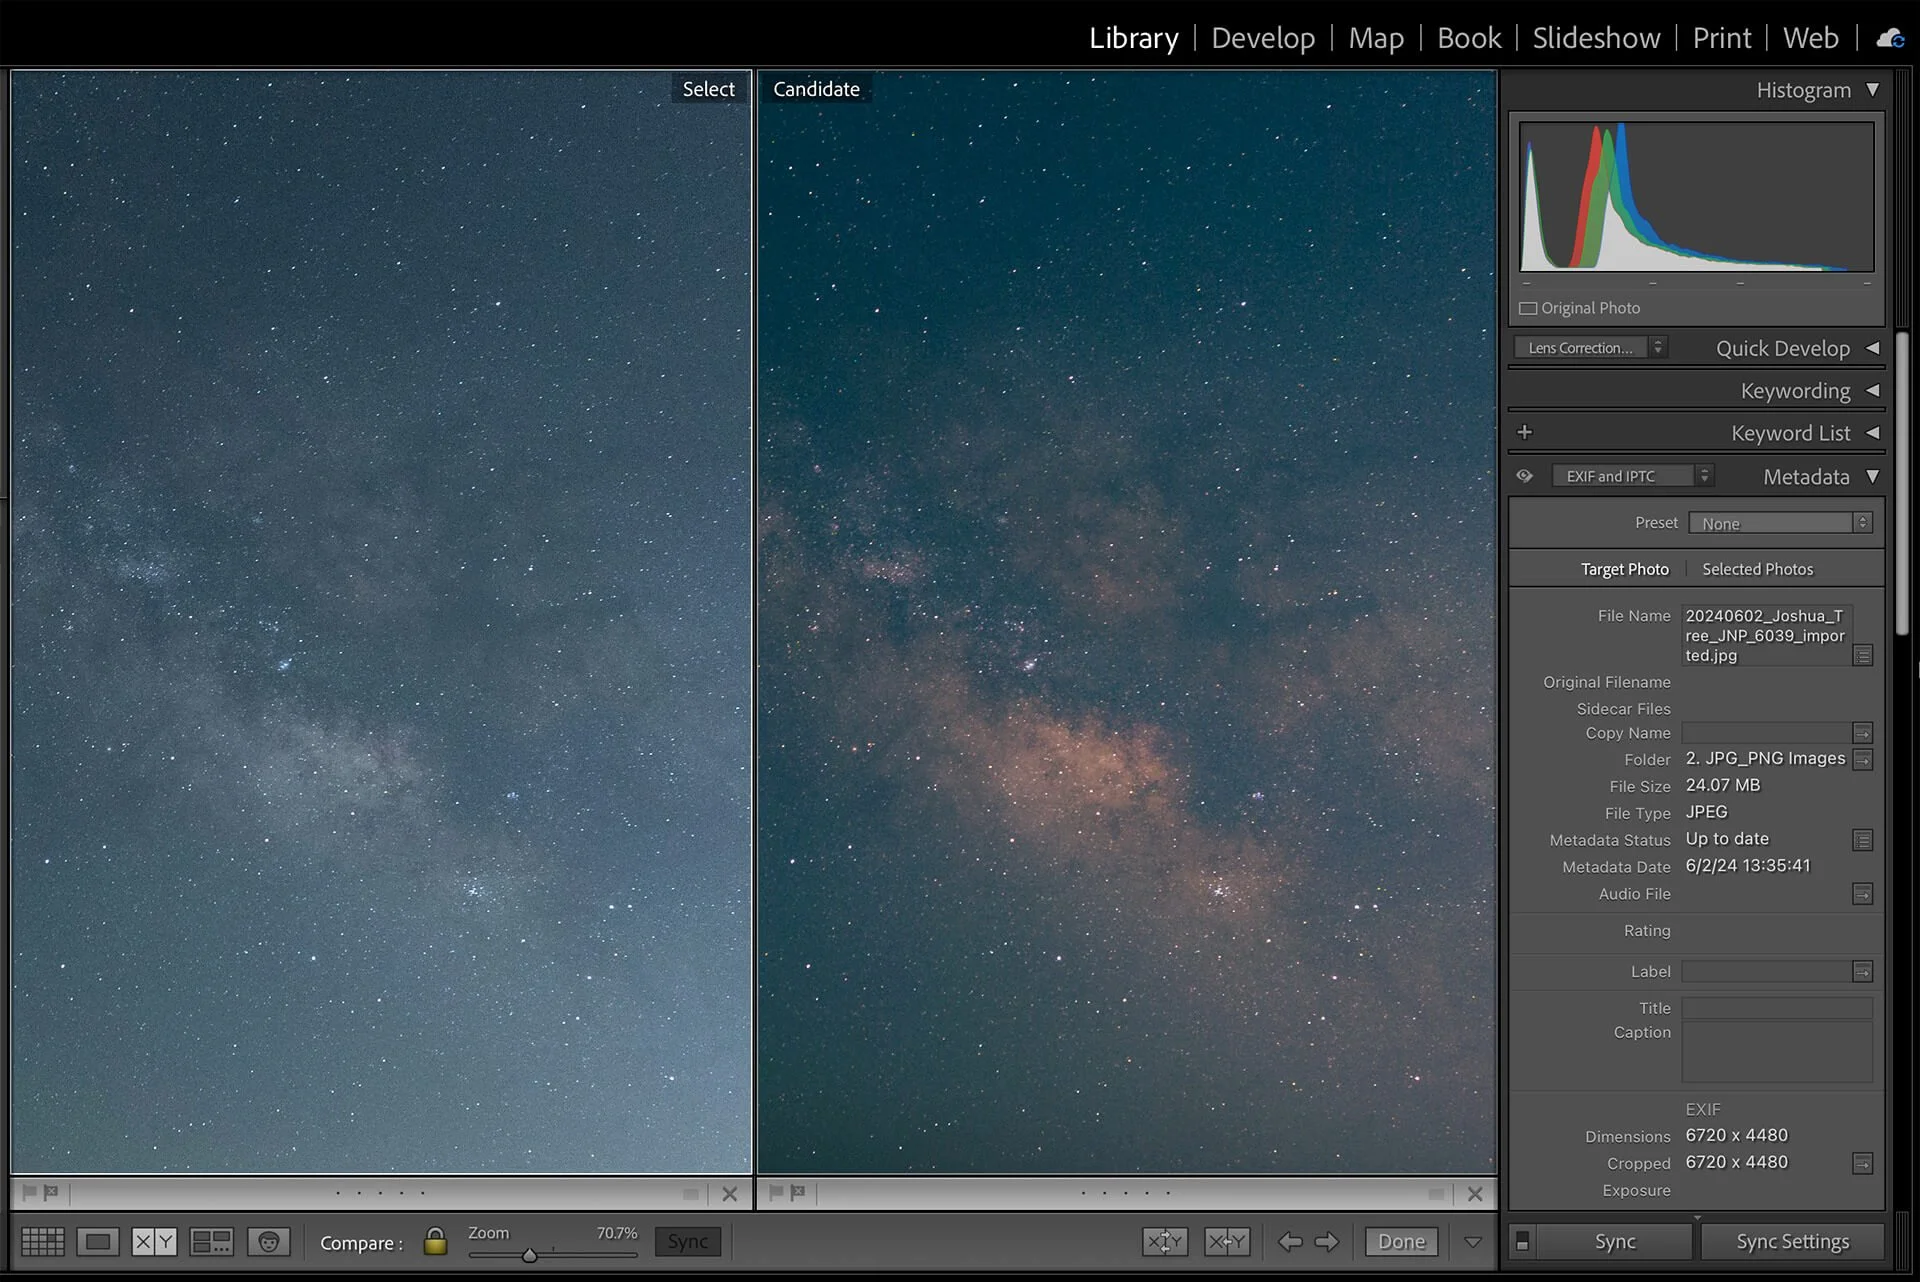
Before Editing (L) and After Editing (R)
One of my Dark Sky workshop attendees and newsletter subscribers requested this post, and I'm happy to oblige (thanks for the request, Dean). Here’s the workflow I use to edit my Milky Way images.
There is no one ‘right or wrong way’ to edit your images, but this is the workflow I use, and it gets me where I want to go with my final images.
I use Lightroom (and sometimes) Photoshop for all my post-processing and editing, so my workflow refers to the specific tool panels in Lightroom. The workflow should read across to other editing software; however, some features/panels may be called something slightly different.
Workflow Steps
1. Workflow Order
Here’s the order I suggest for editing (not just for Milky Way edits):
Global edits (i.e. edits that affect the whole image)
Local edits (i.e. edits that affect just one specific area of an image)
Spot healing
Photoshop (if you can’t do everything you want to in Lightroom). I try to avoid this if possible, but there are some cases, e.g. blending layers, where you’ll have to use Photoshop.
2. Set Lightroom Defaults
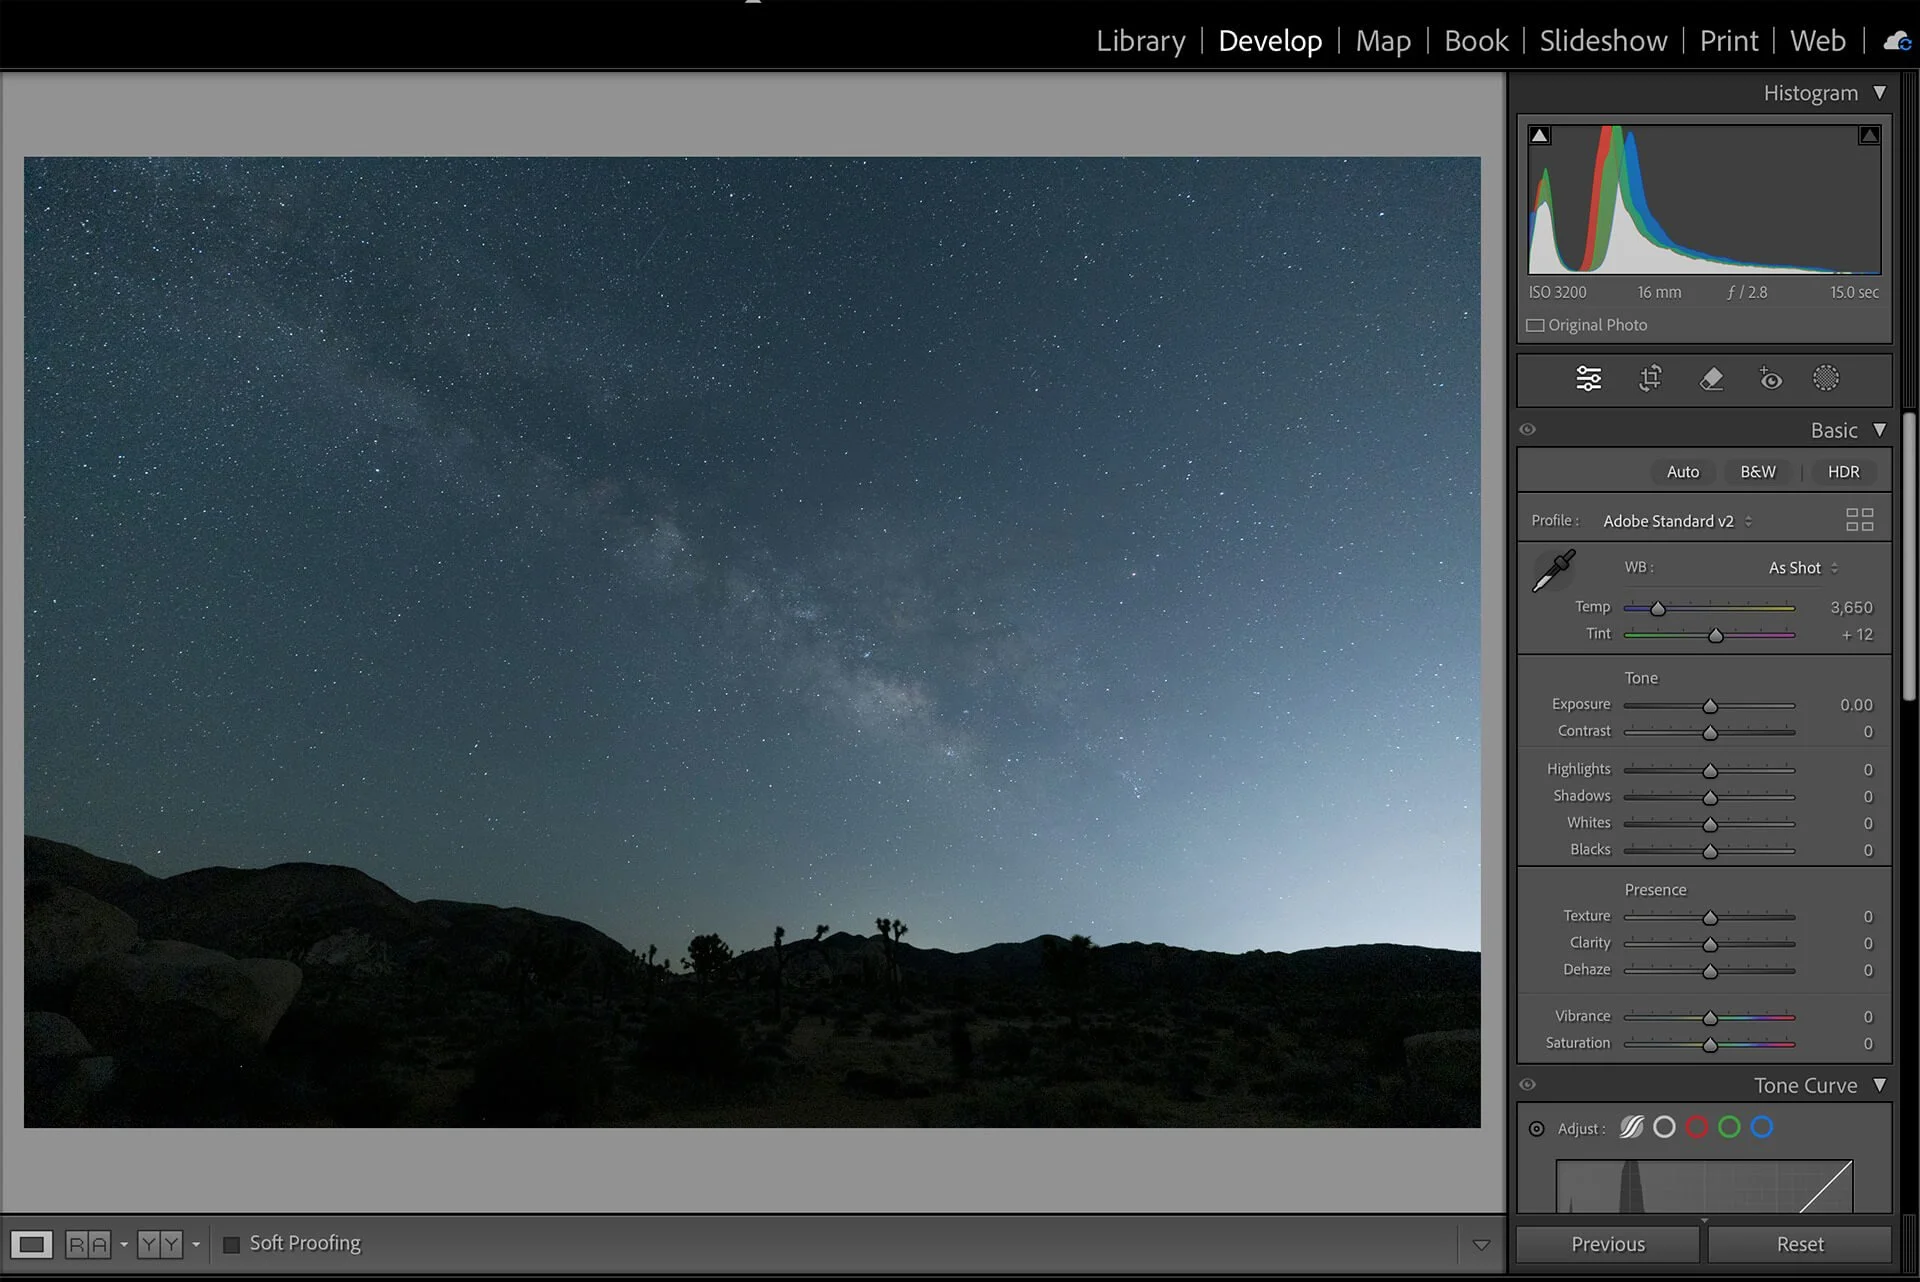
Set the Profile to Adobe Standard v2
Open your Milky Way RAW image, and in the Basic Panel, set the Profile to Adobe Standard v2. For now, turn off the Detail panel's sharpening and noise reduction (luminance and color). Select Remove Chromatic Aberration and Enable Profile Corrections in the Lens Correction panel.
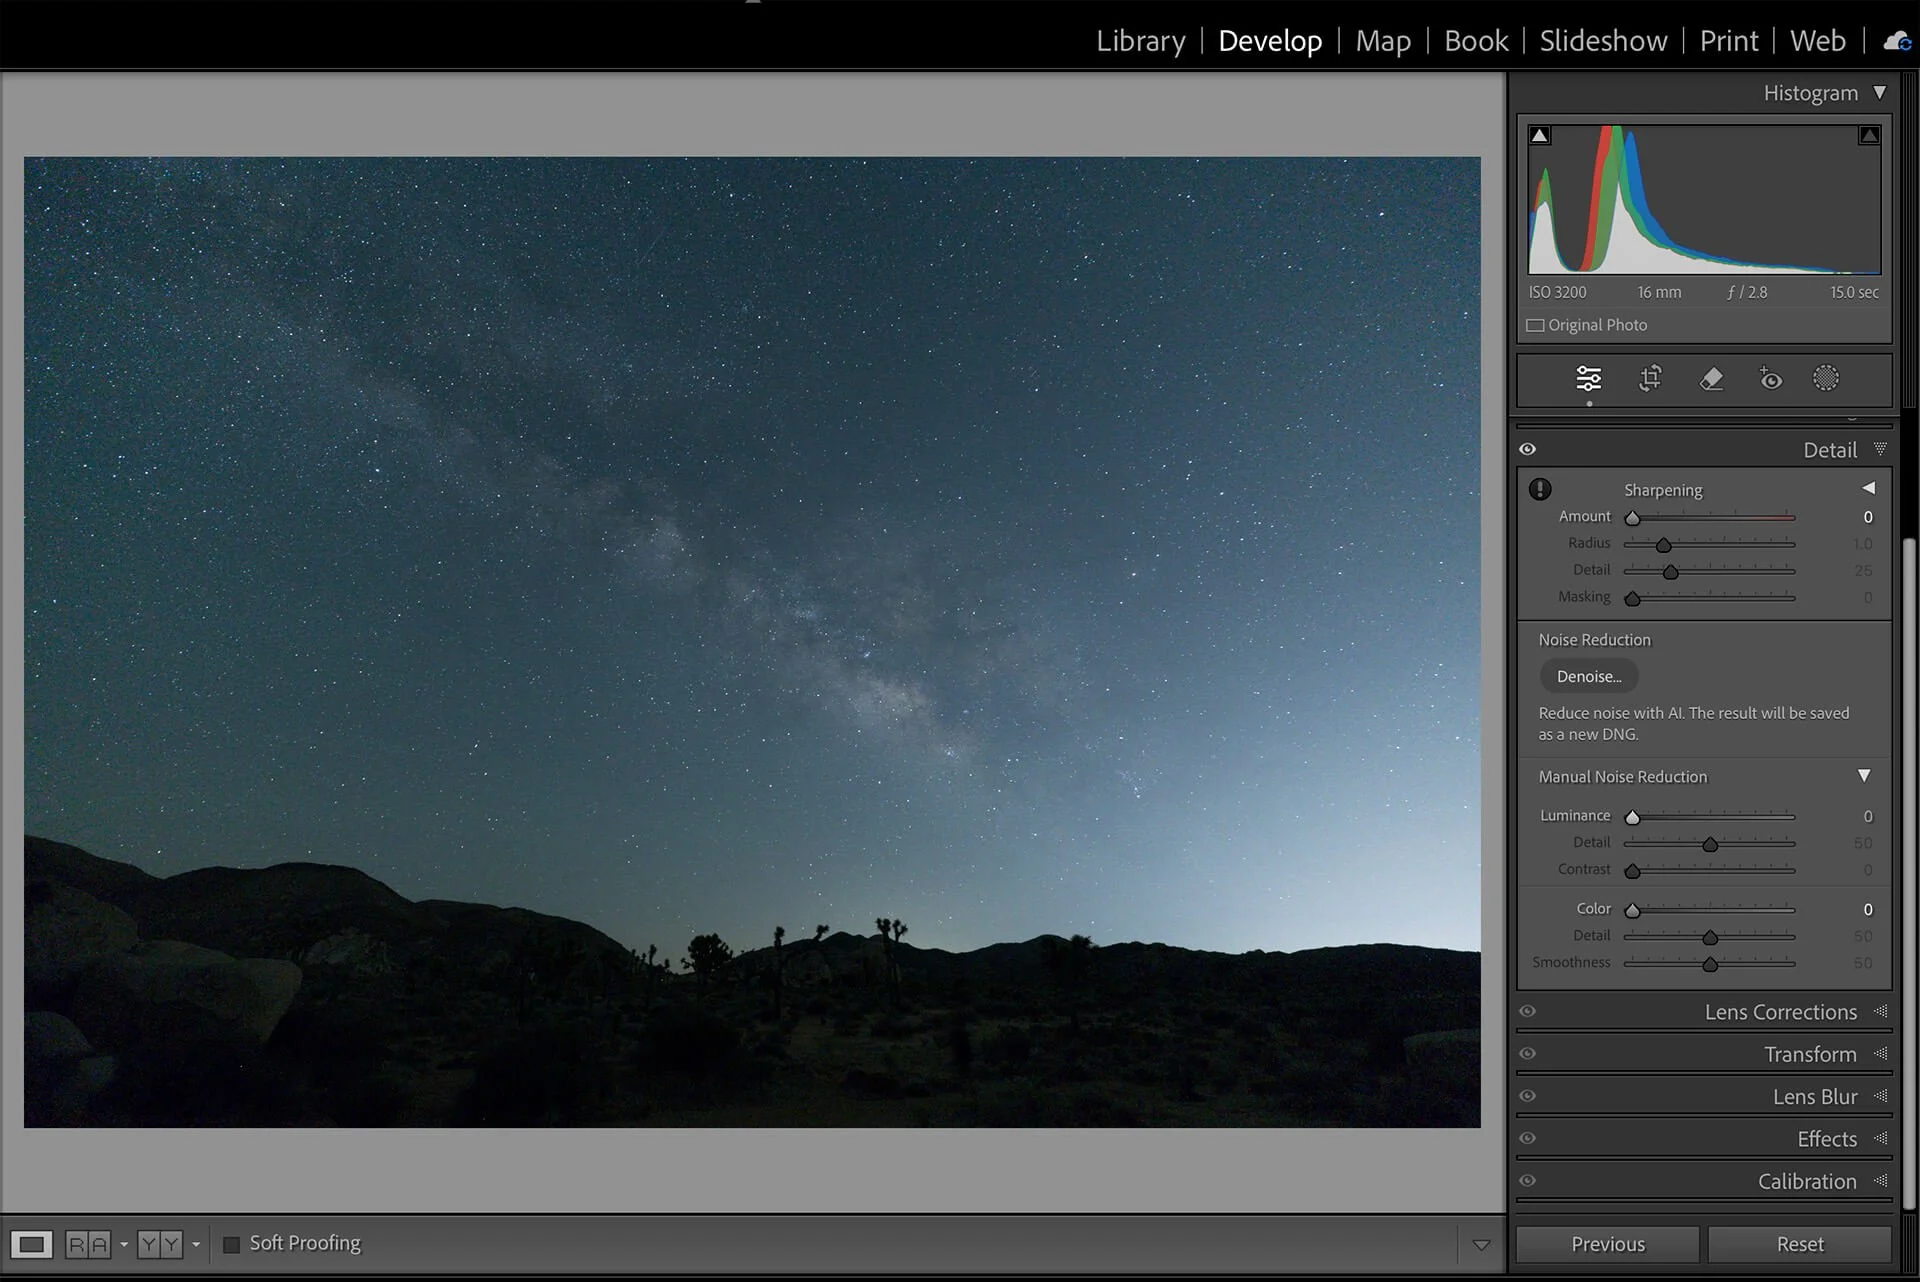
Turn off sharpening and noise reduction
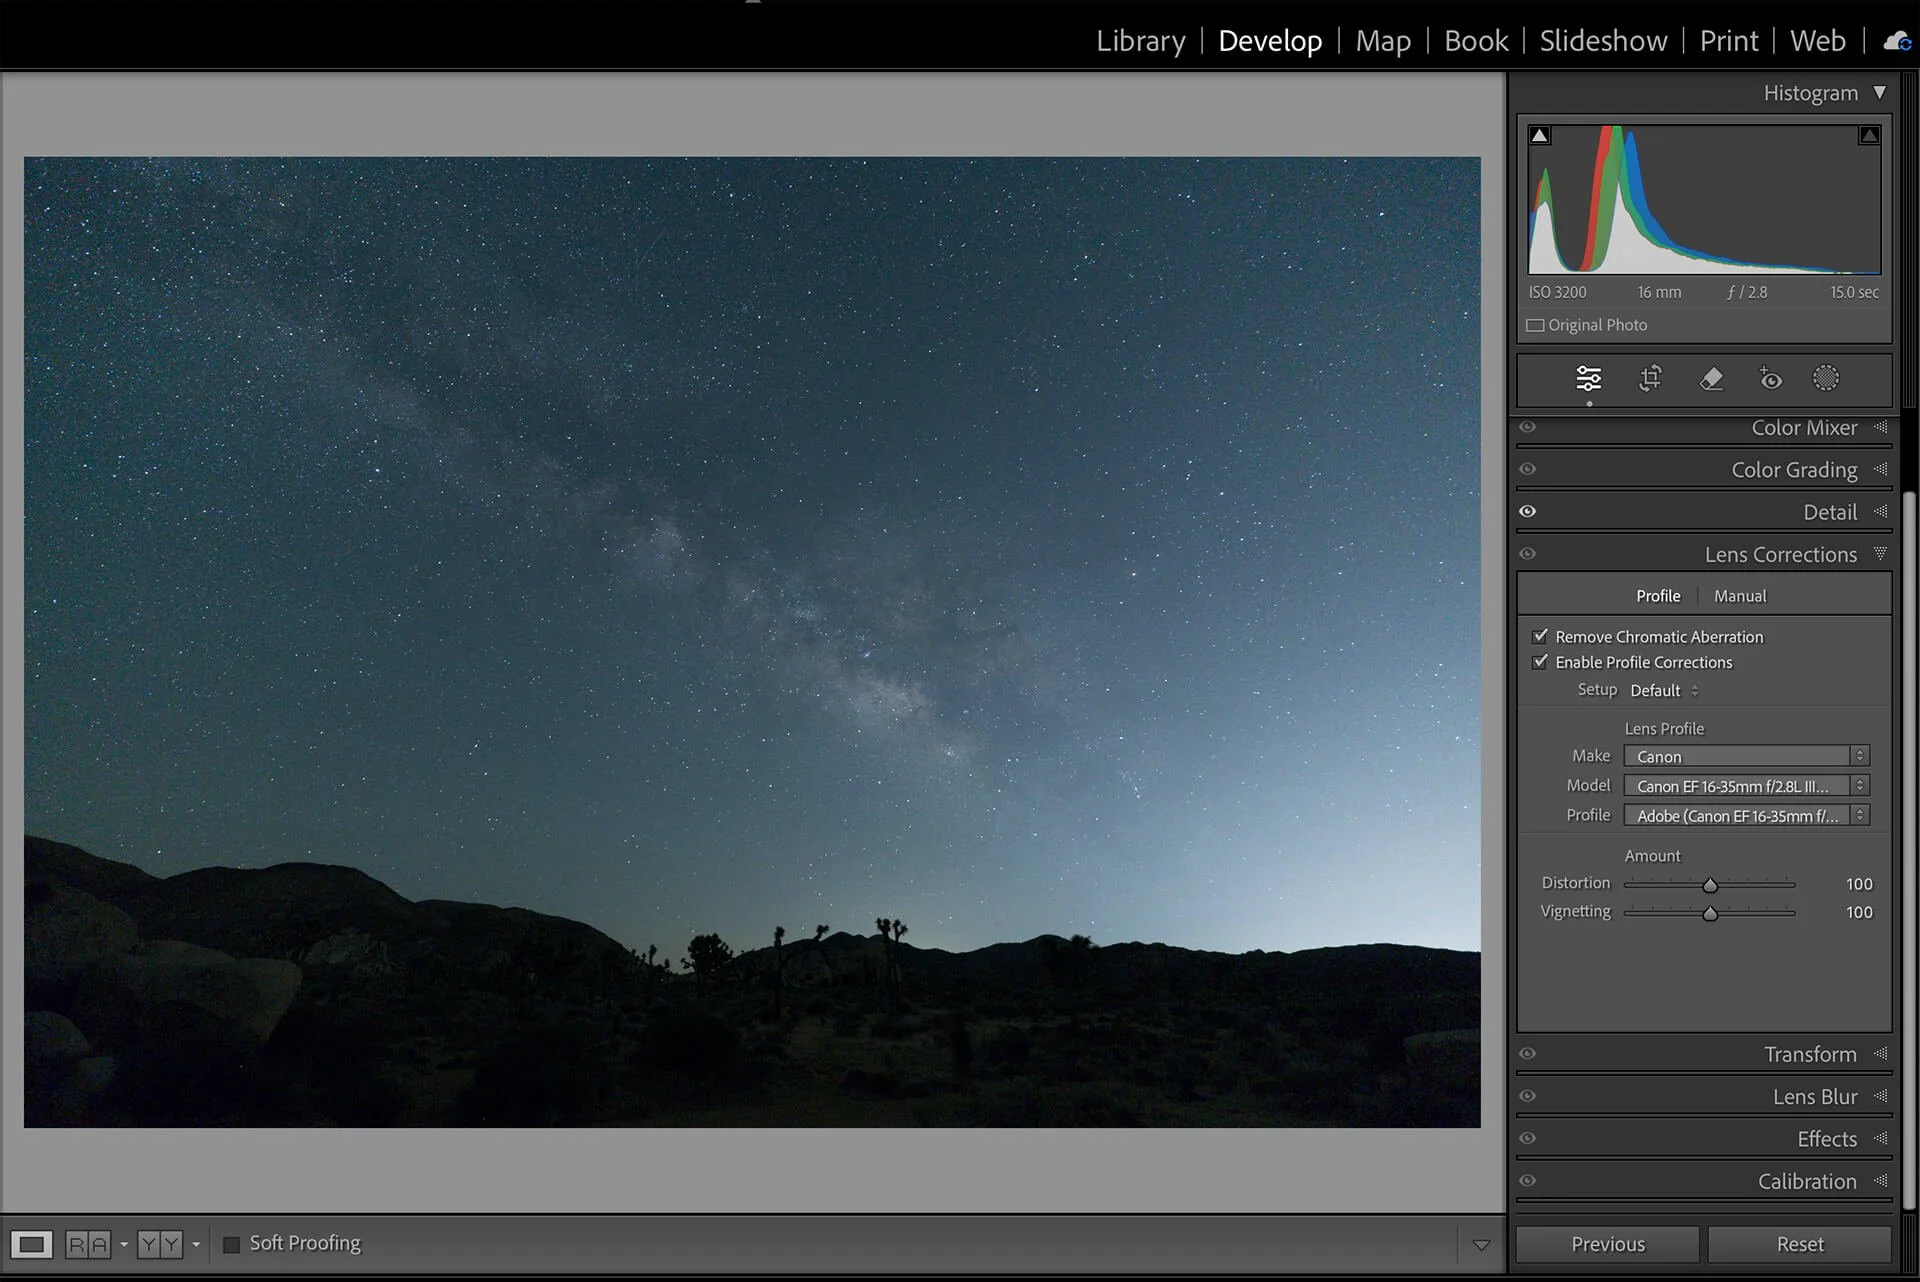
Remove Chromatic Aberration and Enable Profile Corrections
3. Crop Photo
Crop your photo before continuing to your preferred composition and aspect ratio. For this example image, I didn’t crop.
Find a Neutral White Balance
When I shoot dark sky photographs (Milky Way and Star Trails), I recommend setting the White Balance to around 3,500K. -to help visualize the scene's brightness/exposure on the back of your camera. This is a good starting point and is approximately the color temperature of a dark sky - but that varies depending on where you’re shooting, moon phase, light pollution, etc. As you shoot in RAW, it really doesn’t matter what white balance setting you use, as it’s independent of the light information recorded in the camera.
Rather than using the WB eyedropper tool to set your white point (which is very difficult with a dark sky), boost vibrance and saturation to 100 (temporarily) so you can see the range of colors present.
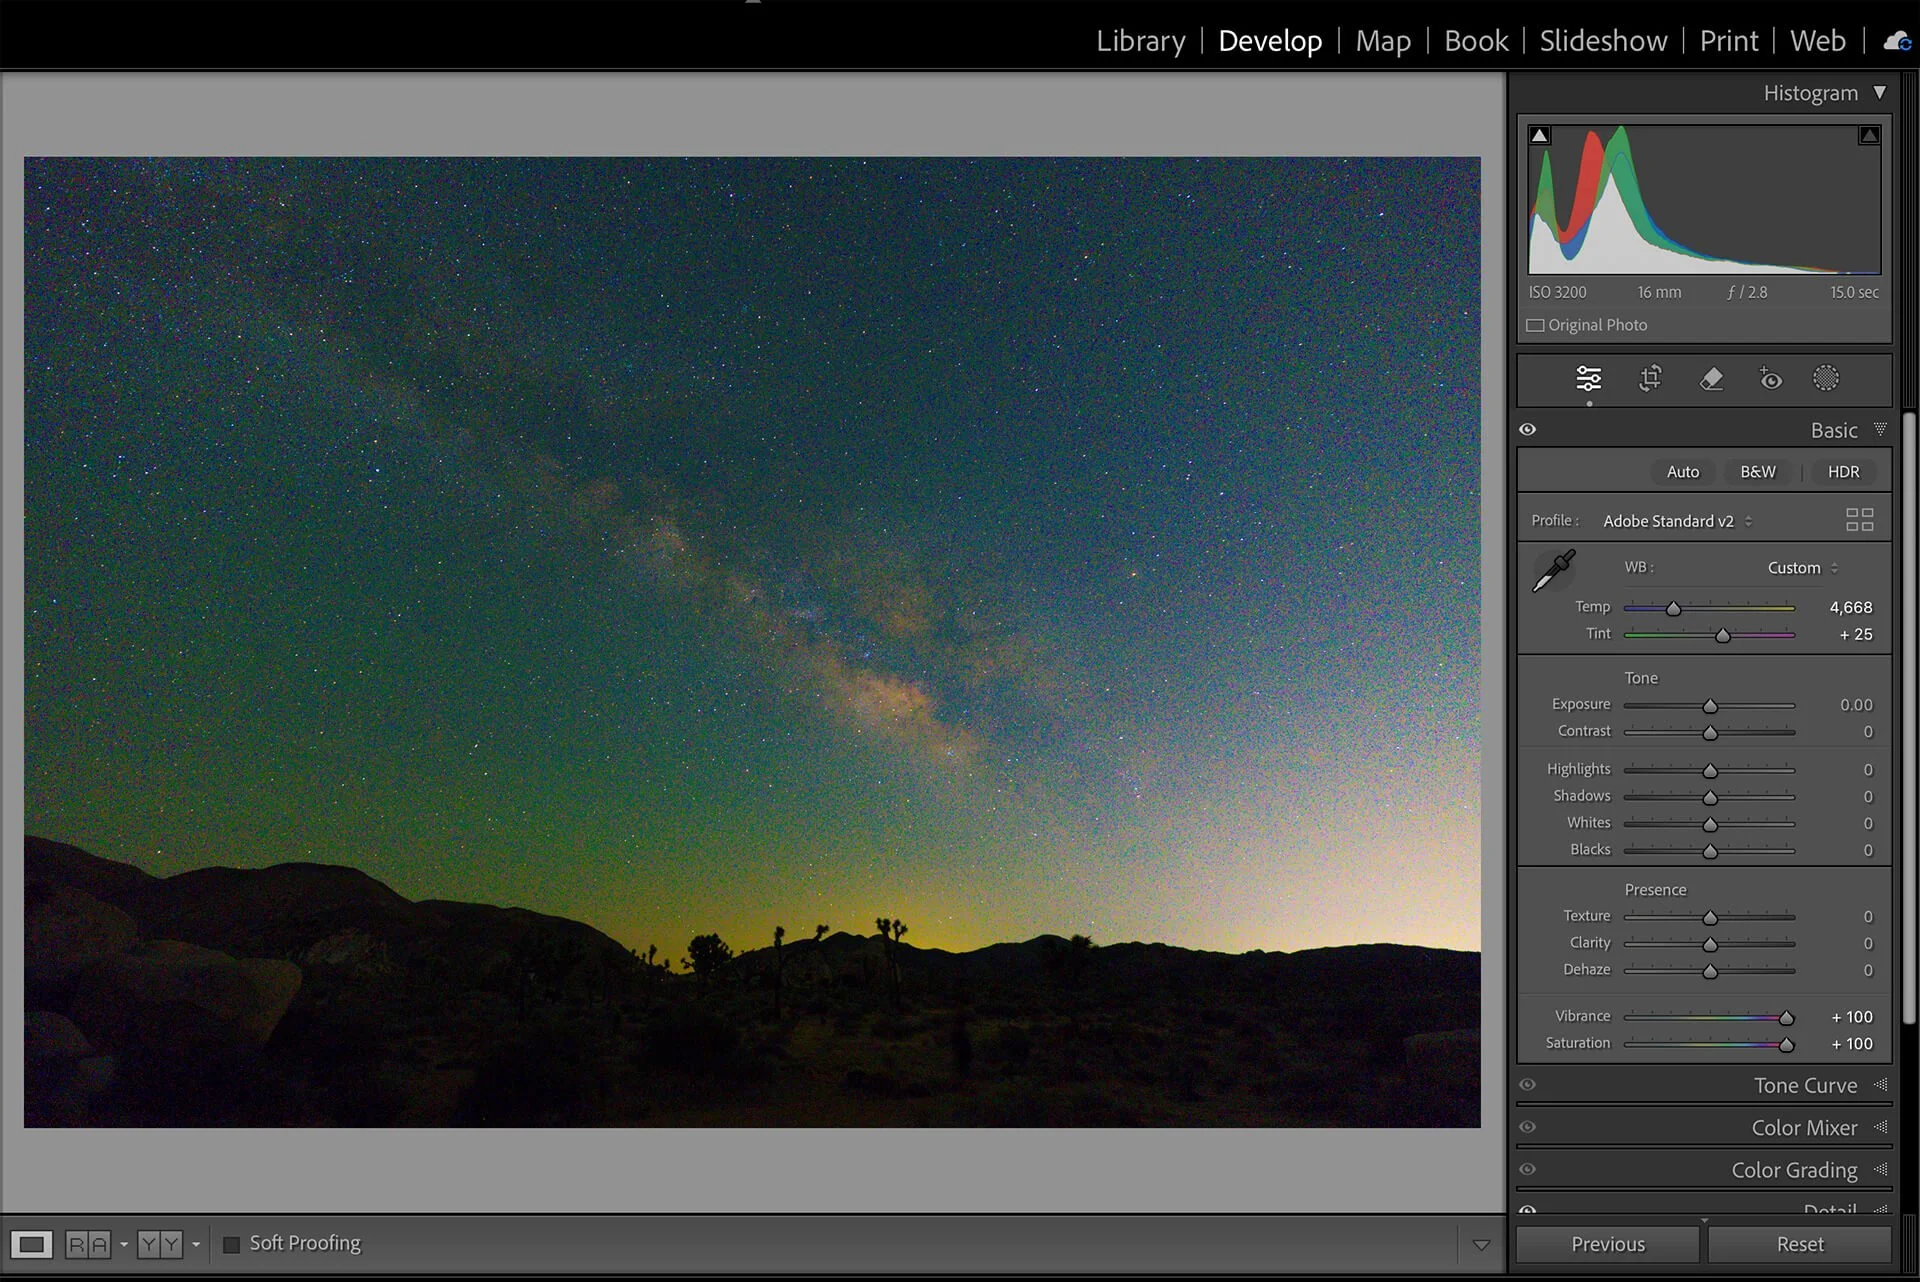
Boost vibrance and saturation to 100 (yes, it looks funky)
Next, move the color temperature and tint sliders back and forth until there’s a good balance/mix of colors in the sky. Then, reset the vibrance and saturation sliders back to zero. I like to add a little magenta at this stage, so move the Tint slider up to approximately +20 to +25.
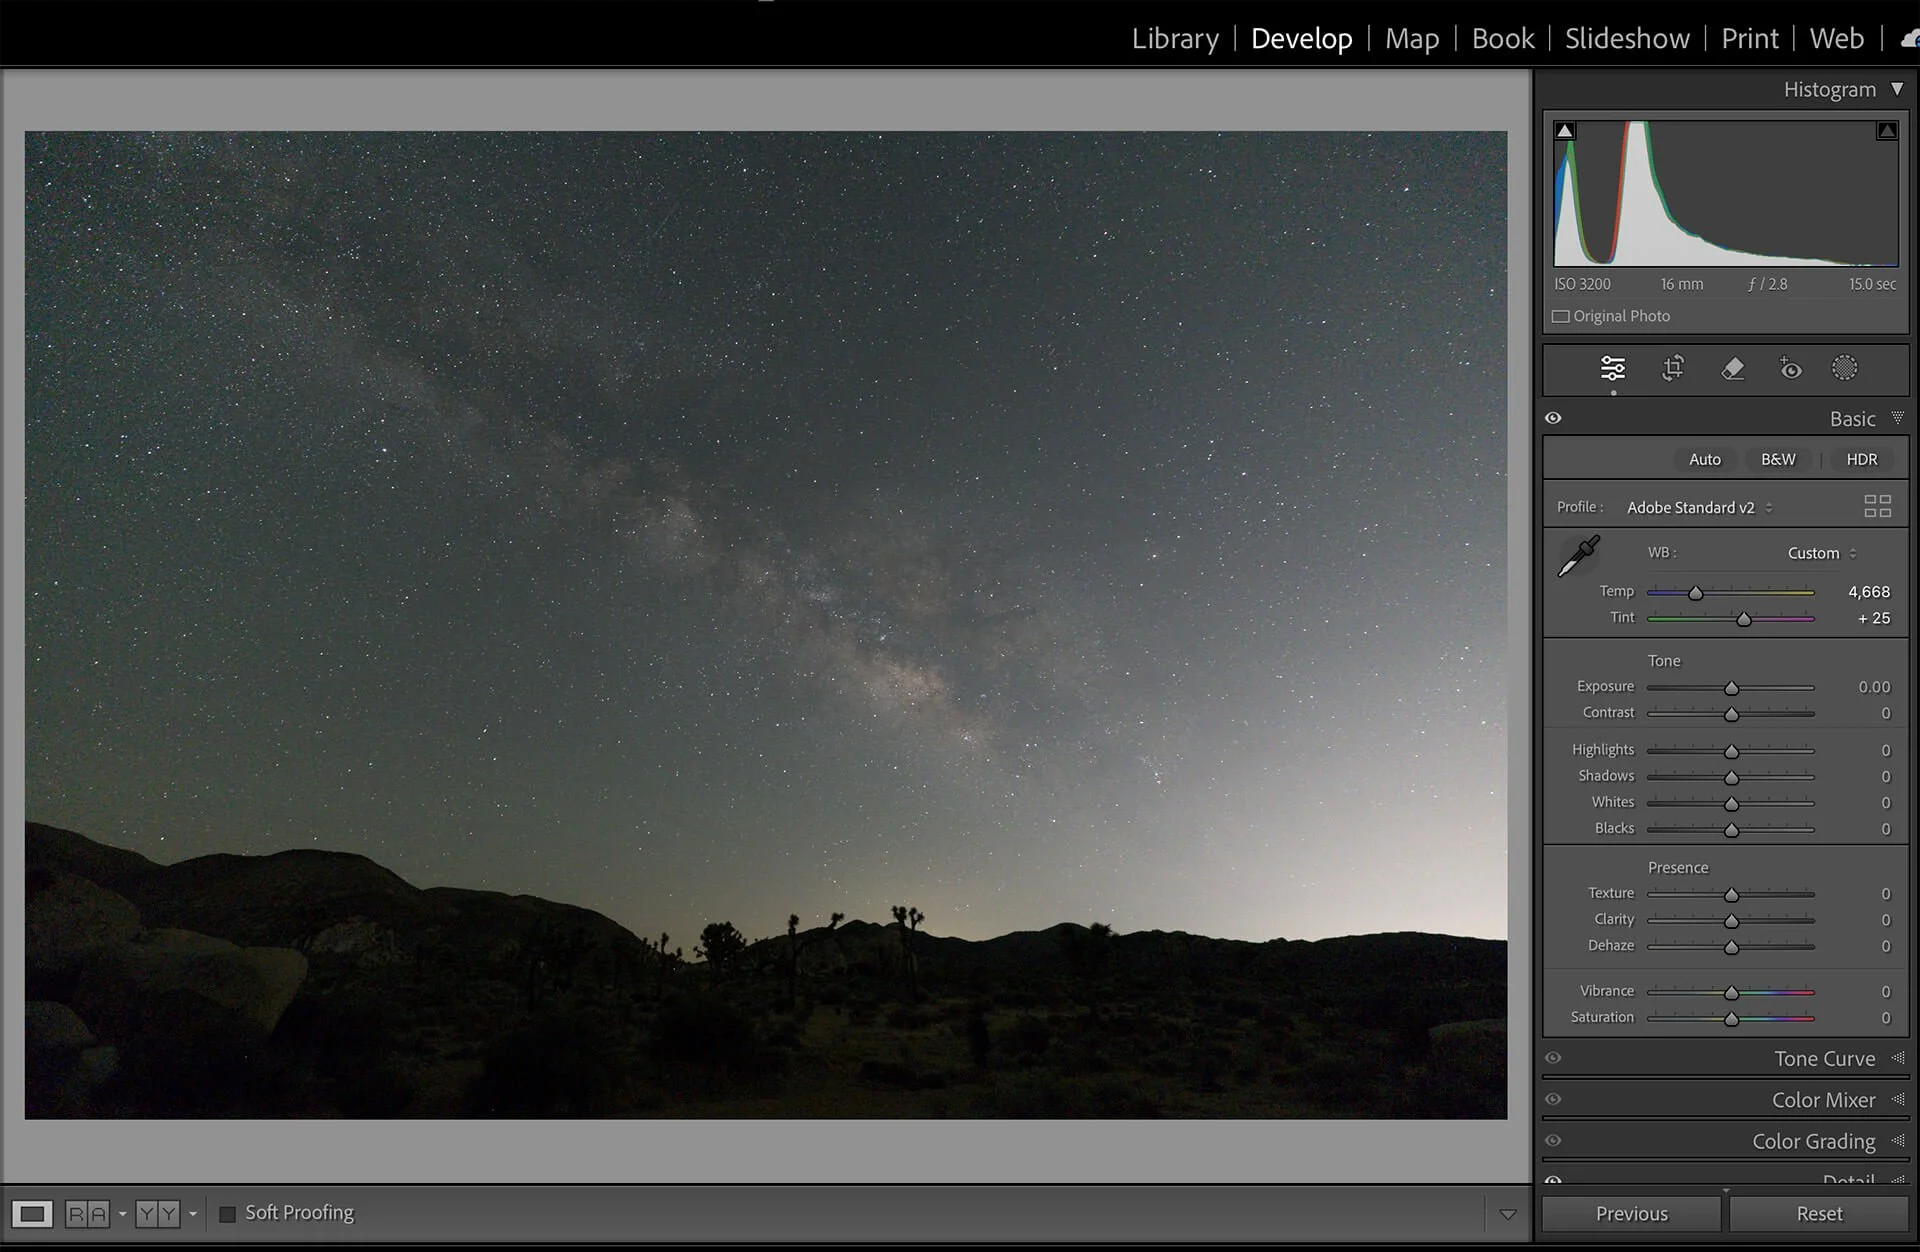
Reset the vibrance and saturation sliders back to zero
5. Use the Basic and Tone Curve Panels to make Global Edits
The next step is to use the Basic and Tone Curve panels to make global changes to brightness and contrast. There are no hard and fixed rules for this; it depends on the scene photographed and your personal editing style and taste. My one recommendation would be to make changes slowly and in moderation. Remember, it’s nighttime in your image, so don’t be tempted to overly brighten things too much.
I like to increase the dynamic range in the image by increasing the highlights (+15 to +25) and reducing the shadows (-15 to -25), likewise increasing the whites (+5 to +10) and reducing the blacks (-5 to -10).
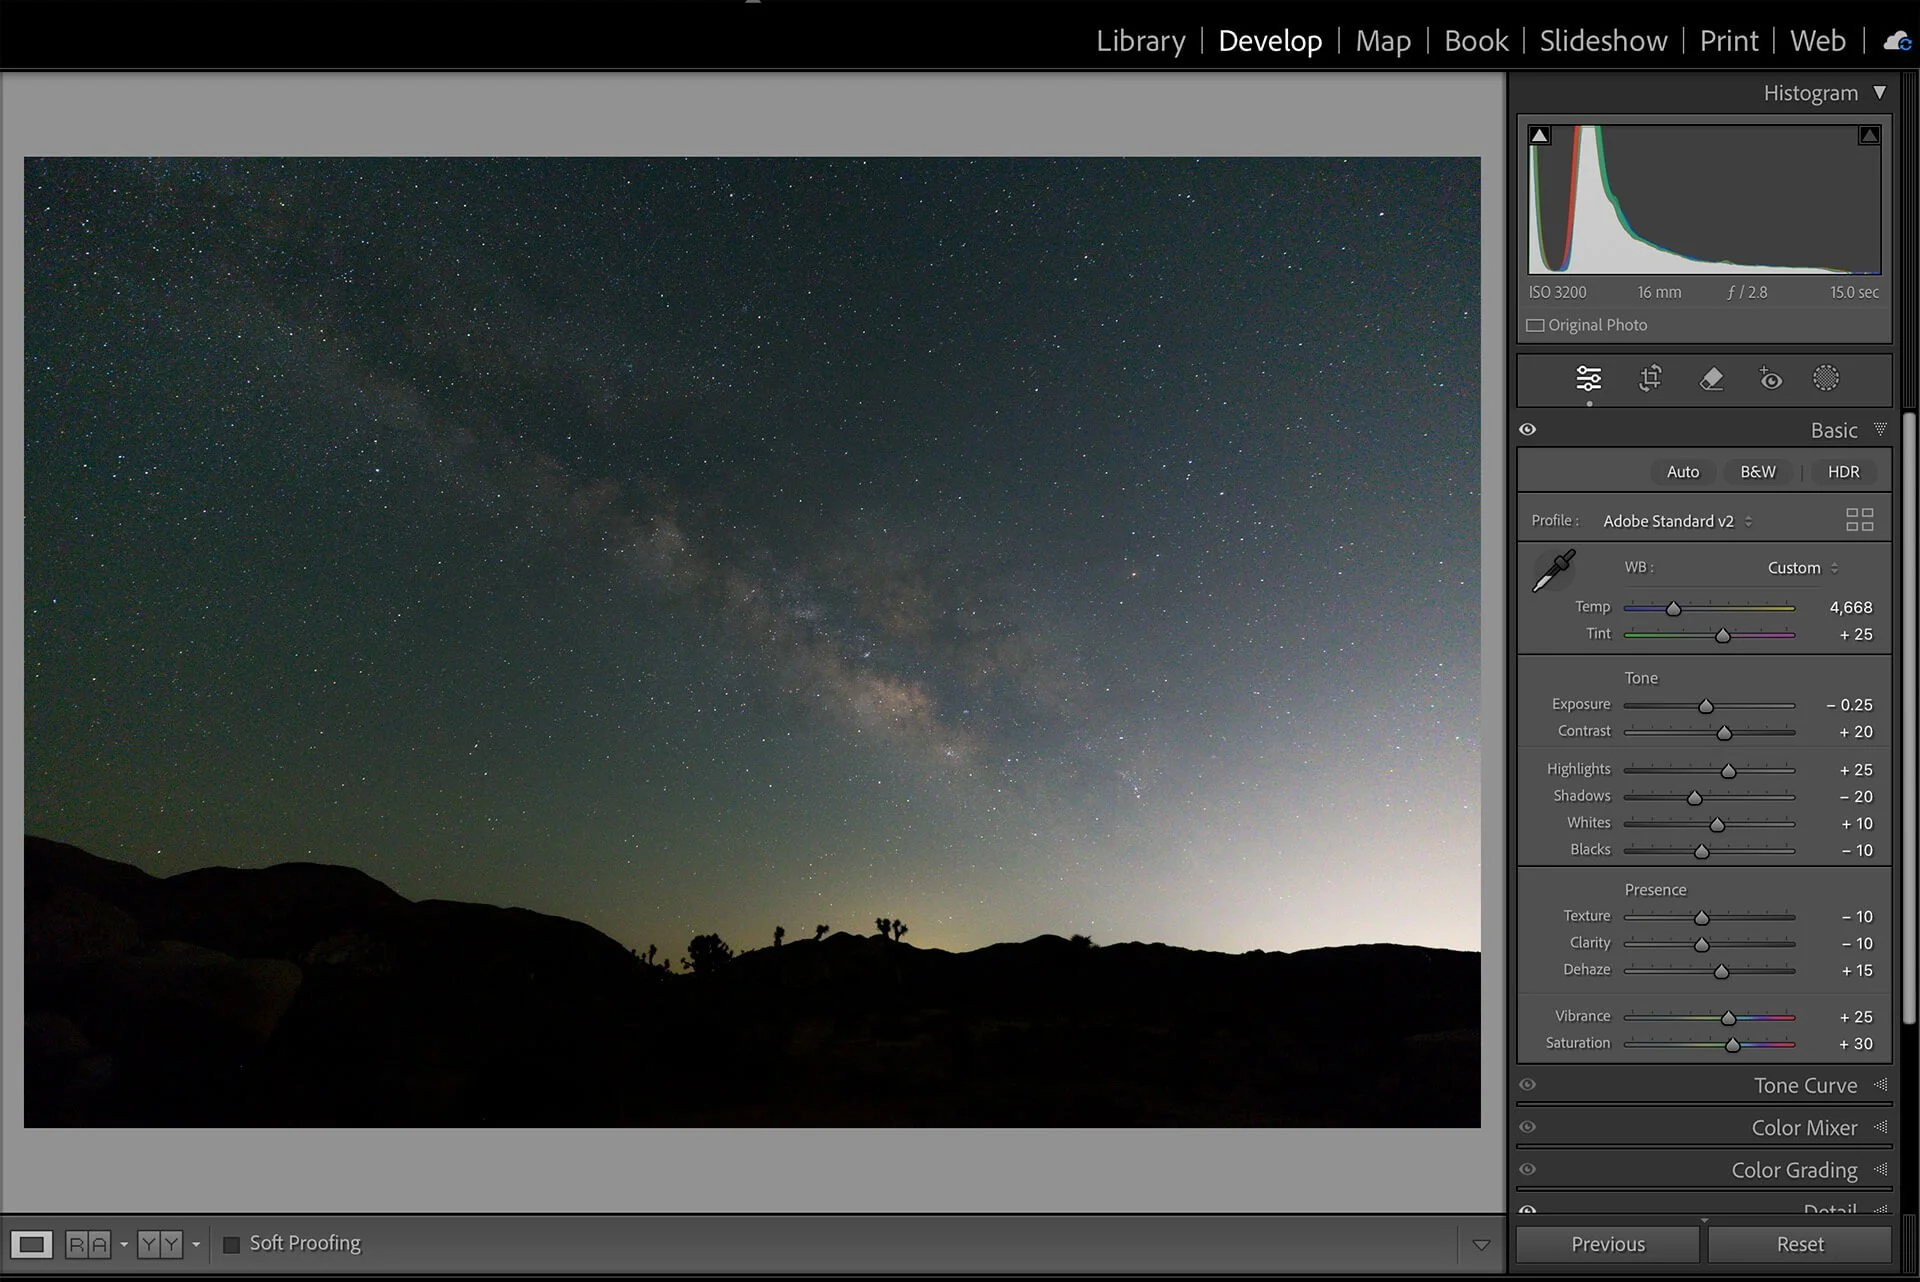
Global Edits in the Basic Panel
Slightly lower the texture and clarity sliders (-5 to -15 usually works) to give the stars a subtler, more refined look and feel.
Increase the Vibrance and Saturation sliders (+20 to +30). Vibrance affects the whole image (saturating it delicately), while saturation primarily affects already saturated areas.
I use the Dehaze slider (+10 to +15) to remove haze and add further contrast to the image. It also helps to reduce light pollution (but not eliminate it).

Global Edits in the Tone Curve Panel
To further boost contrast, decrease the Exposure slider in the Basic Panel (-0.25 to -0.5) and simultaneously increase the Lights in the Tone Curve panel (+20 to +35). I also increase the Contrast slider in the Basic Panel (+10 to +25).
The Highlights slider in the Tone Curve panel is a fine edit that only affects the brightest stars. To keep that refined feel, I like to decrease it slightly (-10 to -15).
6. Use Color Grading rather than HSL Sliders
It’s time to introduce some color into the shadows and highlights. To do this, use the Color Grading panel. I like to make the shadows more blue and the highlights more orange. However, rather than the Highlights color wheel, I use the Midtones wheel instead to reduce targeting only the brightest stars.
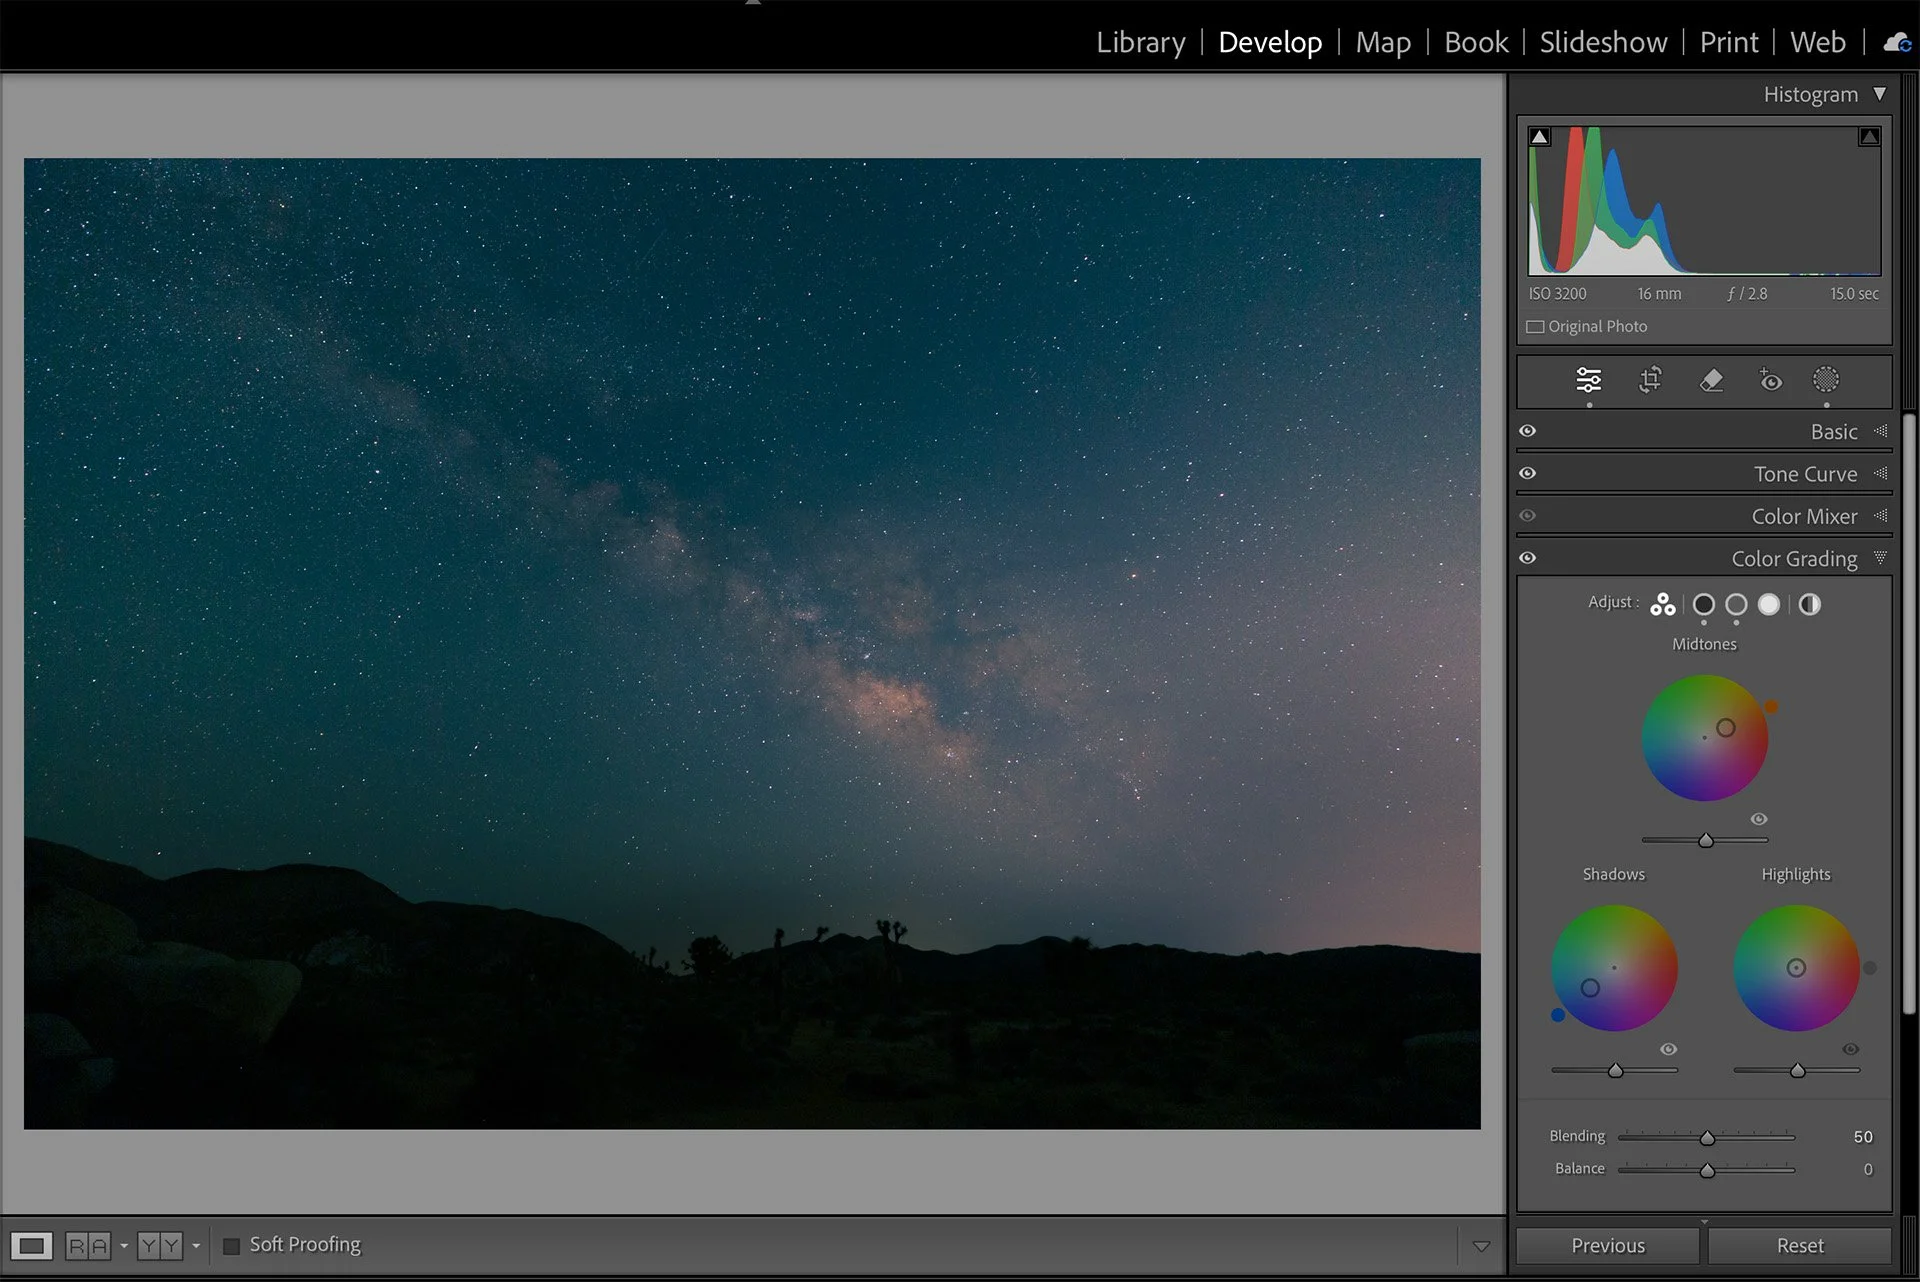
Color Grading to introduce color to midtones and shadows
7. Sharpening and Noise Reduction
I recommend not using the default Lightroom color noise reduction settings on your Milky Way images. These settings can remove the color around stars while removing color noise, which is why we turned them off in step 2. We will add some sharpening and noise reduction but retain those colorful stars without excess color noise.
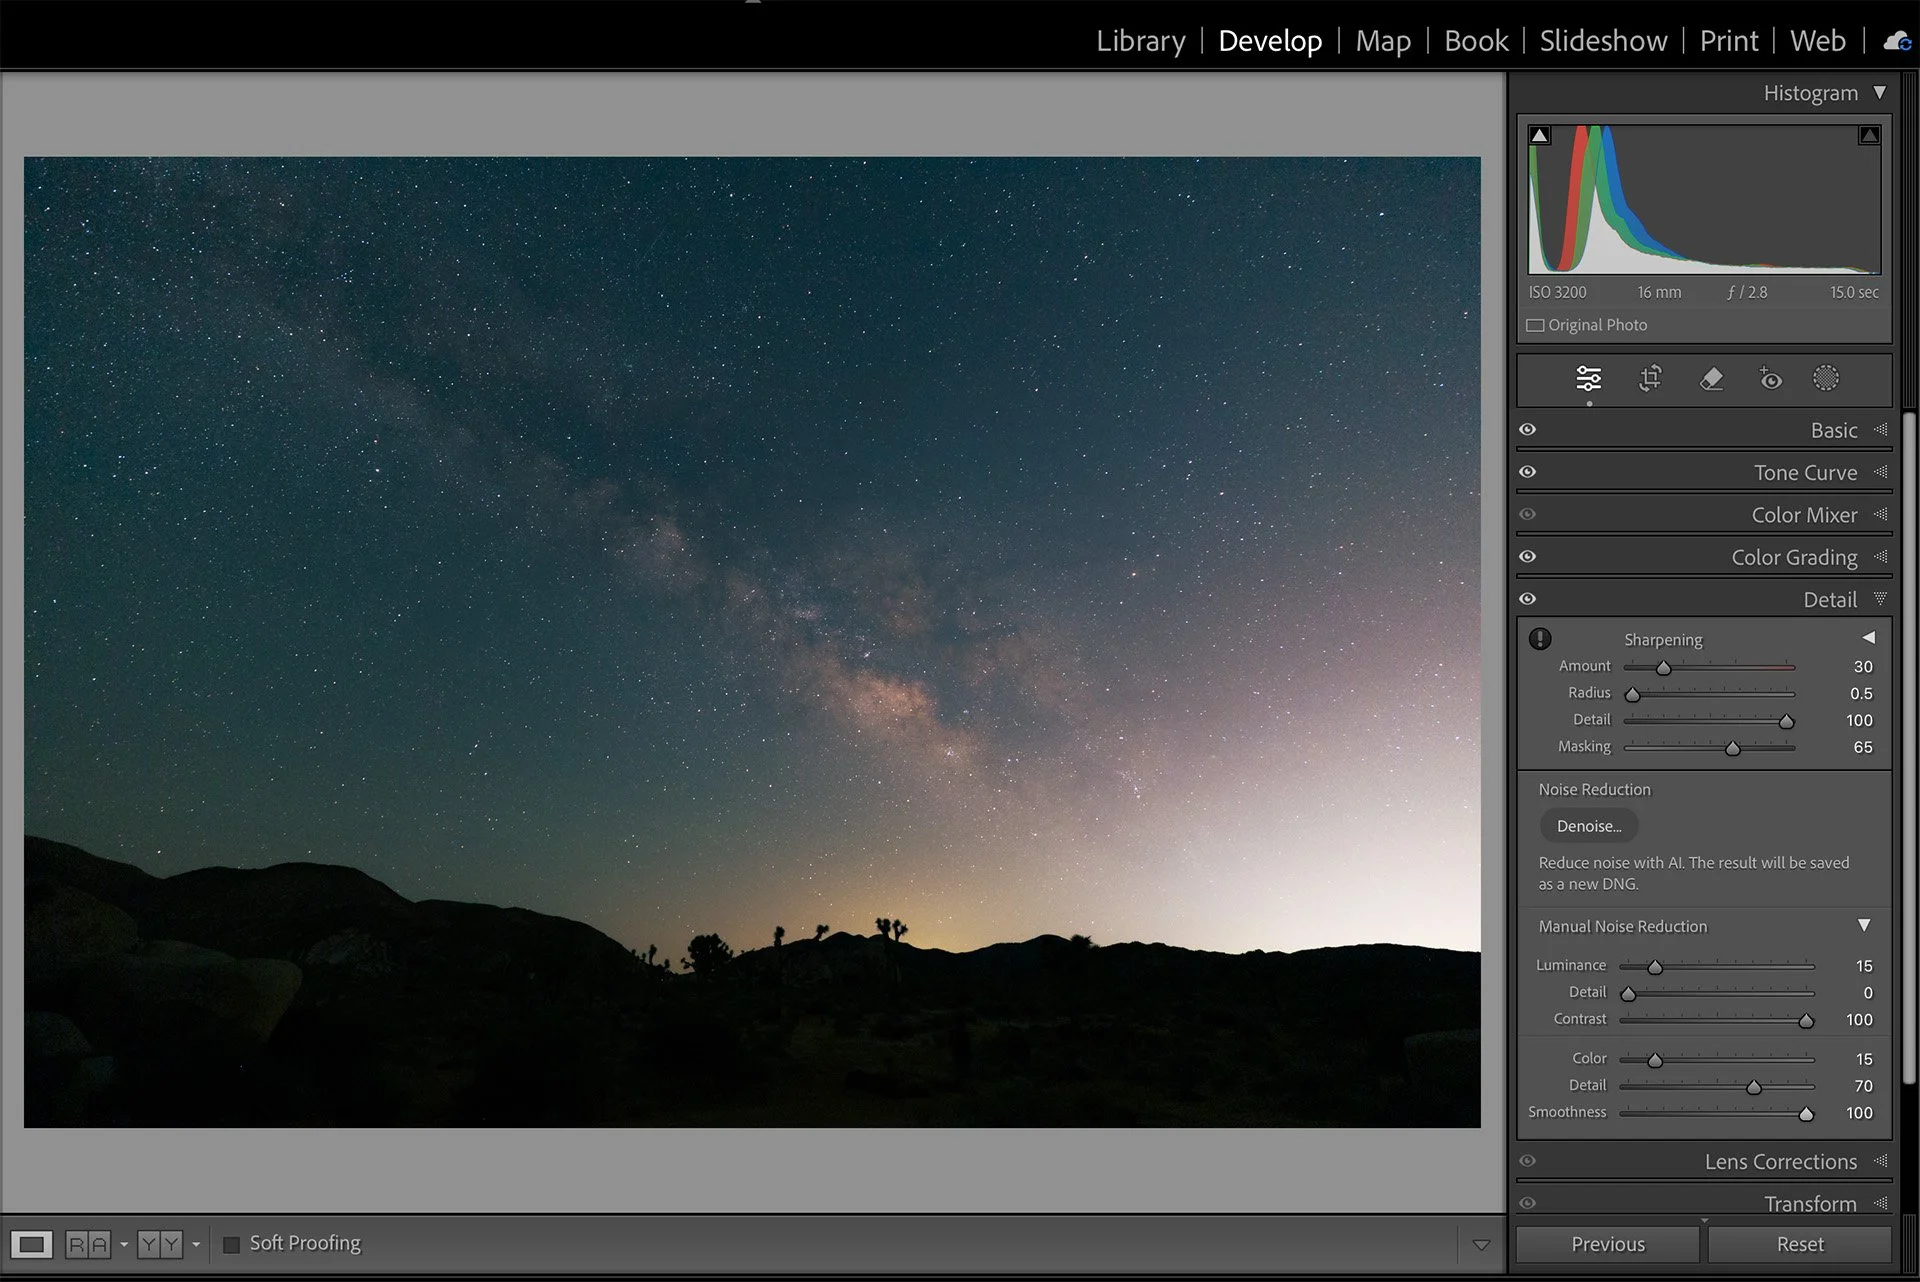
Sharpening and Noise Reduction
Through trial and error, I now use the following settings:
Sharpening - Amount: 30, Radius: 0.5, Detail: 100, Masking: 65
Manual Noise Reduction - Luminance: 15, Detail: 0, Contrast: 100, Color: 15, Detail:70, Smoothness: 100
I suggest starting here and then adjusting to suit your preference(s).
Use Masking for Local Adjustments
I needed to reduce the orange/yellow light pollution on the horizon, so I added a graduated filter by dragging it from the bottom of the image to approximately halfway up the sky. As the bottom right-hand corner of the scene was very bright due to light pollution (thanks, Coachella Valley), I rotated the filter to darken that corner. You can see the red overlay that shows how the filter is positioned/rotated.
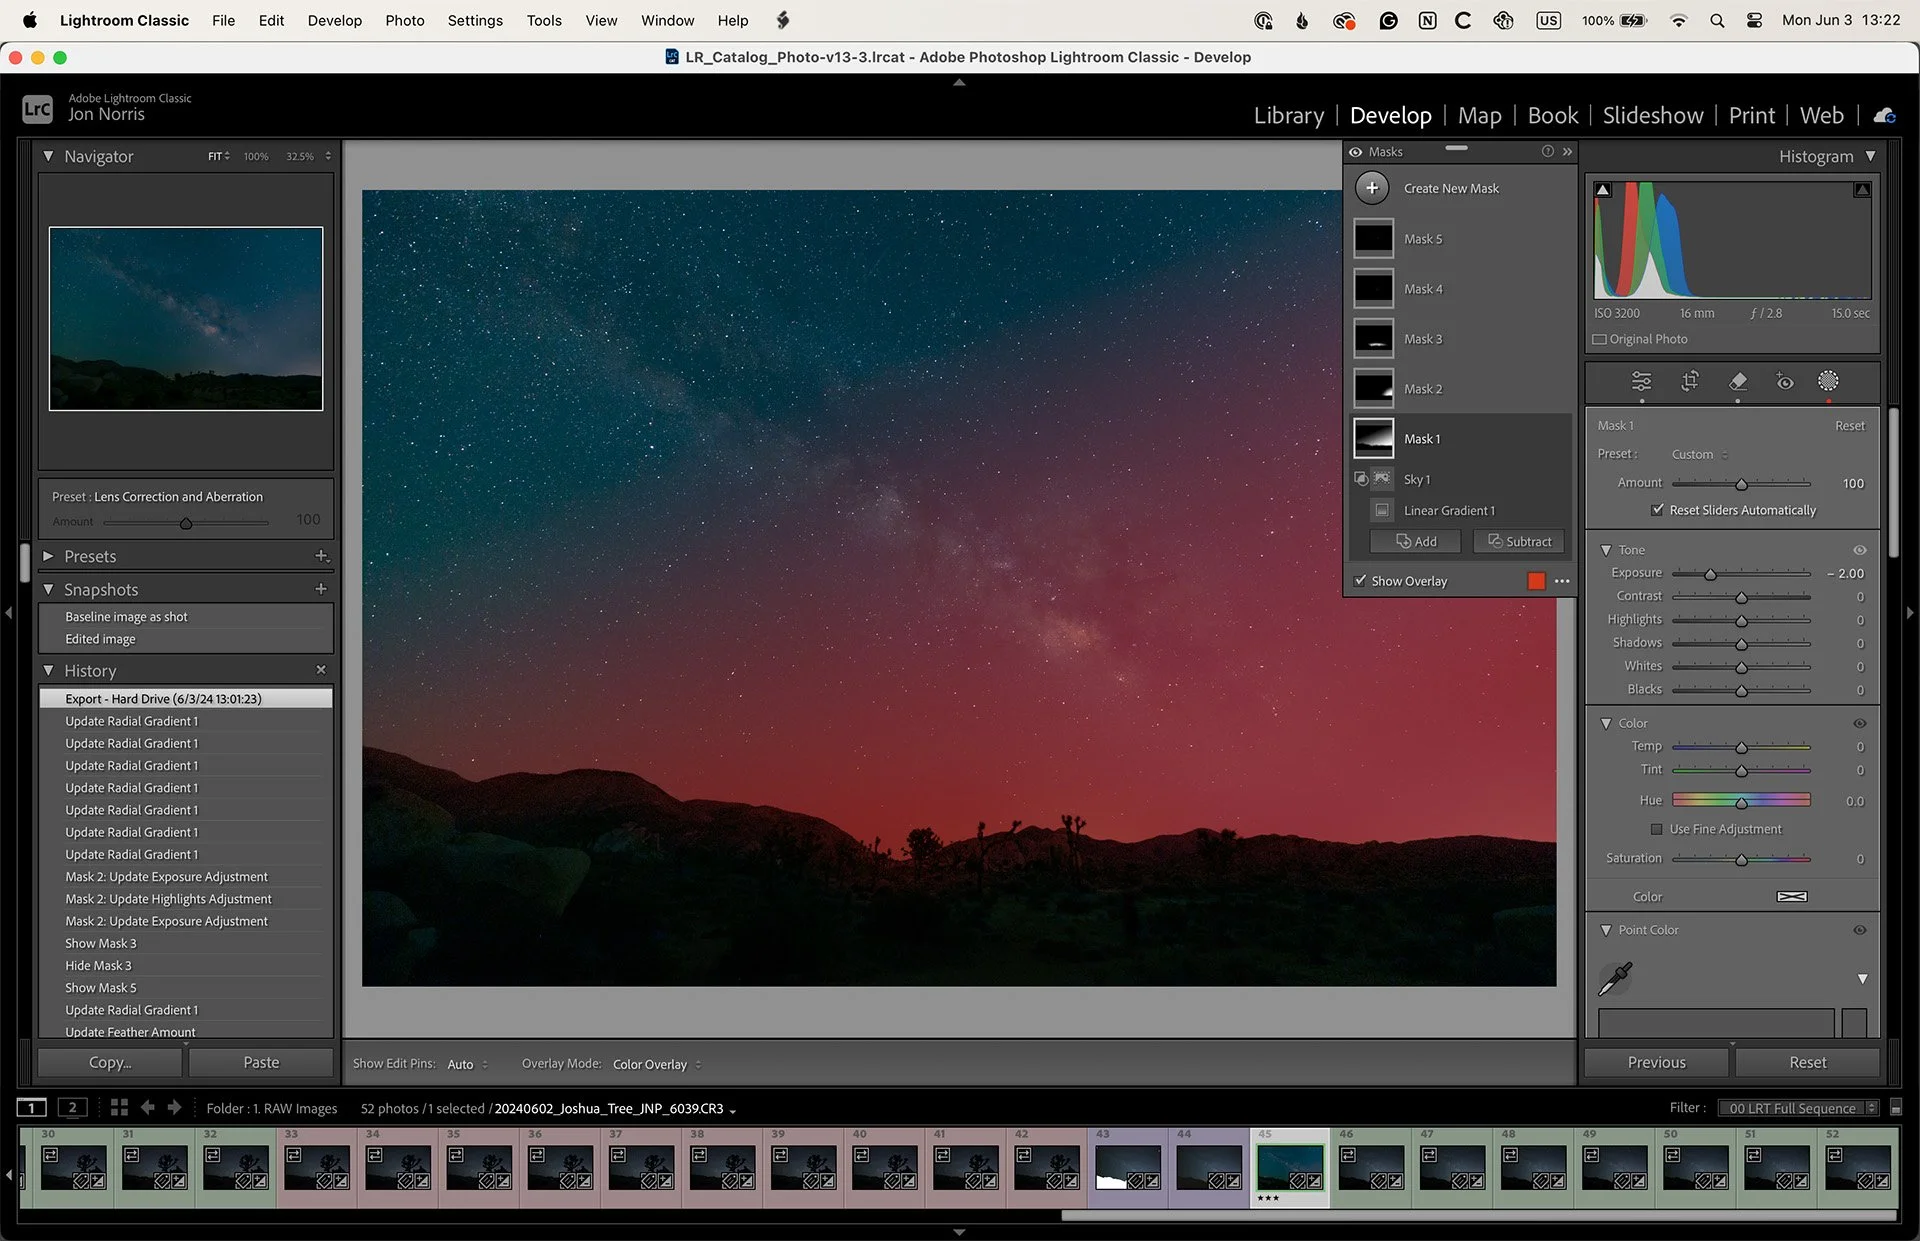
Gradient Filter (angled due to very bright RH bottom corner)
To ensure that the graduated filter does not impact the foreground, I subtracted the invert of a sky mask, leaving just the horizon and lower sky selected. Then, I reduced the exposure by -2 stops to darken the sky portion of the graduated filter.
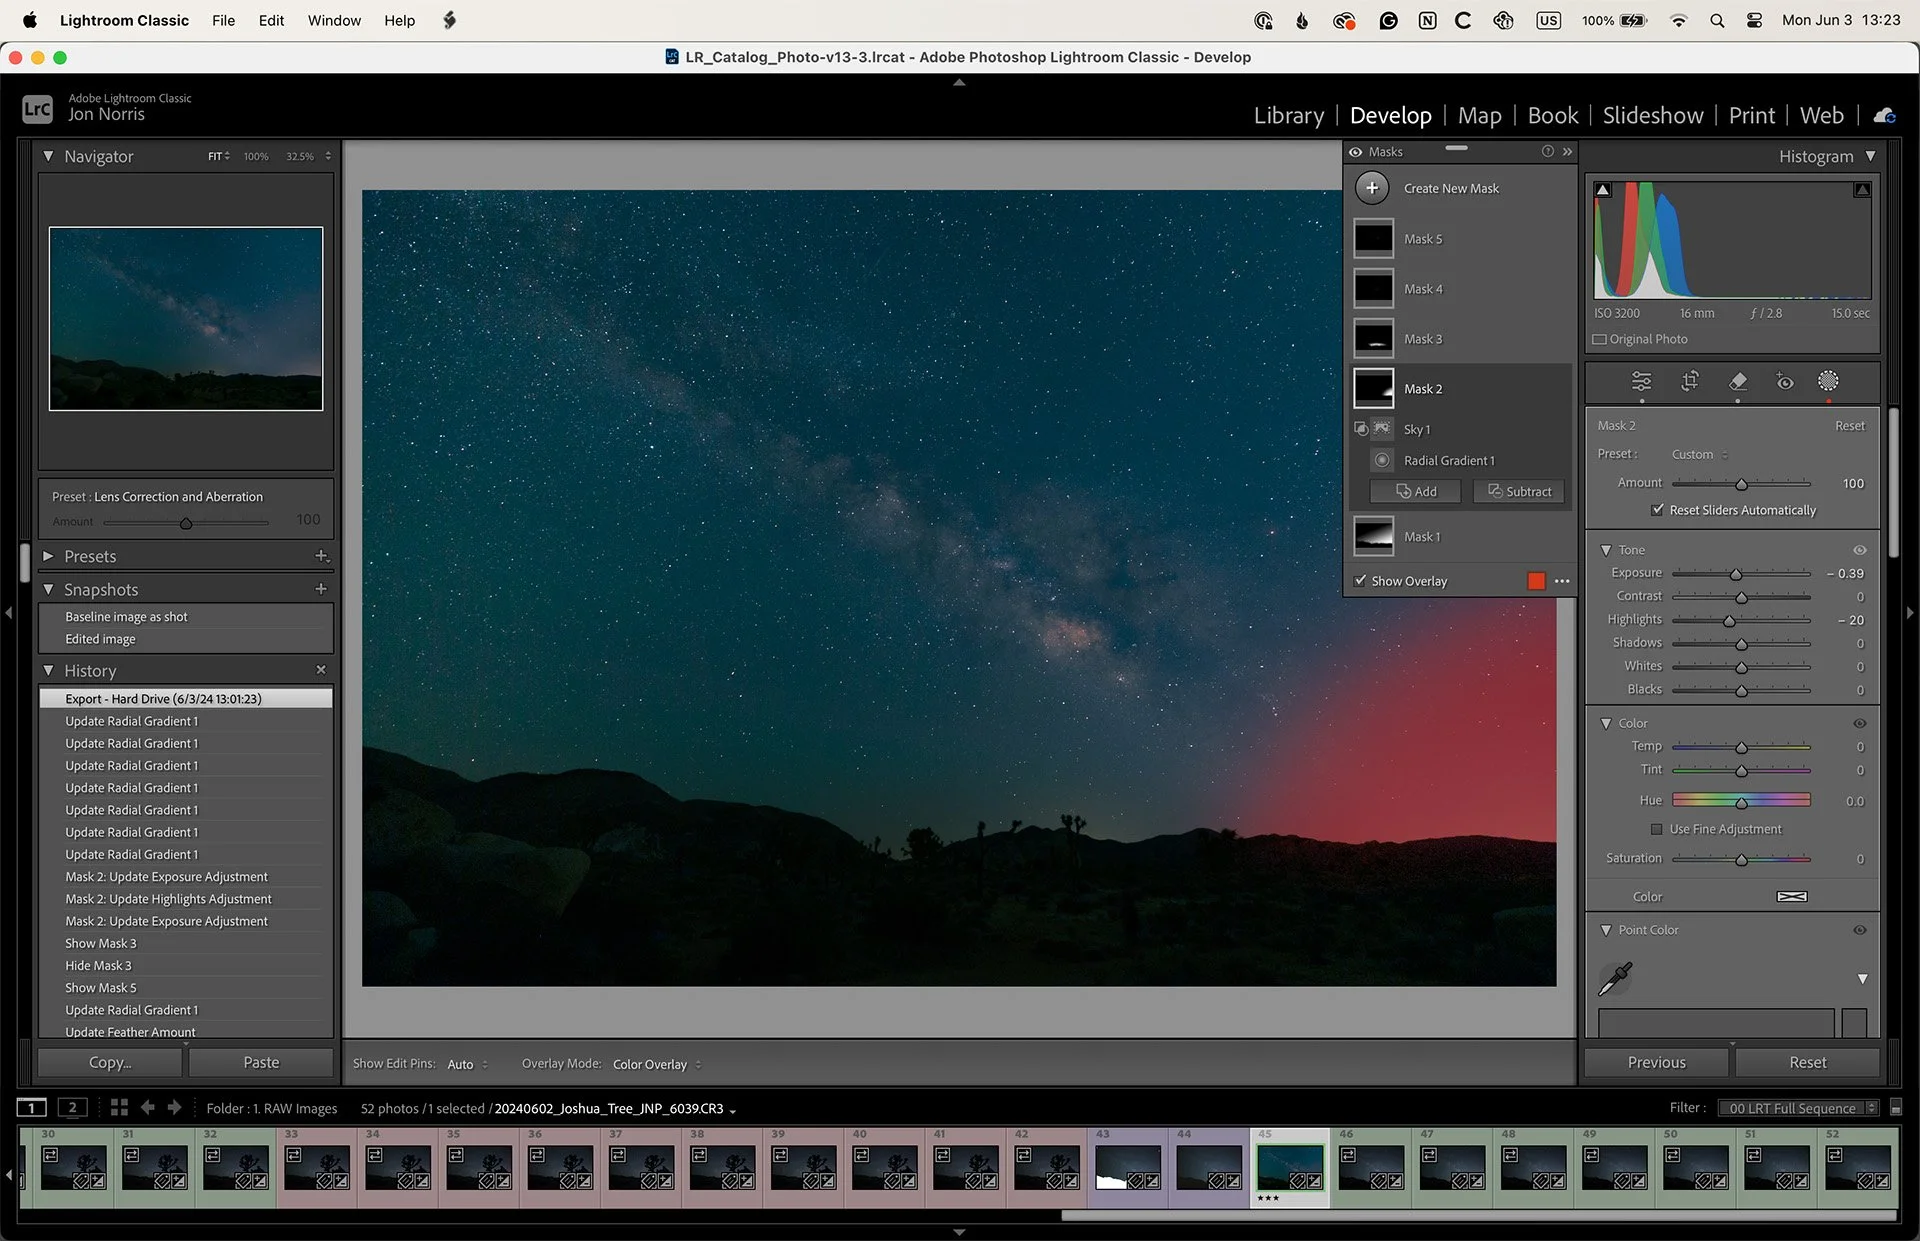
RH bottom corner radial filter
I created a radial filter to compensate for the light pollution on the right-hand bottom corner of the image. I then added a third radial filter to reduce the light pollution on the horizon in the center of the image. Toggling on and off the ‘Show Overlay’ tickbox for a filter will show/hide the red overlay so that you can see the filter's effect on the image.

Center horizon radial filter
9. Use the Brush tool for Dodging and Burning
Dodge (brighten) and burn (darken) specific areas of the Milky Way to emphasize and de-emphasize them and very locally increase contrast. Using a small brush (size 3 to 5), I select the bright areas of the Milky Way galactic core that I want to emphasize by dodging. Once I’ve selected those areas, I increase the Exposure slide to +1.
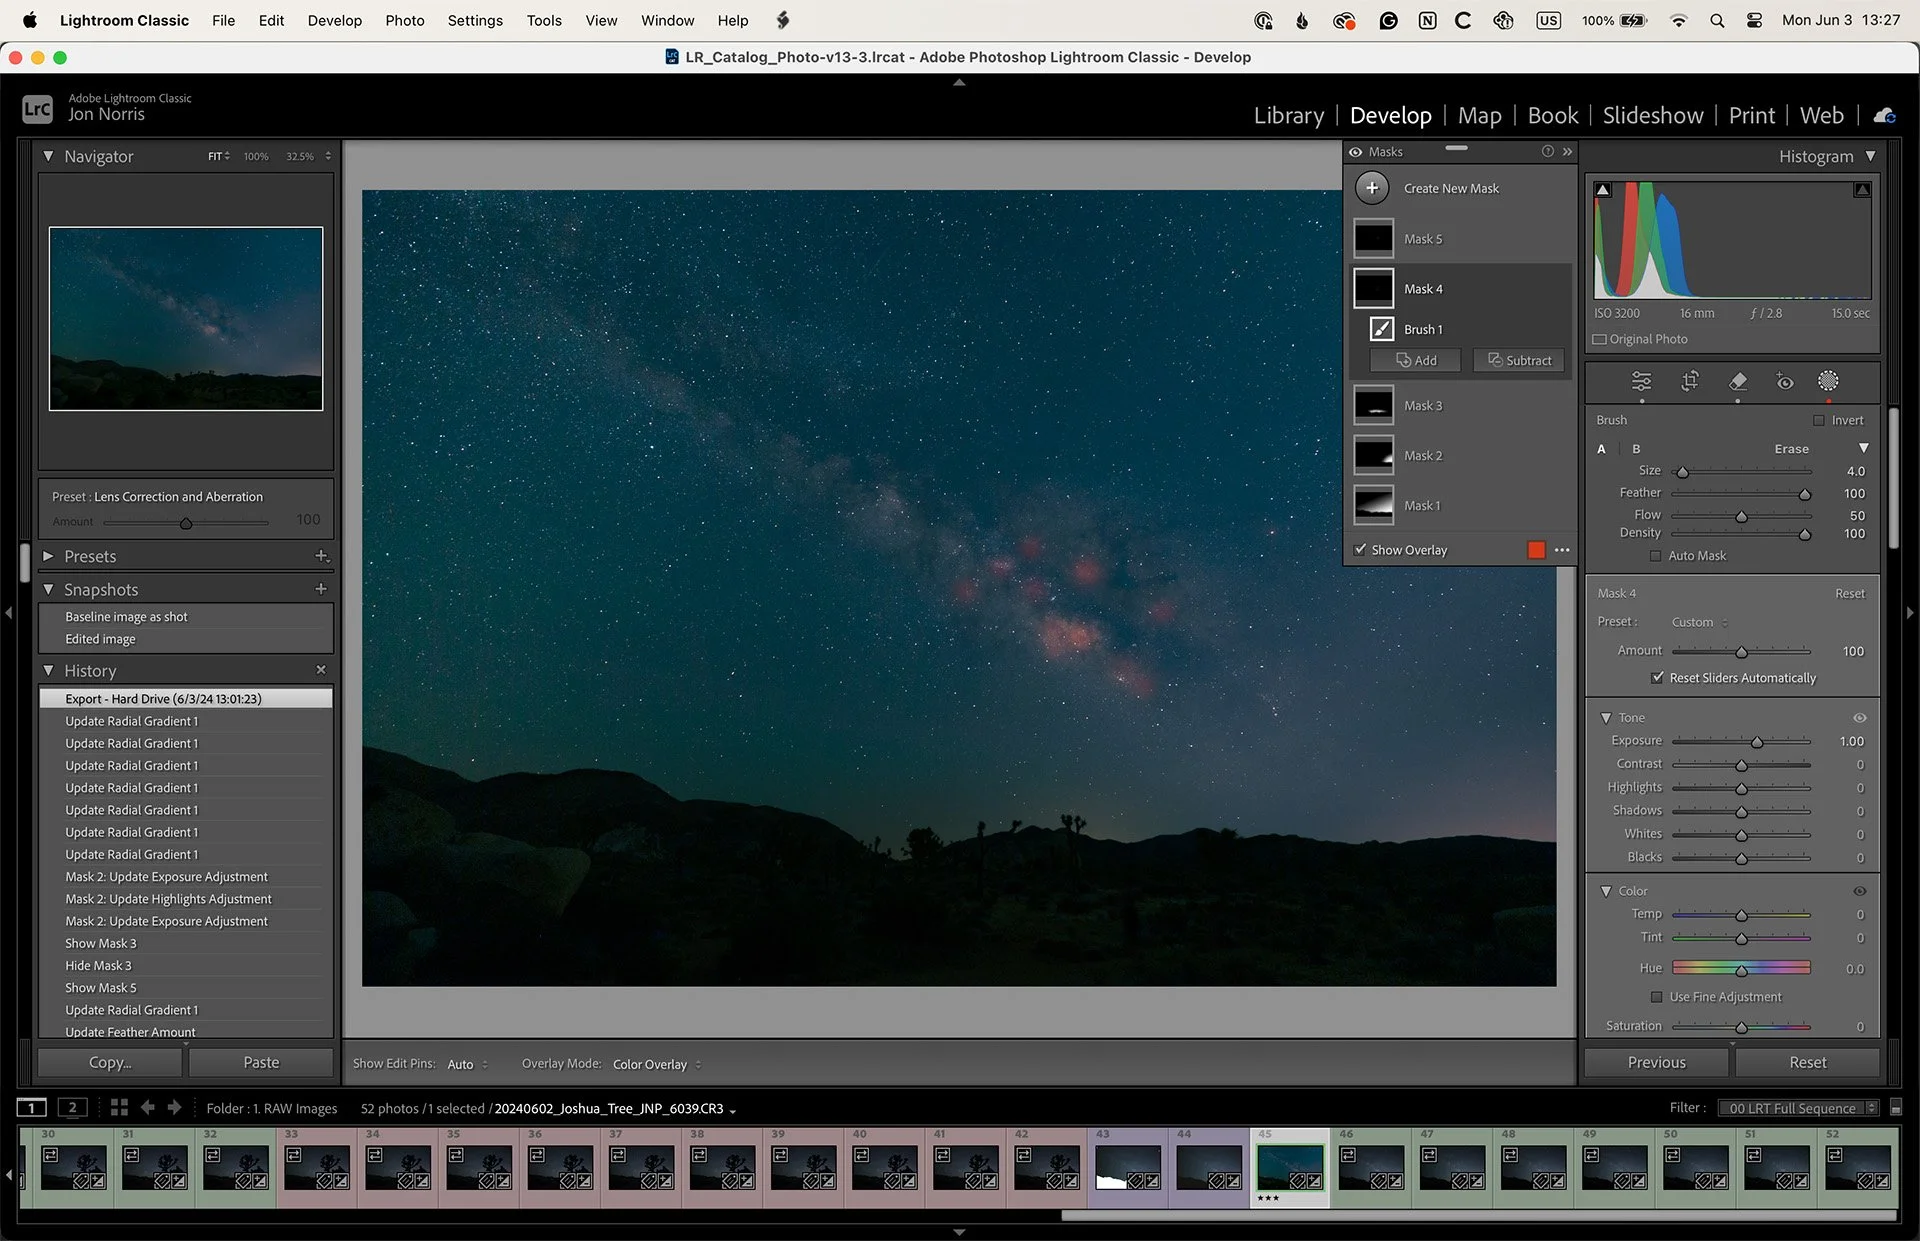
Using a brush to dodge (brighten) selective areas
Similarly, using a new brush selection (at the same size), I select the dark areas of the Milky Way galactic core that I want to emphasize by burning. Once I’ve selected those areas, I decrease the Exposure slide to -1.
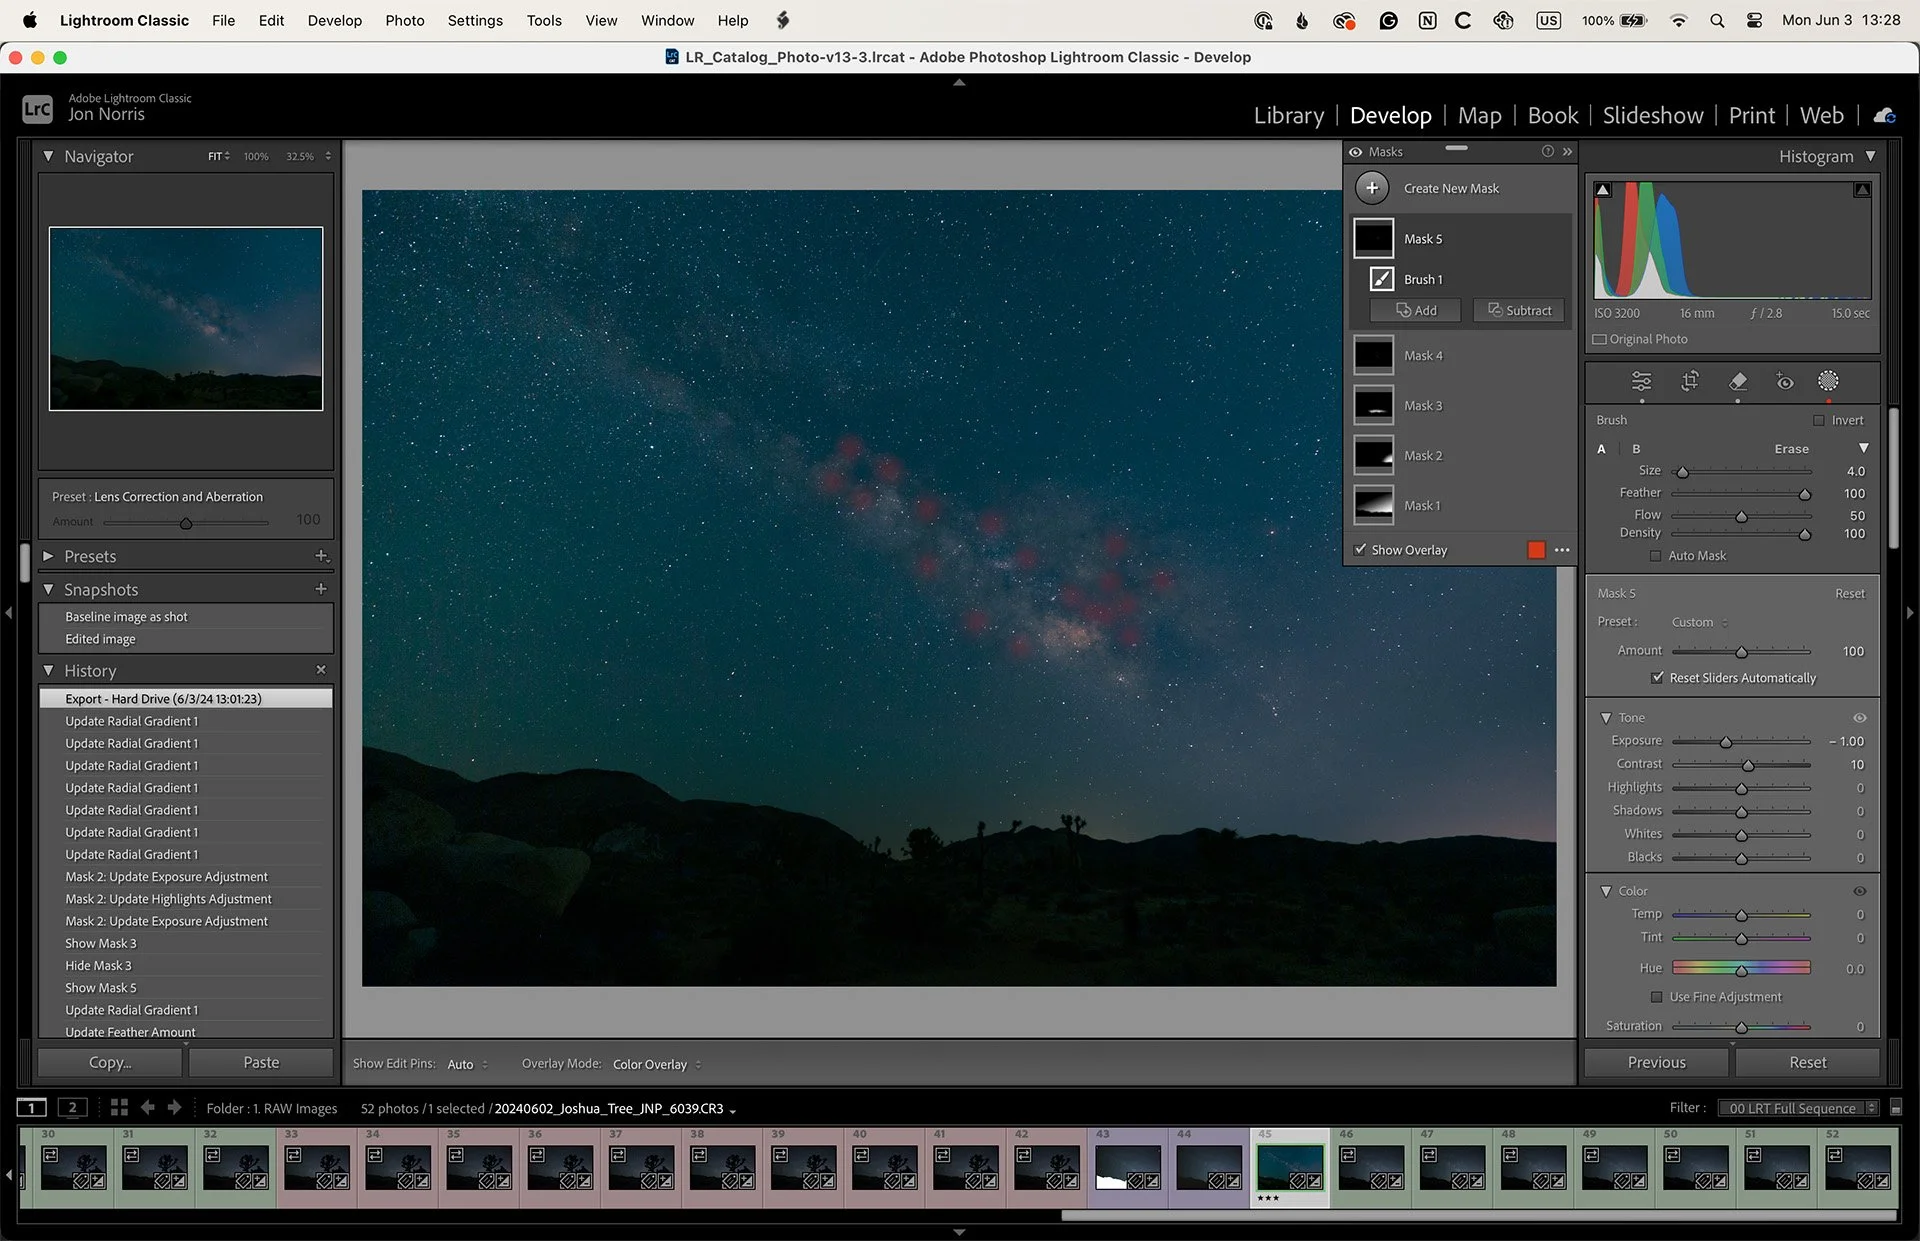
Using a brush to burn (darken) selective areas
10. Spot healing as required
Finally, I use the spot-healing tool to remove any hot spots or stray lights (we were close to a campground) that you may see in the foreground.
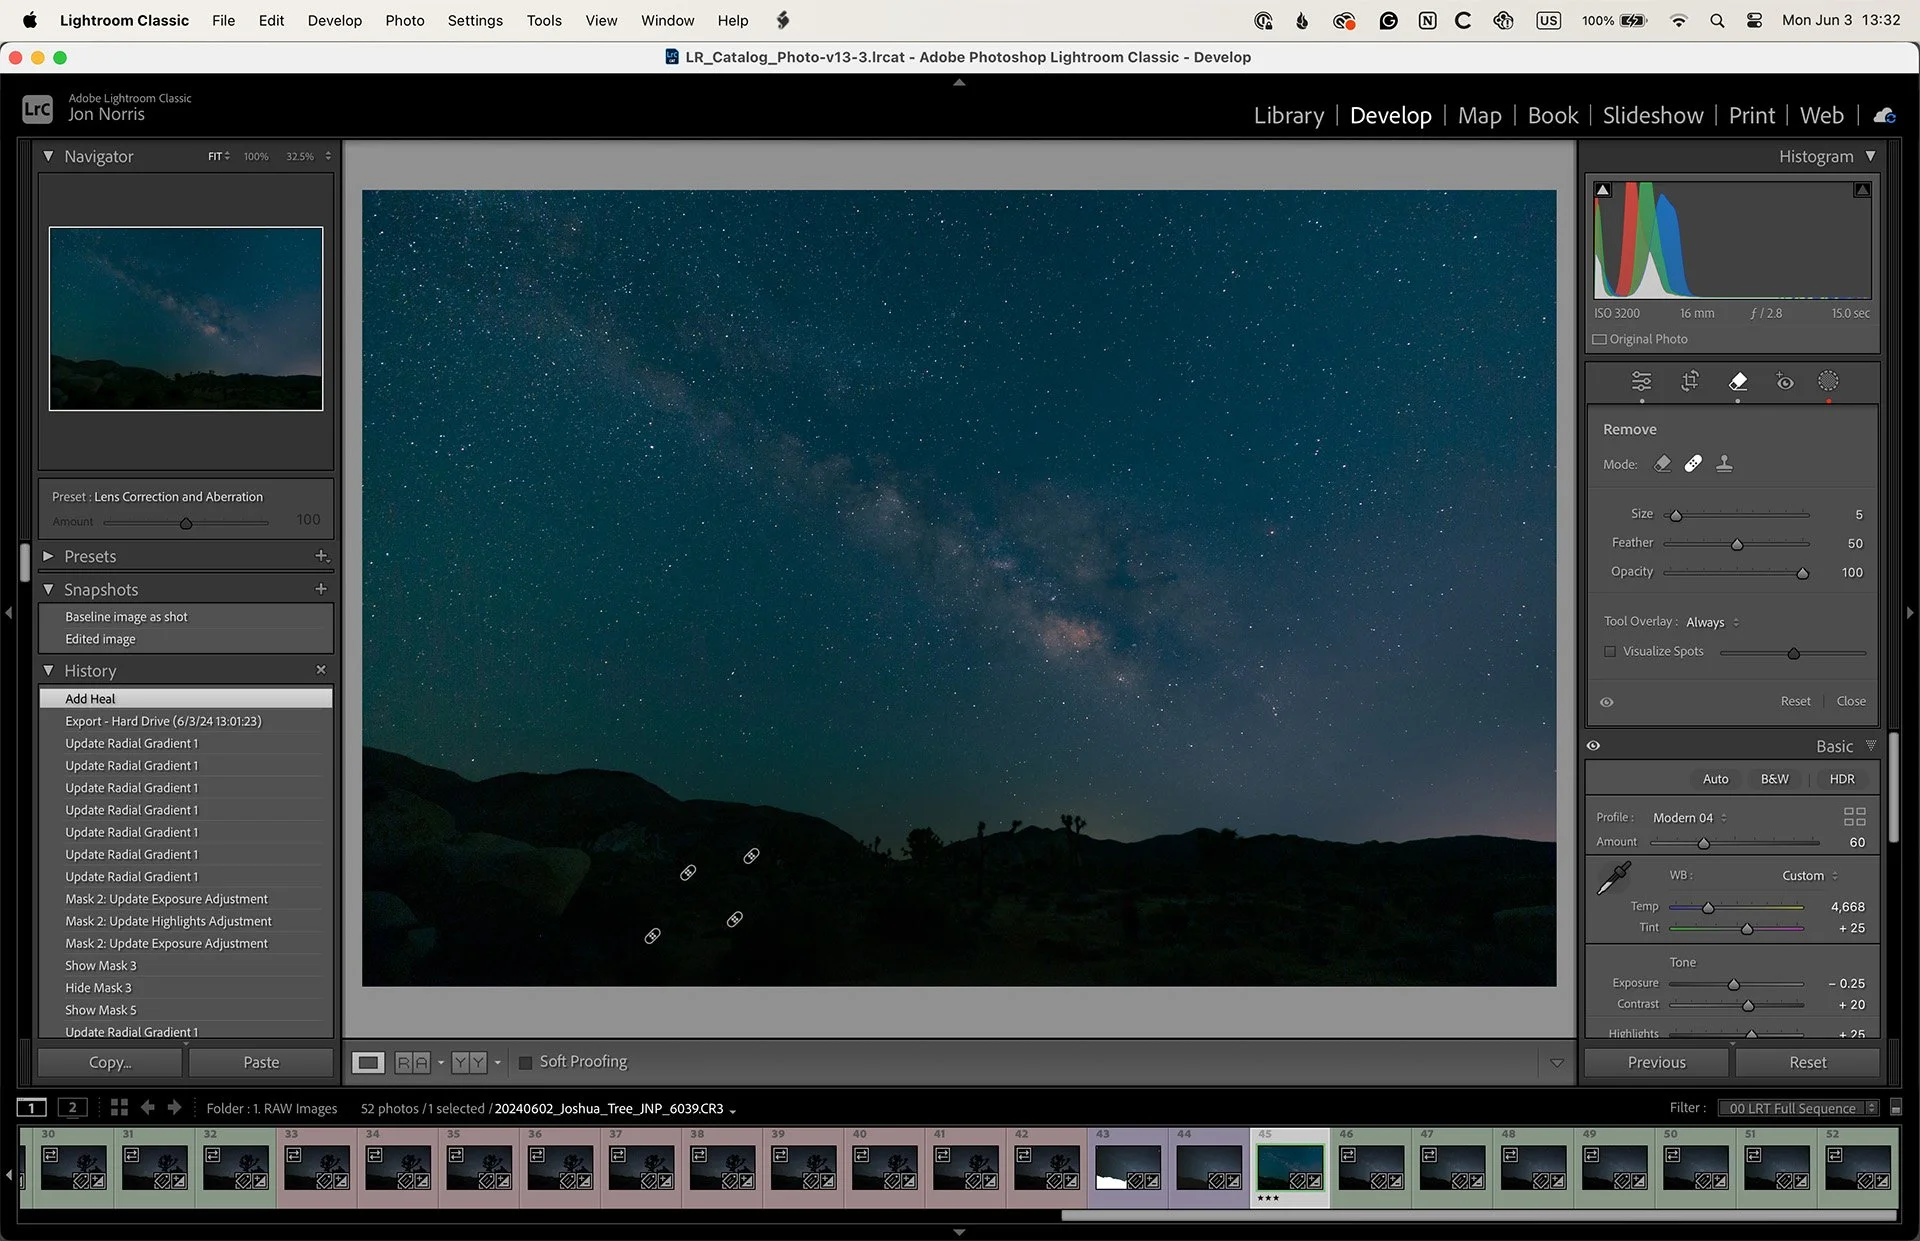
Spot Healing
NOTE: Remember, there is no right or wrong way in how you choose to edit your Milky Way images.
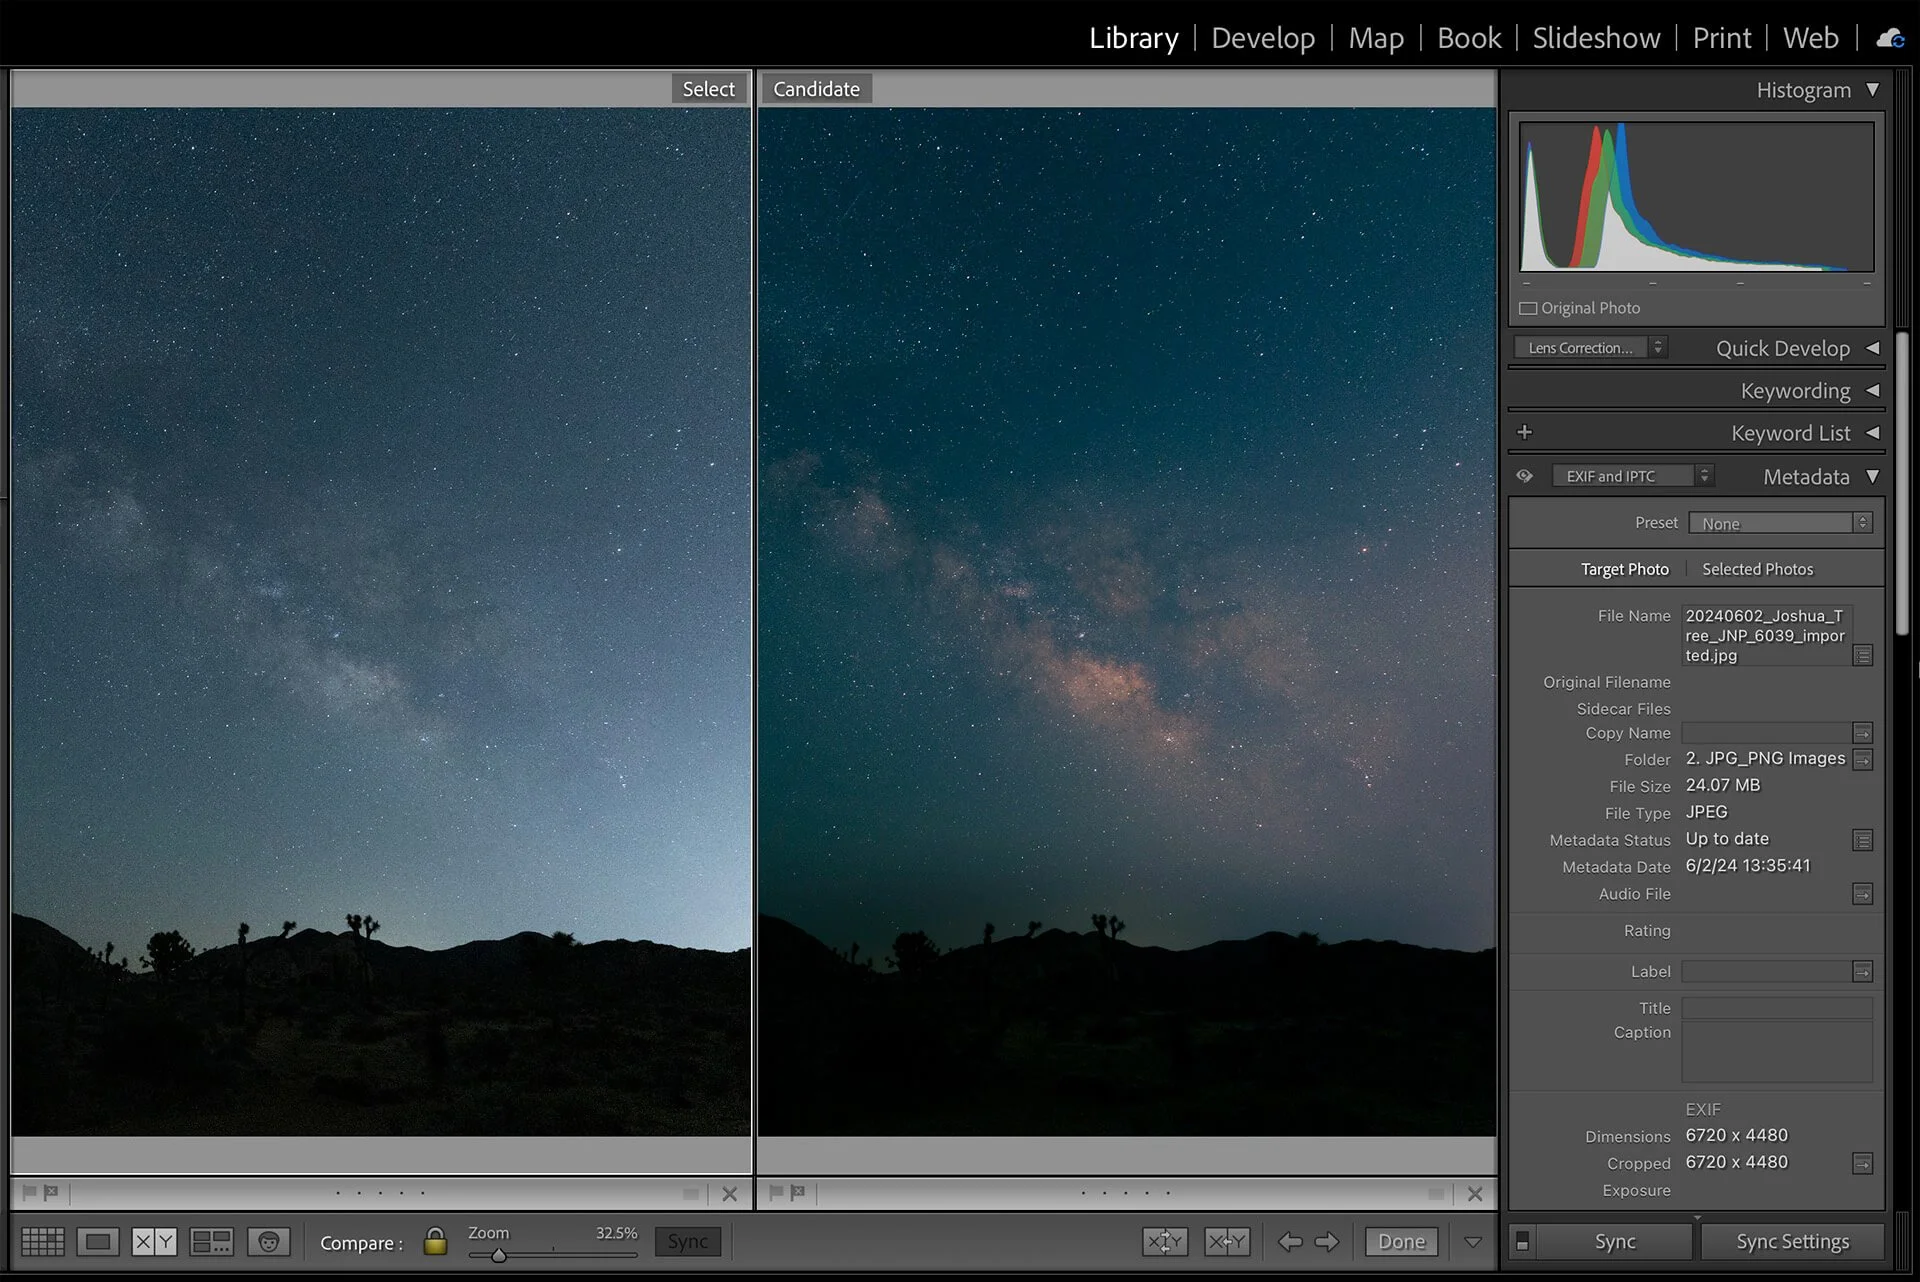
Before Editing (L) and After Editing (R)
Put your personality, style, and imagination into processing your Milky Way images how you like them. My style of editing may not be the same as yours. You may think that I’ve been conservative and too much of a realist or, conversely, that I’ve overdone the editing. That’s one of the wonderful things about photography. How you choose to edit is just that - your choice.
Do it your way.