Explore Landscapes #131
Your camera’s screen isn’t designed to show you the correct exposure for the scene you’re framing. Learn to trust the histogram instead.
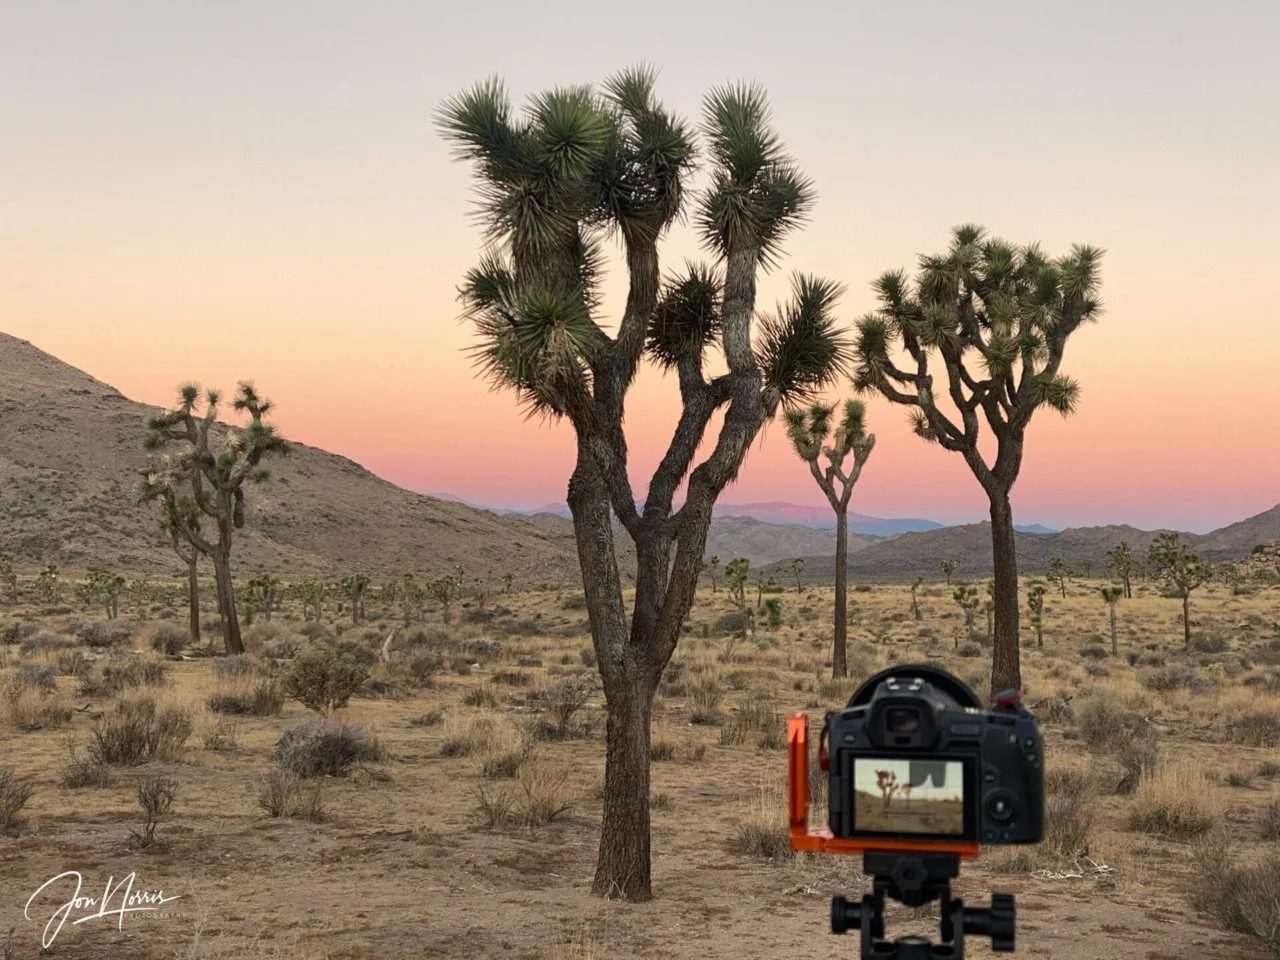
Shooting ‘First Light’ at Quail Springs | © 2011 Jon Norris
When it comes to judging exposure, your histogram is more accurate than relying on camera metering, which is far more accurate than relying on the camera’s screen. In this post I’m going to explain why that is.
If you’d like to learn more about Light and Exposure take a look at this article.
This post explains what I believe are the essential photography terms that you need to understand - regardless of whether your preferred genre of photography is landscape, abstract, or portraiture (or anything else)
The brightness illusion — how ambient light and the LCD backlight changes perceived exposure
Let’s start with a few definitions as the type and use of displays is different on DSLRs than it is on mirrorless cameras.
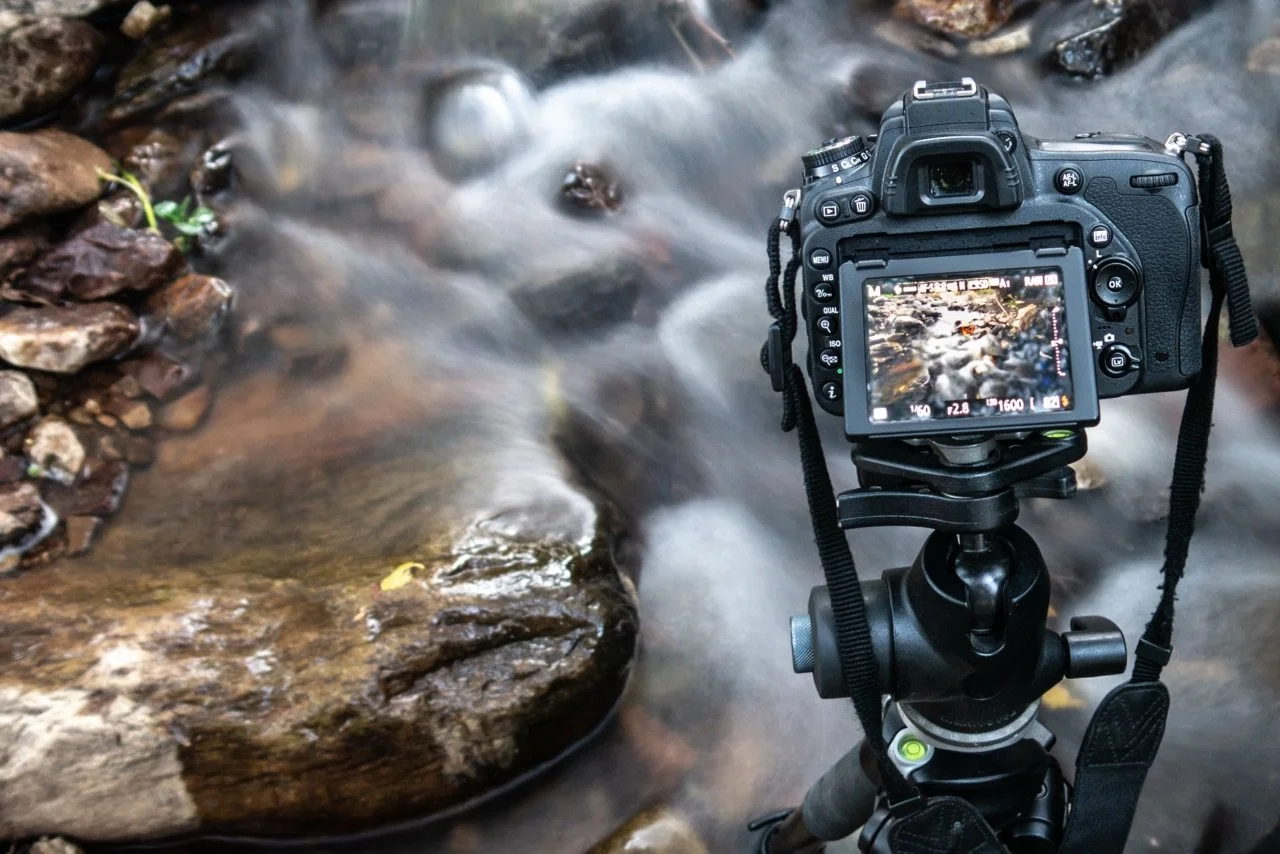
Nikon D750 DSLR with LCD screen and OVF | Stock Image
DSLRs
A DSLR features a LCD (liquid-crystal display) on the back of the camera body. An LCD is a flat-panel display technology that uses the light-modulating properties of liquid crystals combined with polarizers to show images. It’s important to note that LCDs do not emit light directly; instead, they act as light valves that control the passage of light from a backlight (typically LEDs - Light Emitting Diodes) through a matrix of pixels.
Backlight is the critical word here. You can adjust the brightness of your DSLR’s LCD-to make it brighter or darker, which in combination with the ambient light present while you’re viewing the screen means that what you see may not be representative of the actual ambient lighting on the scene that you’re shooting.
DSLRs use optical viewfinders (OVF) and, with the aid of the mirrors inside the camera, what you see through the eyepiece is the view through the lens, which is captured on the digital sensor when the shutter button is pressed and the mirror retracts.
So what you see through the optical viewfinder of your DSLR is a closer representation of the ambient lighting in your scene—but still not the best way of checking exposure.
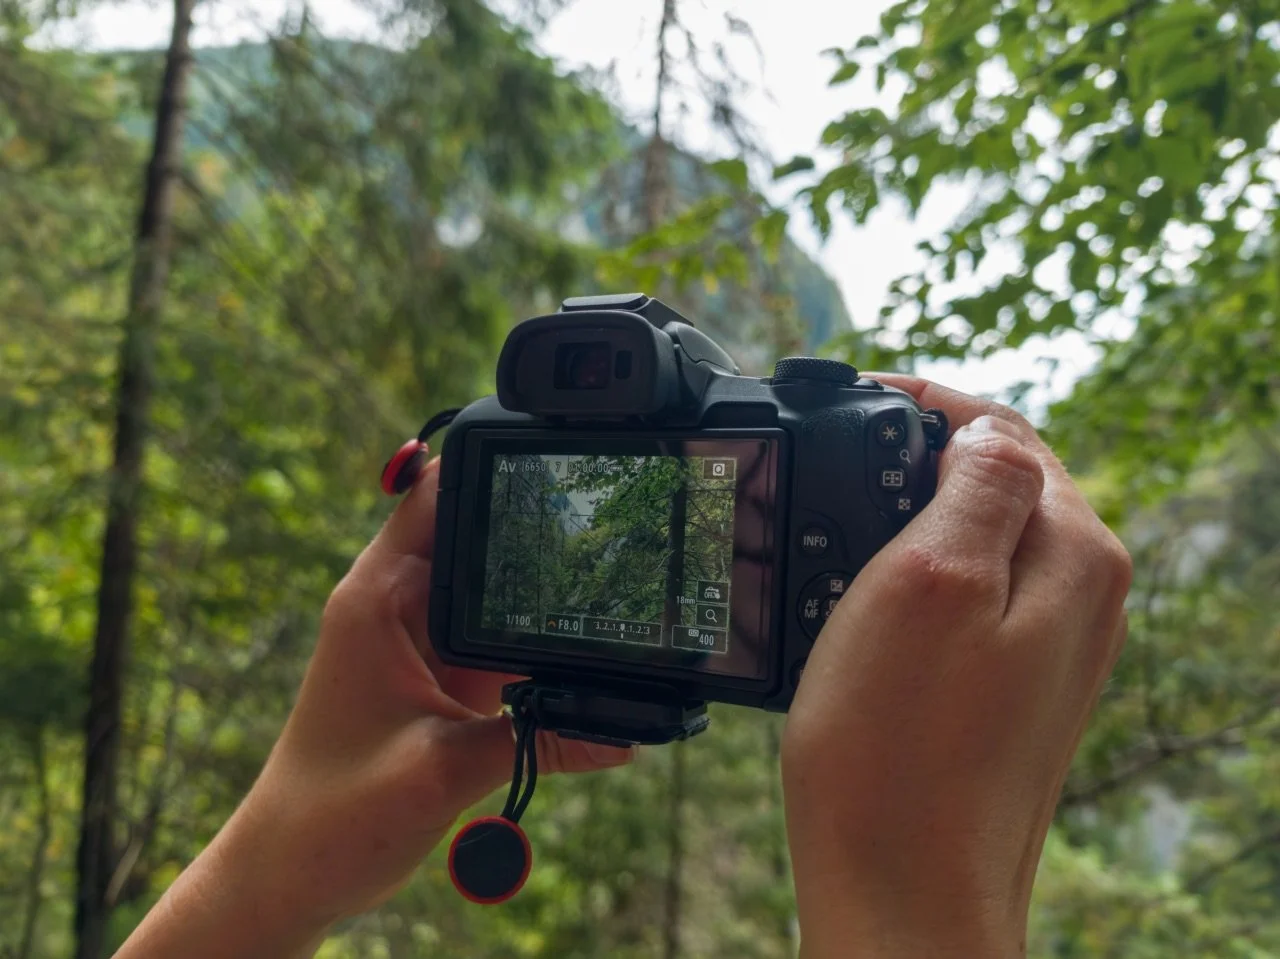
Canon R50 Mirrorless Camera with LCD screen and an OLED EVF | Stock Image
Mirrorless Cameras
The majority of mirrorless cameras on the market today feature an OLED (Organic Light-Emitting Diode) screen-although some still use a LCD screen to reduce cost. An OLED display is an emissive technology, where each individual pixel contains organic compounds that emit their own light when an electrical current is applied, eliminating the need for a backlight and liquid crystal layer.
In a mirrorless camera, the optical viewfinder is replaced by an OLED for their electronic viewfinders (EVFs).
OLEDs are now the industry standard for EVFs as they offer superior contrast, deeper blacks, and higher refresh rates as compared to LCD viewfinders. An EVF uses the data from the camera’s imaging sensor to display an image on a small OLED screen inside the viewfinder, and/or on an LCD on the rear face of the camera.
Great I hear you say. So we got rid of the backlit LCD which may not show the scene’s ambient lighting accurately, so now we can trust the OLED rear screen or EVF on a mirrorless camera? No!
Even if using a mirrorless camera, you should not rely solely on the OLED rear screen or EVF to judge exposure, as the OLED’s brightness is influenced by both ambient lighting and internal settings, which can trick your eye into underexposing or overexposing images.
Many mirrorless cameras have a function that automatically boosts the EVF’s brightness to aid focus and scene composition in low light, as compared to an OVF that shows a near-dark frame due to the lack of ambient lighting.
For example, the Canon R5 EVF often appears brighter than reality due to ‘Exposure Simulation’ (the Canon term for this feature). You can disable Exposure Simulation in the Shoot Menu, which forces the EVF to reflect the actual captured brightness (similar to a DSLR’s optical viewfinder) rather than boosting it. Most other mirrorless cameras have similar functions—but they’re probably called something slightly different.
Measuring Light and Determining Exposure
Metering is the process of using light information gathered by your camera to determine the proper exposure settings. There are various metering modes, including spot metering (which takes a reading from a very small area of the image (less than 5% of the total image), center-weighted metering (which takes its reading from an area in the center of the image), and multi-zone metering (which takes its reading from various points across the entire image).
However, relying on any of your camera’s metering modes takes control away from the photographer and the camera may not always get the exposure right. A camera’s meter perceives the light reflected from middle gray (18% gray) as “normal” exposure. So, overly dark scenes appear gray - as do overly bright scenes.
The center of the scale is 0 - where the camera’s meter thinks the image is correctly exposed (see Image 1). As you change the exposure settings (shutter speed, aperture, or ISO) and the pointer moves to the left (negative), it’s becoming underexposed (according to the meter). If the pointer moves to the right (positive), it’s becoming overexposed (according to the meter).
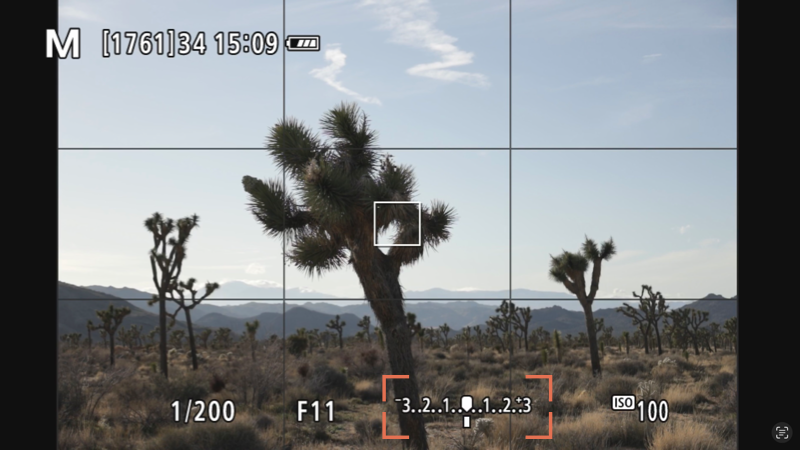
Image 1 - Metering showing ‘correct’ exposure as determined by the camera | © 2023 Jon Norris
So, if I can’t trust my screen, EVF, or metering for judging exposure what do I do?
The most reliable way to judge exposure is by checking the histogram, as it provides an objective exposure representation unaffected by screen brightness or ambient lighting conditions.
My recommendation, whether you’re shooting with a DSLR or mirrorless camera, is that you use the rear screen (or OVF/EVF) for composition and framing, but verify your exposure settings by checking the histogram and looking for clipping warnings to ensure accurate exposure capture.
Reading a histogram in plain English — shape, clipping, and what “correct” actually means for raw files
Trusting your histogram is an essential part of my workflow. As I said at the start of this post, it’s more accurate than relying on camera metering, which is far more accurate than relying on the camera’s screen.
A histogram can be displayed during shooting (on mirrorless cameras) or be reviewed after shooting (on DSLRs) - see Image 2.
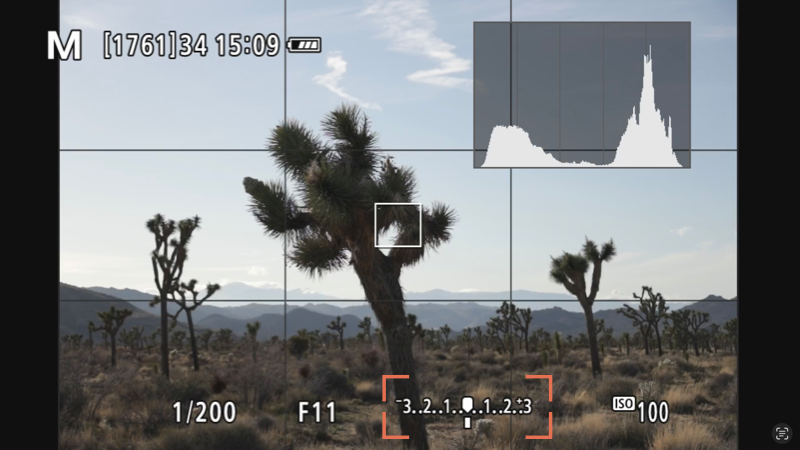
Image 2 - Same exposure but with the histogram displayed in addition to the metering scale | © 2023 Jon Norris
The histogram is a bar graph that shows the 256 different tones, from pure black (on the left) to pure white (on the right).
The height of each bar shows the number of pixels that appear in the image of that tone.
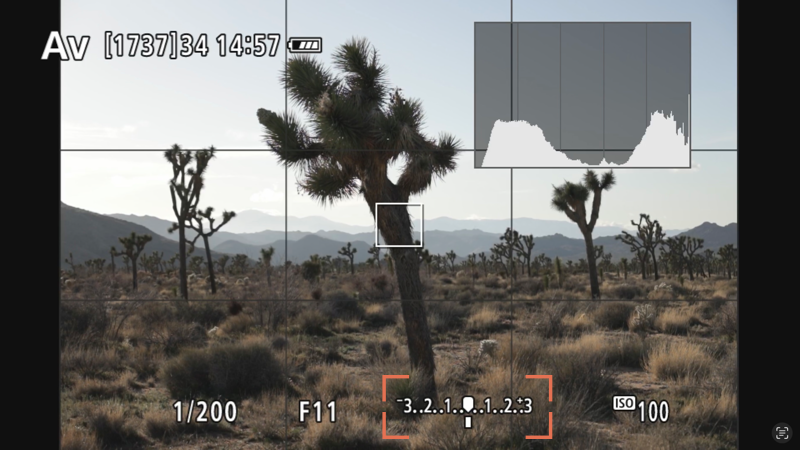
Image 3 - Metering showing ‘correct’ exposure as determined by the camera; the histogram shows that in fact the highlights are clipped (histogram butts up to the right hand side) and that some areas of the whites are blown out (no detail - pure white) | © 2023 Jon Norris
In Image 3, the histogram butts up against the right-hand edge, indicating that some whites are clipped; however, the meter shows a correct exposure. If you relied on the meter, you would have taken an overexposed image with no detail in the clipped area.
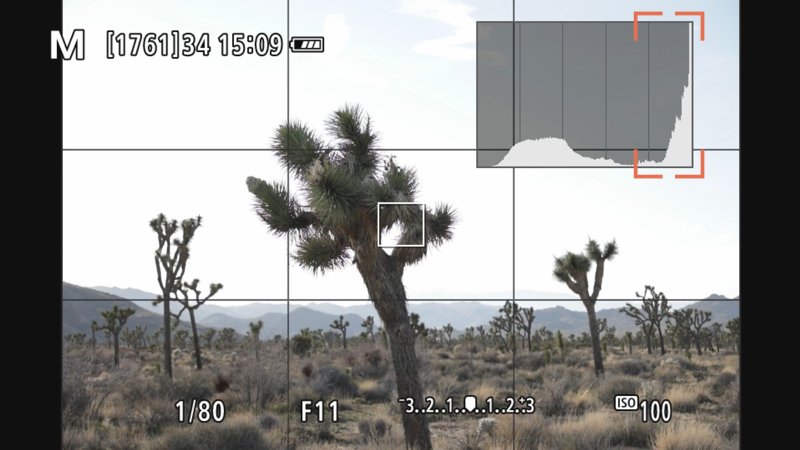
Image 4 - Shutter speed slowed down from 1/200s to 1/8s which shifts the histogram off the right hand side of the graph showing overexposure and clipping of the whites | © 2023 Jon Norris
As you (or the camera) change your exposure settings (depending on your shooting mode, for example, Program, Aperture Priority, or Manual), the histogram will change shape and move to the right or left - see Images 4 and 5.
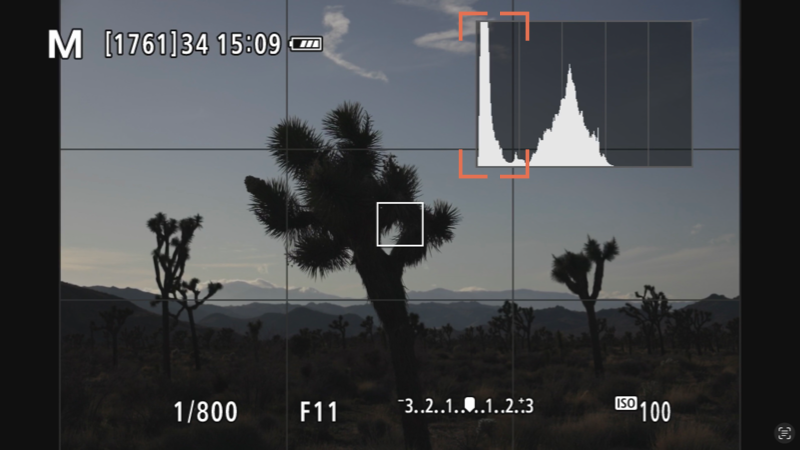
Image 5 - Shutter speed increased from 1/80s to 1/800s which shifts the histogram to the left hand side of the graph showing under exposure and clipping of the blacks | © 2023 Jon Norris
Using the histogram, you can adjust the camera settings that affect exposure (aperture, shutter speed, and ISO) to ensure you capture the full range of tones in the scene.
The intent is to position the histogram so that the graph profile touches the bottom and does not get clipped on the left-hand or right-hand side.
This ensures that you don’t have any blown-out areas (pure white) or detail-free shadows (pure black).
The shape of the histogram is not important and is purely a result of the different tones in the scene you’re shooting.
Sometimes, it is impossible to position the histogram graph without clipping the whites, blacks, or both when photographing sunrise, sunset, or other high-contrast scenes.
This is because the scene’s dynamic range (the difference between the brightest and darkest parts of the image) exceeds what the camera’s sensor can capture in a single image.
In this case, you can use exposure bracketing to take a range of images with different exposure settings. These bracketed images are then combined in post-processing to create a final shot showing the scene’s full dynamic range.
Read this linked article to get an overview on exposure bracketing.
Expose to the right, carefully — how far is too far?
Expose to the right (ETTR) is a digital photography technique where you intentionally overexpose an image, shifting the histogram toward the right hand side, capturing the maximum amount of light data without clipping important highlights.
Digital camera sensors record more tonal information in brighter areas than in the shadows. By capturing a brighter image and subsequently darkening it during post-processing, you can significantly reduce noise, particularly in shadow areas.
Image 4 showed what the histogram looks like for an overexposed image. The histogram curve is hard up against the right-hand side.
So with ETTR, you change your exposure settings to shift the histogram curve away from the right-hand side. You could make the shutter speed faster, reduce the aperture, or reduce the ISO-all of which will reduce the amount of overexposure.
What you want to achieve is a small gap at the right-hand side of the histogram-i.e. the histogram slope touches the base before meeting the right-hand side. In the next section I’ll cover a useful technique where your camera will help you expose to the right without overexposing.
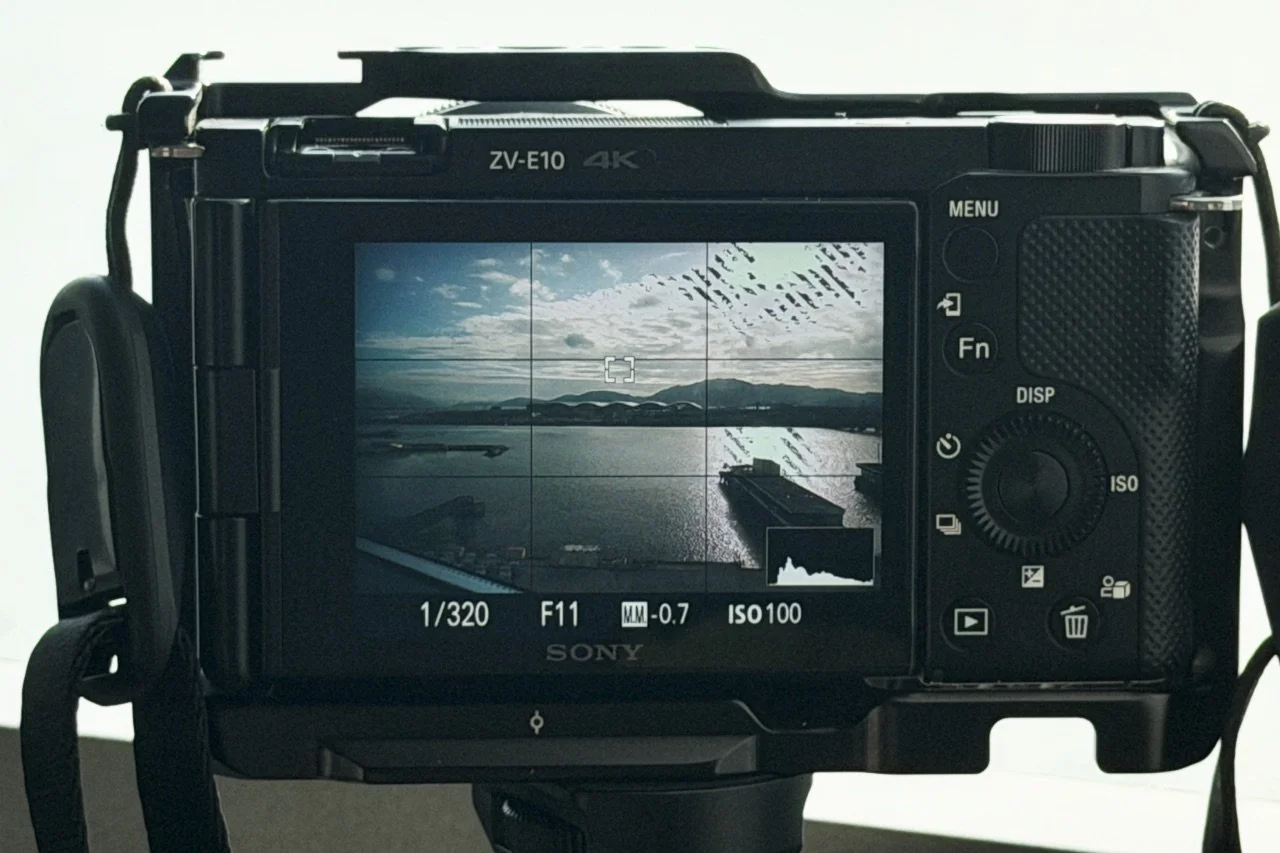
Zebra indication on the LCD screen of my Sony ZV-E10 | © 2026 Jon Norris
The blinkies (or zebra) test — a repeatable field drill using your own LCD/OLED warnings
Almost all mirrorless, and more recent DSLRs have a built-in warning tool that detects whether an image is overexposed.
Canon cameras refer to the overexposure warning tool as Highlight Alert (commonly called blinkies), displaying it as flashing areas during image playback (on their DSLRs) or in real-time (on their mirrorless cameras). Sony cameras generally use the term Zebra Pattern (or zebras) to overlay diagonal stripes in the EVF or on the OLED screen to indicate overexposed areas in real-time.
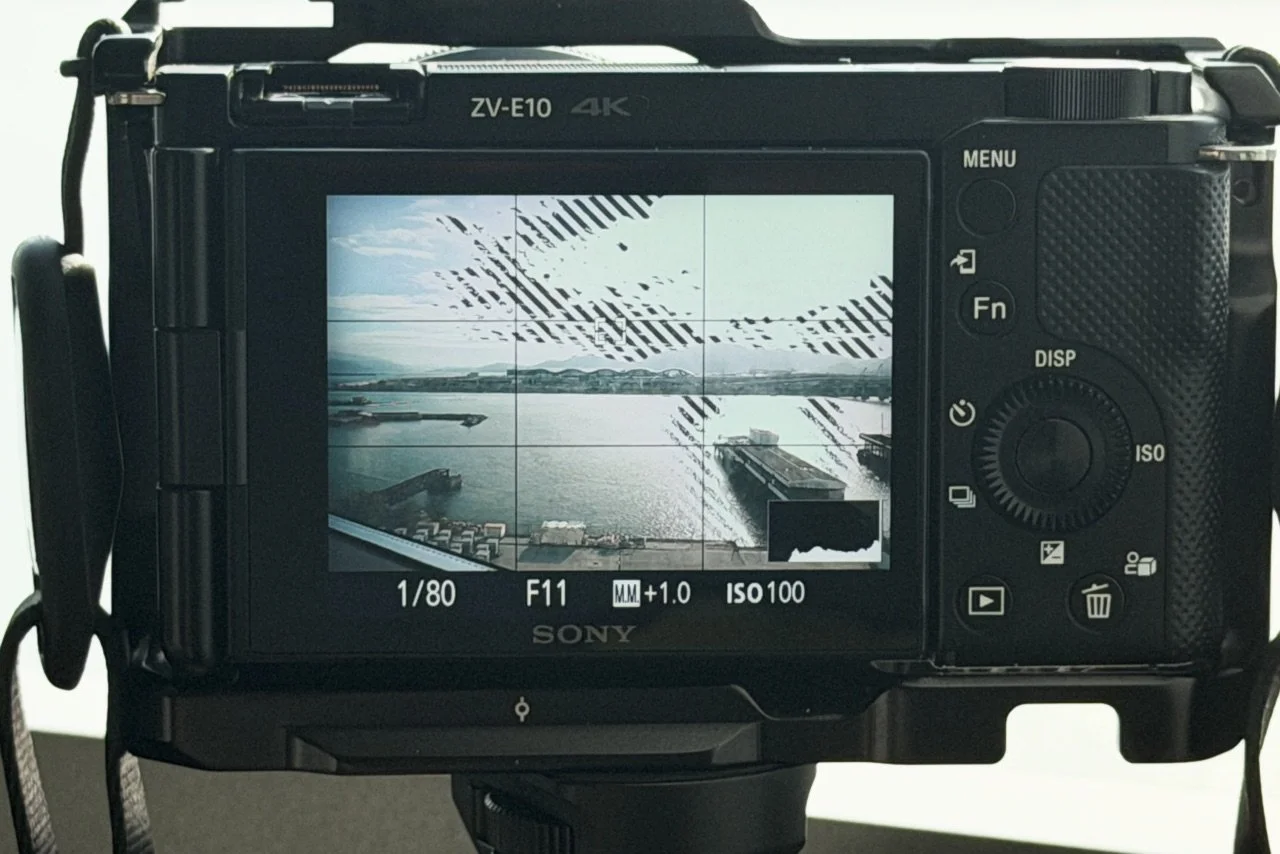
Increased zebra indications on the LCD screen of my Sony ZV-E10 as the shutter speed is slowed down (allowing more light to hit the sensor) | © 2026 Jon Norris
On my Sony ZV-E10 (my travel camera) I use the zebras to alert me to overexposure as the camera does not have an EVF and often it’s difficult to eyeball the histogram on the camera screen-especially in bright sunlight.
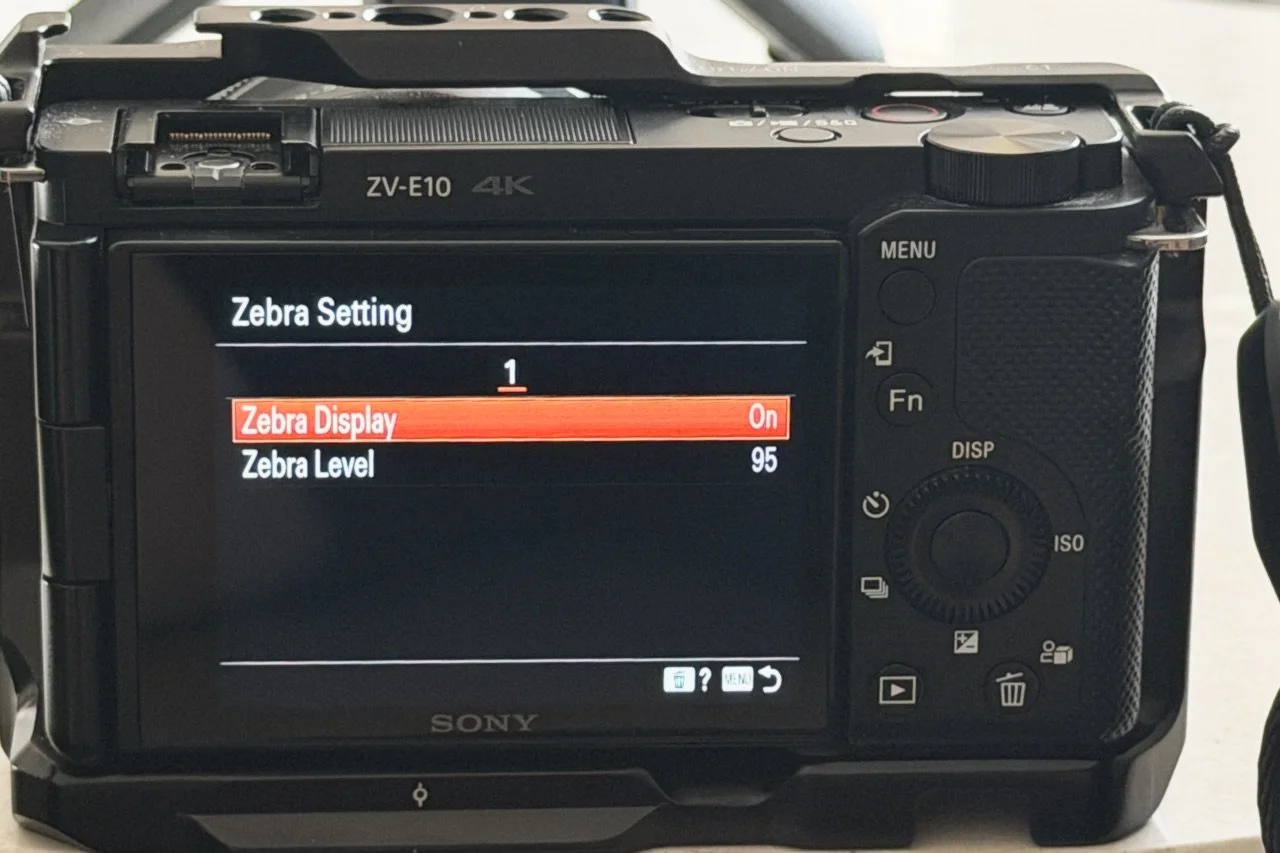
Zebra settings on the LCD screen of my Sony ZV-E10 | © 2026 Jon Norris
On my Sony ZV-E10 I can change the sensitivity of when the zebras start to appear. I typically use 95—which means that the zebras start displaying when the histogram extends to 95% towards the right-hand side. If you have the option to adjust sensitivity you may want to do some tests to see what level of sensitivity is right for you that consistently prevents highlight clipping.
I believe that Nikon uses Highlight Display (blinkies) in playback for still images, but offers Zebra warnings primarily in video mode. Panasonic and Fujifilm offer blinkies in the live view preview for still photography. Olympus: Uses blinkies that can be adjusted in sensitivity, often visible in live view.
NOTE: I’m not familiar with Nikon, Panasonic, Fujifilm or Olympus cameras so would suggest you check your user manual to verify what built-in warning tools you have.
So from my point of view, always trust your histogram when determining exposure.
Trusting your histogram is an essential part of my workflow each and every time I take a photo, and has become second nature to me.
I’d be happy to answer any questions you might have about this post—or to discuss problem exposures that you’ve experienced. Let me know in the comments.
