Five Camera Settings to Learn and Practice
Explore Landscapes #2
As well as the more obvious camera settings (such as exposure and focus), several other camera settings come in handy when shooting landscape photography.
As well as the more obvious camera settings (such as exposure and focus), several other camera settings come in handy when shooting landscape photography. They're not the first ones you may think of - or be familiar with - but they will help you improve your images.
In this post, I will highlight five camera settings that you should learn (and practice) before your next photography outing.
Before going through these five camera settings, stop reading this post and go and find the instruction manual that came with your camera. If you can't find the physical copy, you should be able to find an online PDF version.
The images in this post come from the manual for my Canon R. Your manual may look different, depending on the make and model of the camera you use, and the setting may be called something slightly different on your camera. However, these five settings are features on almost all DSLRs and Mirrorless cameras.
You should download a PDF version of your camera's manual onto your phone to refer to it when out with your camera. Sometimes, you may need a nudge to remember the specifics of a setting. Having the manual with you means you can get that nudge.
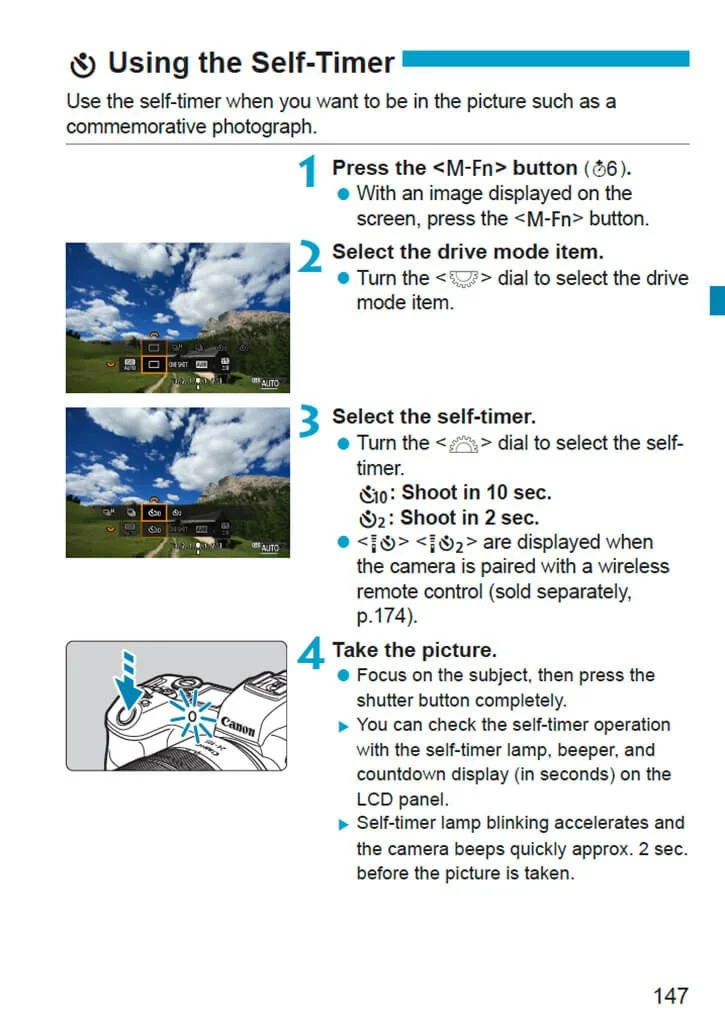
2-Second Timer
2-Second Self-Timer
I shoot most of my landscape photos with my camera mounted on a tripod. To prevent me from introducing any movement into the tripod as I press the shutter button, particularly when using a slow shutter speed, I use the 2-second timer. The 2-second delay between pressing the shutter button and the photograph being taken is enough time for any vibration I may have introduced to dampen out.
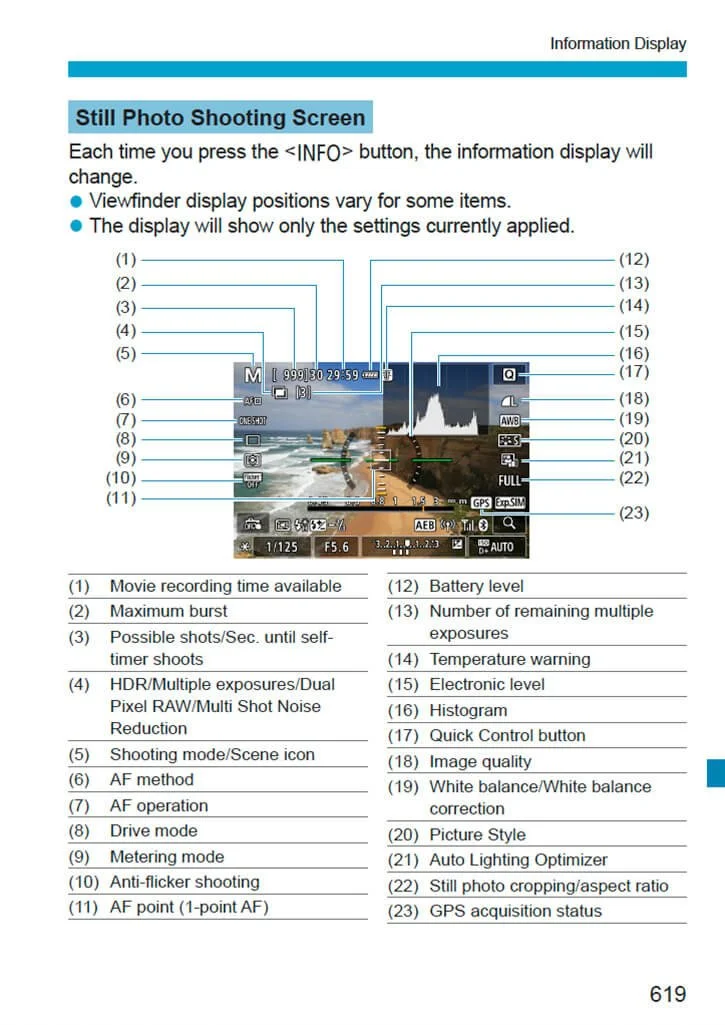
Display the Histogram
I always use the histogram on my camera to measure the light in my scene and determine the correct exposure. See my post, Trust Your Histogram.
A histogram can be displayed during shooting (on mirrorless cameras) or reviewed after shooting (on DSLRs). Those DSLRs with Live View can also display the histogram during shooting - but be aware that your battery will drain quickly with Live View.
Read your manual and learn how to display your histogram during shooting or review the image after shooting.
Display the Histogram
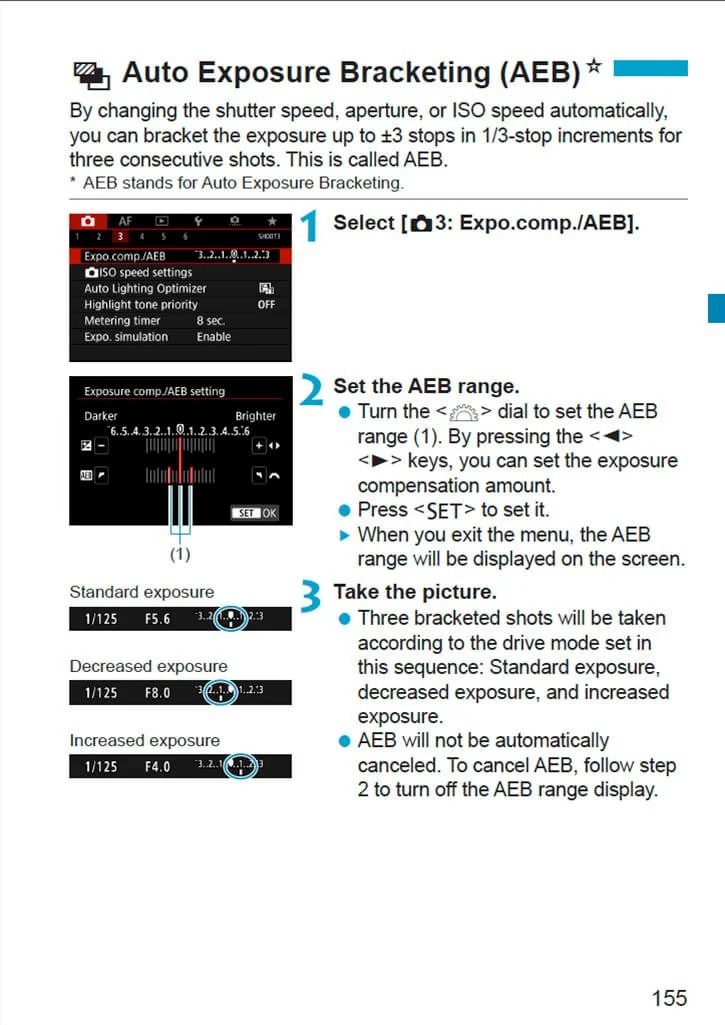
Exposure Bracketing
Exposure Bracketing
Sometimes, it is impossible to position the histogram graph without clipping the whites, blacks, or both when photographing sunrise, sunset, or other high-contrast scenes.
This is because the scene's dynamic range (the difference between the brightest and darkest parts of the image) exceeds what the camera's sensor can capture in a single image.
In this case, you can use exposure bracketing to take a range of images (typically three, five, seven, or nine, depending on your camera) with different exposure settings. These bracketed images are then combined in post-processing to create a final shot showing the scene's full dynamic range.
Manual Focus Peaking
This feature is excellent for those of us whose eyes aren't what they used to be and need some help judging whether the right part of the image is in focus.
With this setting, you can choose a color that contrasts with your scene (typically red, blue, or yellow), and anything in your photo that is in focus will be displayed in your viewfinder with a color fringe around it.
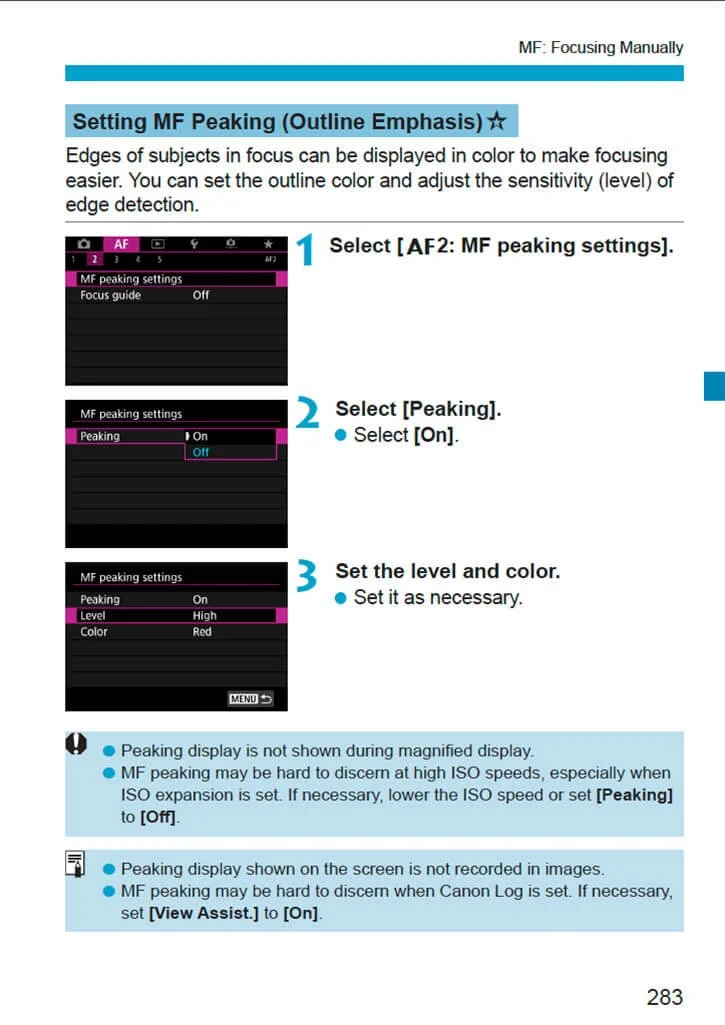
Manual Focus Peaking
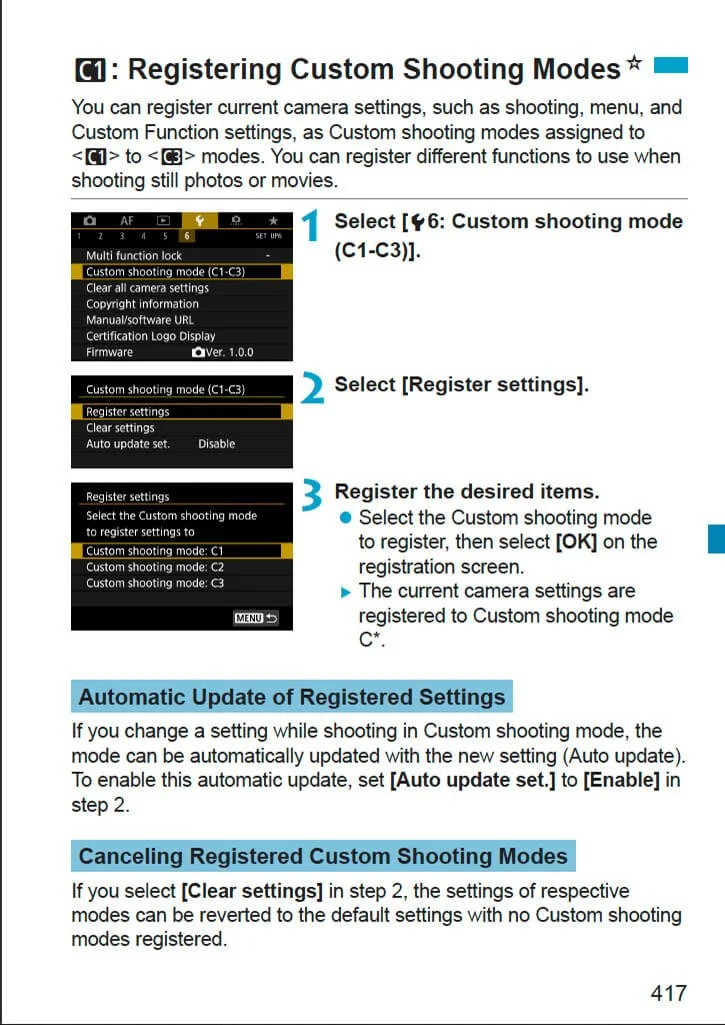
Custom Shooting Modes
Custom Shooting Modes
Now that you know about the four camera settings listed above, the fifth one I want to mention allows you to quickly save a custom set of camera settings that includes these essentials.
Most DSLRs and mirrorless cameras have at least two (sometimes three) custom shooting modes. With these modes, you can pre-set your preferred camera settings for a particular shooting genre. For example, I have mode C1 set for manual mode on a tripod (that would include all the items in this post); mode C2 is set for aperture-priority hand-held photography; mode C3 is set for manual mode dark sky photography.
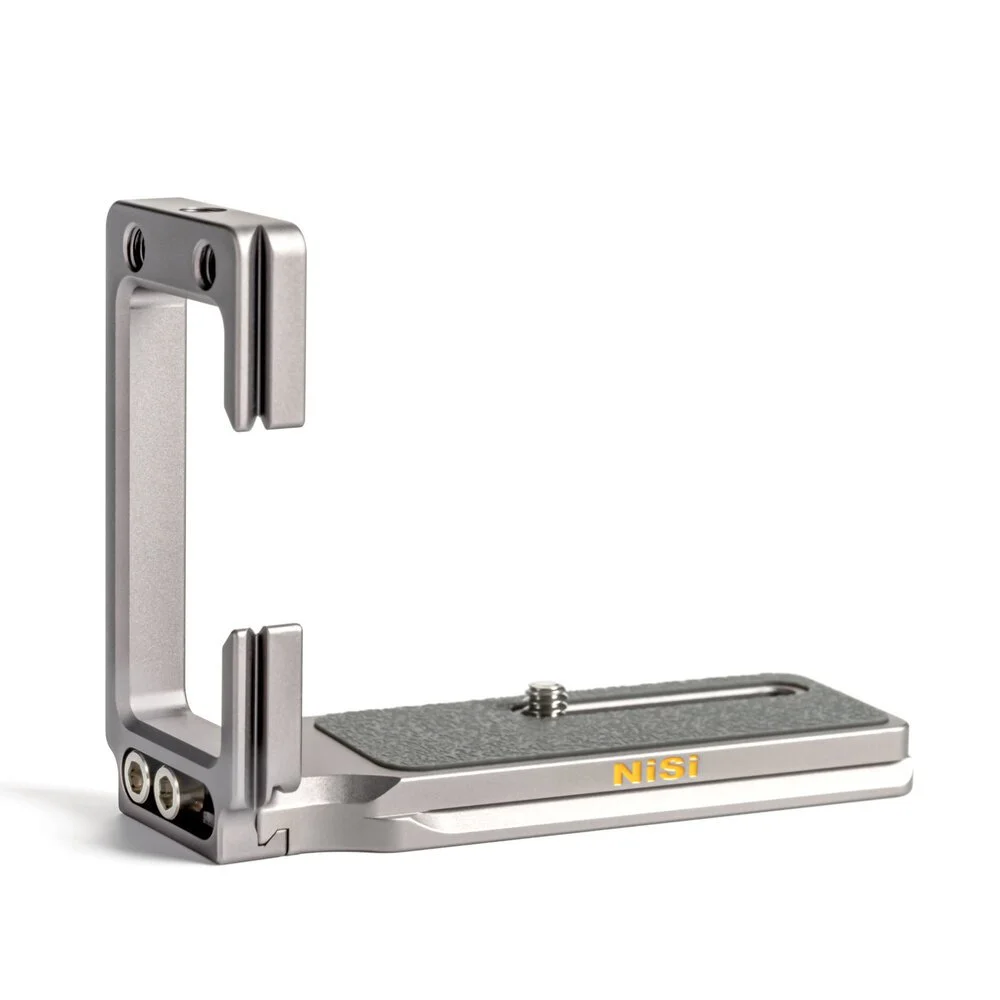
Gear Suggestion
I recommend investing in a L-bracket for your camera. This bracket attaches to the base of your camera. It lets you quickly connect your camera to the tripod in horizontal or vertical orientation without adjusting your tripod head. Many tripods do not easily allow you to position your camera vertically, and the L-bracket makes this very easy.
Nisi sells a variety of adjustable L-brackets to suit cameras with or without flip-out screens - you can see these on my gear page.
Wrap Up
So, find your camera manual and settle on the sofa to learn and practice these five camera settings before your next outing. You'll save yourself a lot of frustration by not having to learn these on the fly and improve your landscape photography simultaneously.
If you have any questions on my workflow or any other topic I've mentioned, please leave a comment below, and I'll get back to you.
Until next time, explore, experience, and enjoy our wildlands responsibly. Think before you geotag. Adopt the 7 Principles of Leave No Trace and practice Responsible Nature Photography.
Bye for now,
Jon